The Kitchen Garden Magic: How to Grow Fresh, Crunchy Bean Sprouts at Home in Just 6 Days!

The Kitchen Garden Magic: How to Grow Fresh, Crunchy Bean Sprouts at Home in Just 6 Days!

If you’ve ever wanted to add a burst of nutrition and freshness to your meals without spending much time or money, bean sprouts are the perfect choice. These tiny powerhouses of vitamins, minerals, and enzymes can be grown right in your kitchen—no soil, no fancy equipment, and no outdoor space required!

Inspired by the video “The Kitchen Garden! Easiest Method to Grow Bean Sprouts in 6 Days!”, this guide will walk you through every step of growing your own crunchy bean sprouts using a simple, foolproof method. Whether you live in an apartment or have a large garden, this technique is quick, clean, and rewarding.


Why Grow Bean Sprouts at Home?

Bean sprouts are more than just a tasty salad topping—they’re a superfood packed with nutrients. Growing them at home ensures you get the freshest, most chemical-free sprouts possible. Here are a few key benefits:

  1. Highly Nutritious:
    Sprouts are loaded with vitamins A, B, C, and E, along with minerals like calcium, iron, and magnesium. They’re also rich in protein and antioxidants that boost your immune system and improve digestion.
  2. Budget-Friendly:
    A handful of mung beans (or any other sprouting bean) can produce a jar full of sprouts, saving you money while ensuring quality.
  3. No Space Needed:
    You can grow sprouts on your kitchen counter—no soil, sunlight, or garden required.
  4. Fast Results:
    In just 6 days, you’ll have a ready-to-eat, crunchy, and nutritious addition to your meals.

Choosing the Right Beans

Before you begin, it’s essential to choose the right kind of beans for sprouting. The most common and reliable options are:

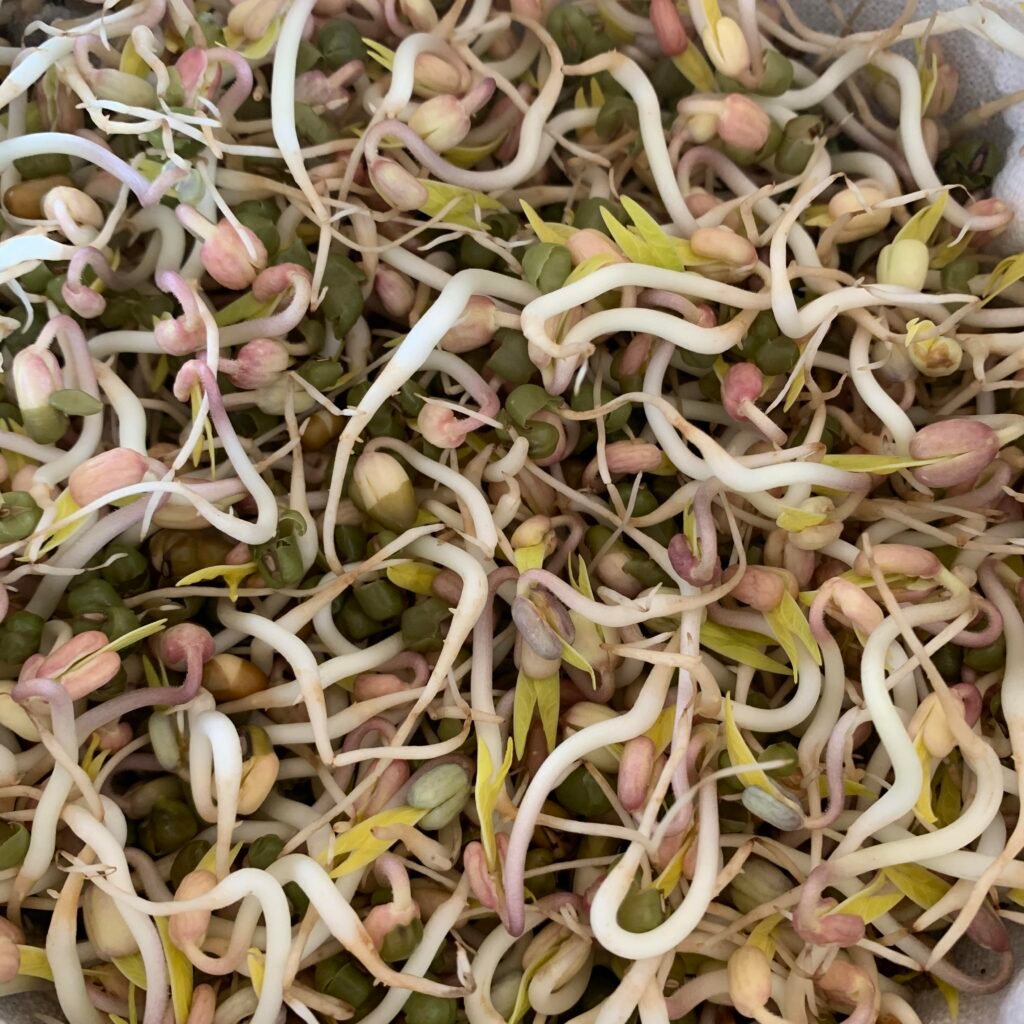
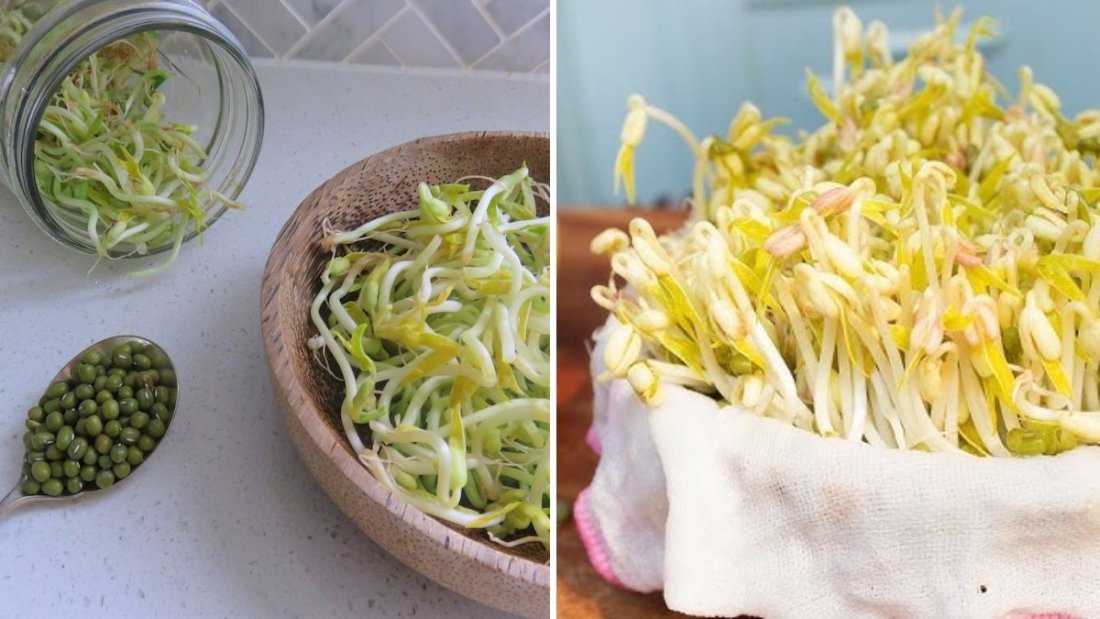
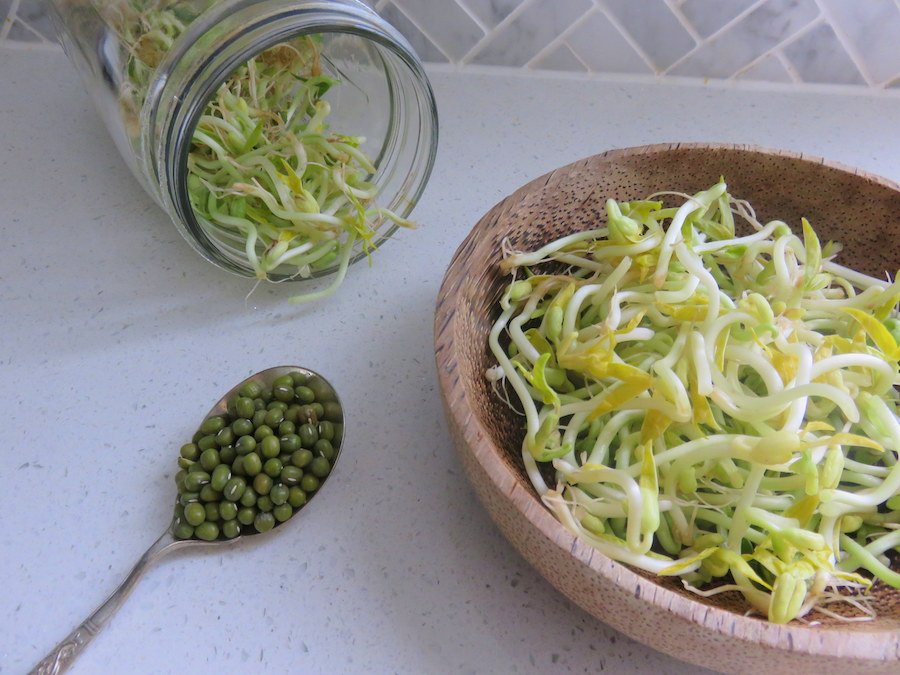
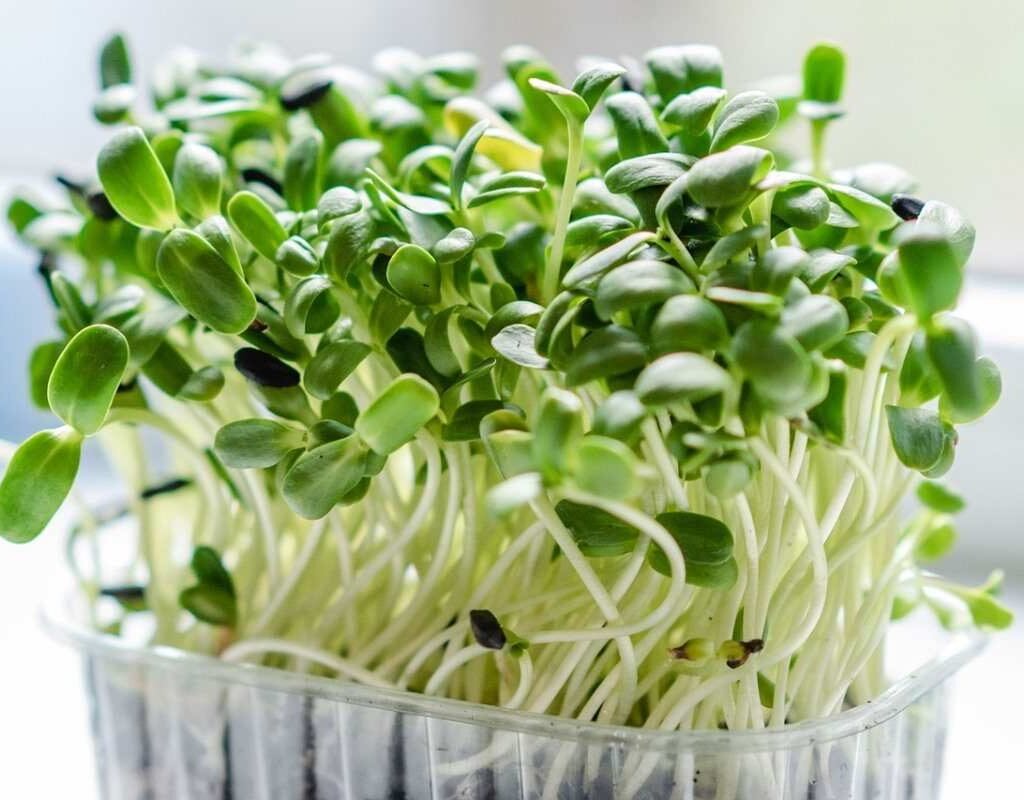
  • Mung Beans: The most popular sprouting bean, producing crisp, juicy sprouts.
  • Soybeans: A bit larger and slightly nutty in flavor, perfect for stir-fries.
  • Lentils: Soft and earthy, excellent in salads and soups.
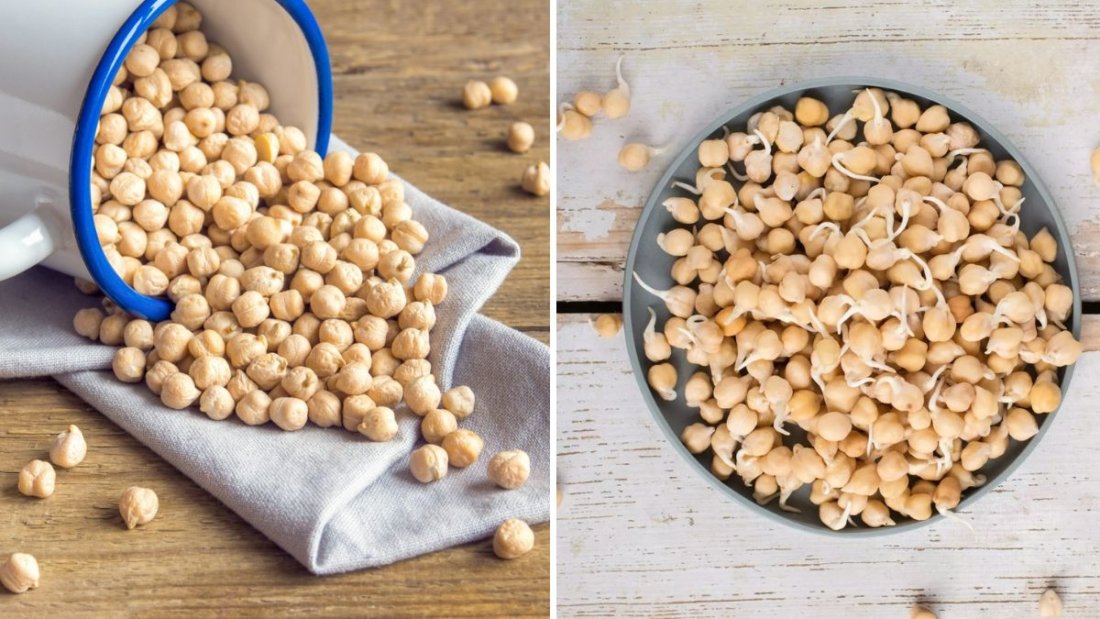
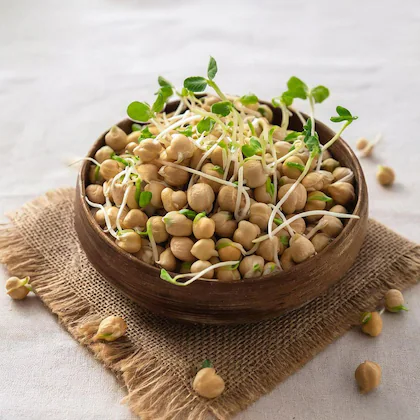
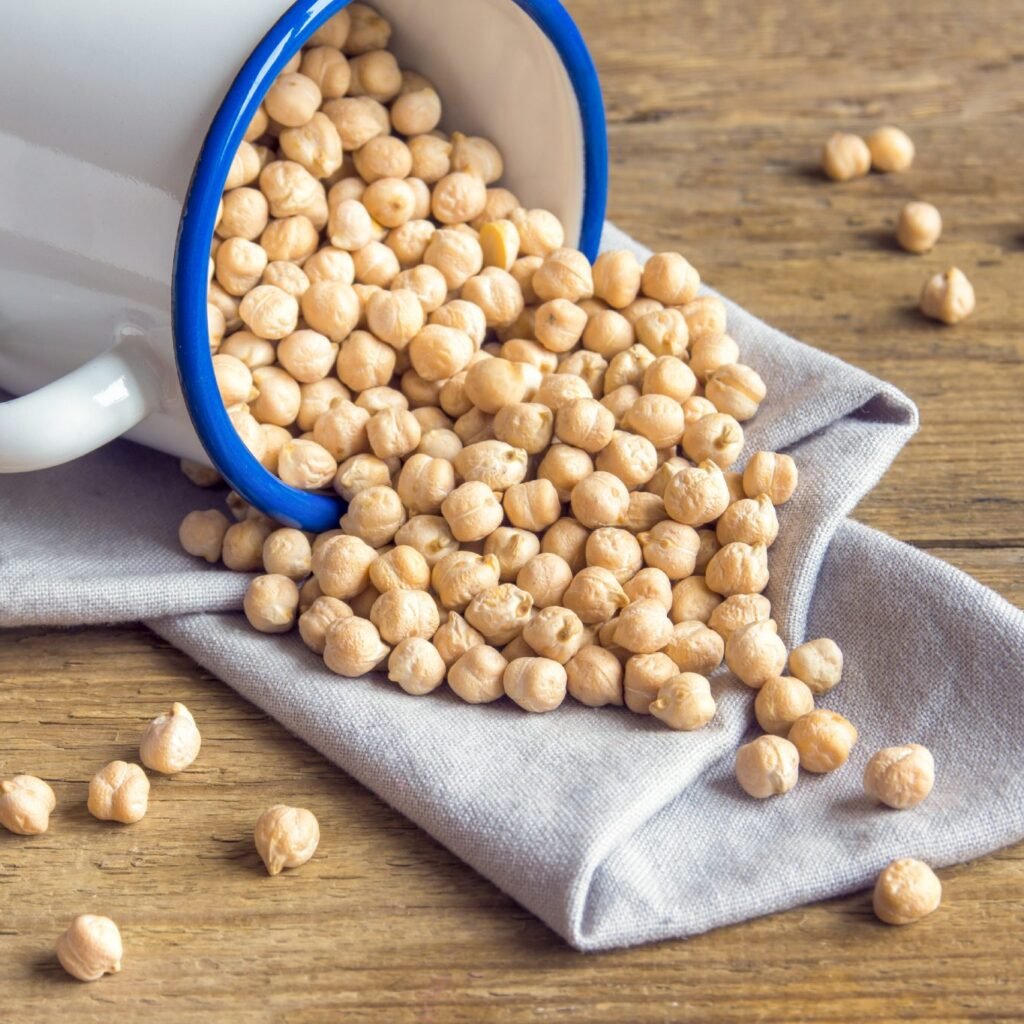
  • Chickpeas (Garbanzo Beans): Great for a hearty crunch and protein boost.

Make sure to buy organic, untreated, whole beans—the kind meant for sprouting, not cooking. Chemical-treated or split beans won’t sprout properly.


What You’ll Need

You don’t need fancy sprouting kits or trays. Here’s what you’ll need from your kitchen:

  • 1 cup of mung beans (or your preferred bean)
  • A large glass jar or a bowl
  • A piece of muslin cloth or cheesecloth
  • A rubber band or string
  • Clean water
  • A dark, well-ventilated space (like a kitchen cabinet)

That’s it—simple, clean, and eco-friendly!


Step-by-Step: Grow Bean Sprouts in 6 Days

Let’s break down the easiest method to grow perfect bean sprouts right at home.


Day 1: Soak the Beans

Start by rinsing your beans thoroughly in clean water to remove any dirt or dust. Then, place them in a bowl or jar and add three times the amount of water as beans (for example, 1 cup beans + 3 cups water).

Let them soak overnight (8–10 hours). This helps the beans absorb moisture and activates the enzymes that trigger germination.

Tip: Use filtered or clean drinking water for best results.


Day 2: Drain and Rinse

After soaking, you’ll notice the beans have swollen and softened. Drain the water completely using the muslin cloth or a fine mesh sieve. Rinse the beans again with clean water and drain thoroughly.

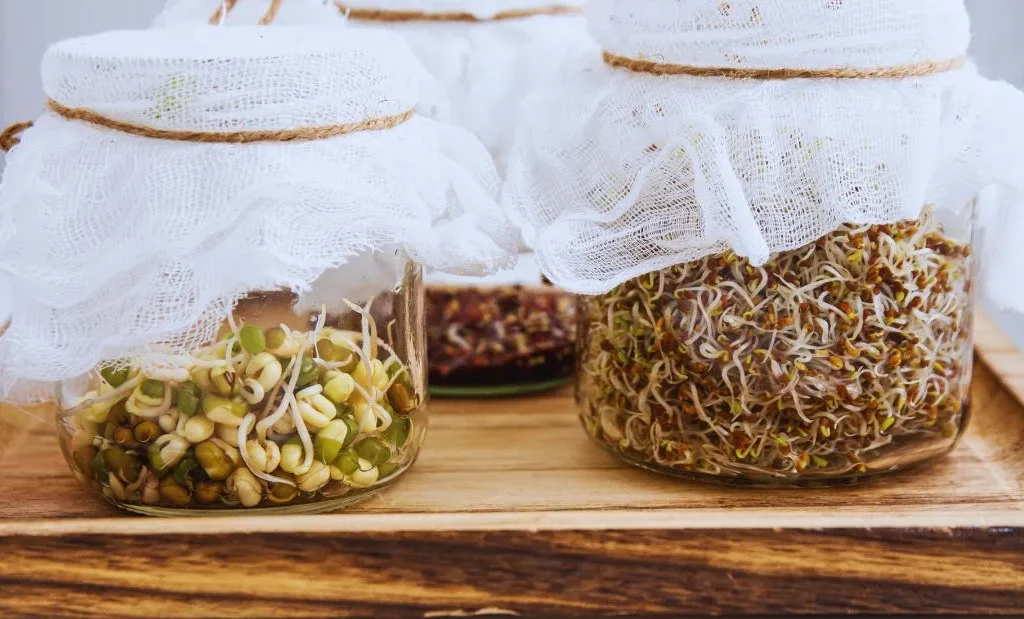
Next, cover the jar’s mouth with the muslin cloth and secure it with a rubber band. Turn the jar upside down at a slight angle to allow excess water to drain out while letting air circulate.

Keep the jar in a dark, cool place—like inside a kitchen cabinet. Sunlight can make the sprouts turn green and bitter.


Day 3 to 5: Rinse and Drain Daily

For the next few days, rinse the beans twice a day—once in the morning and once in the evening. Each time, fill the jar with water, swirl gently, and drain completely. This keeps the sprouts moist but not soggy and prevents mold growth.

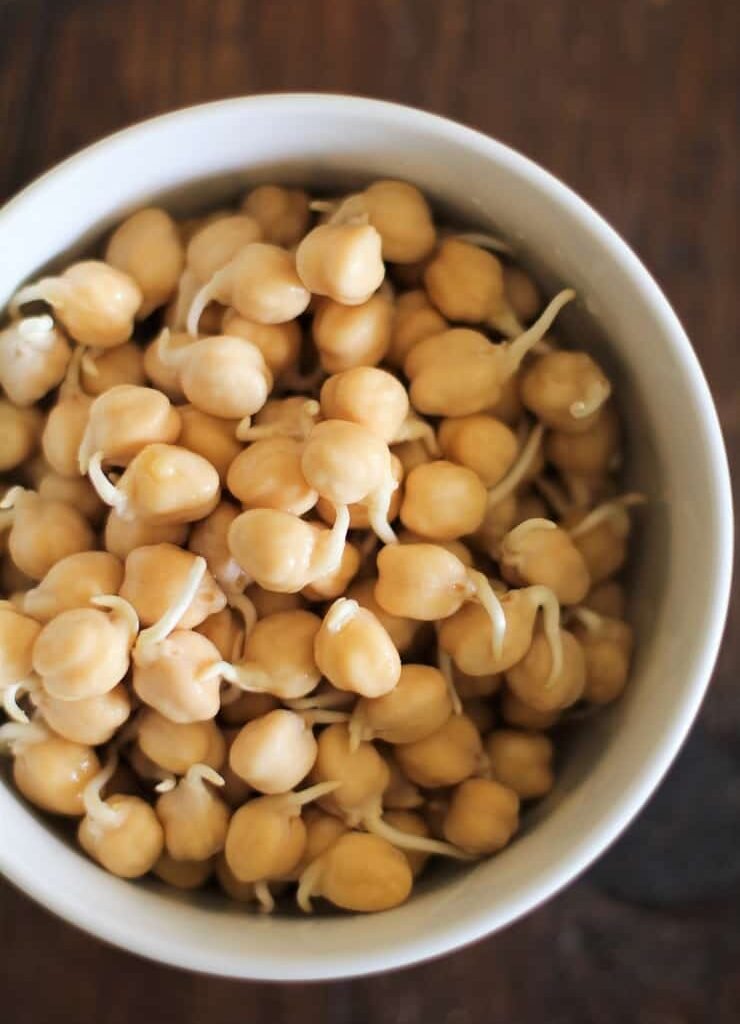
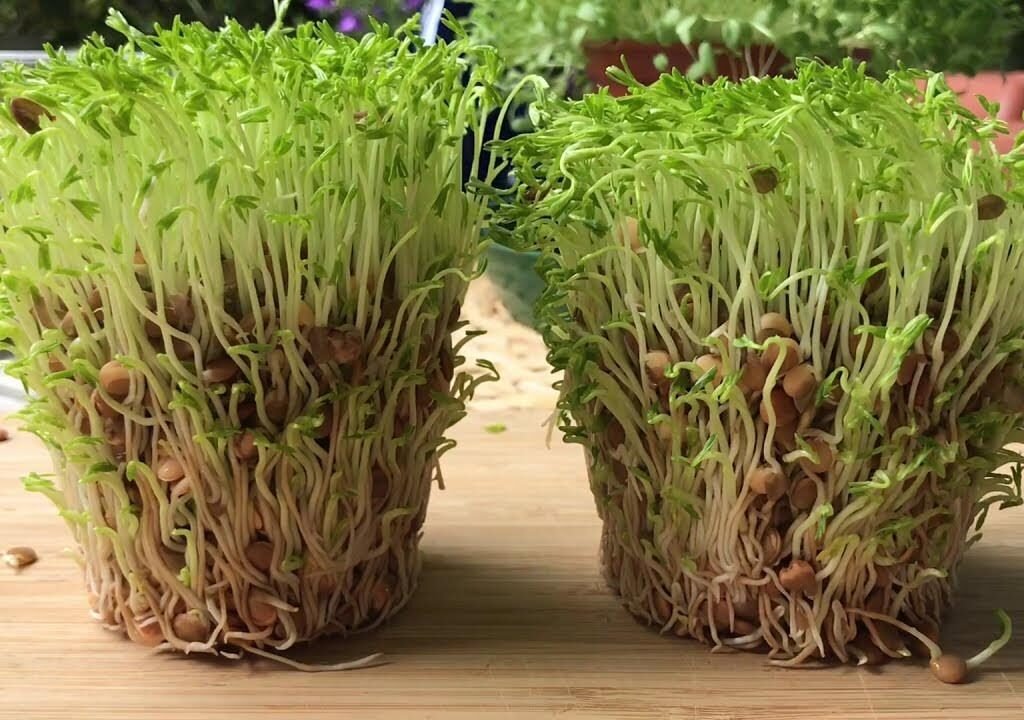
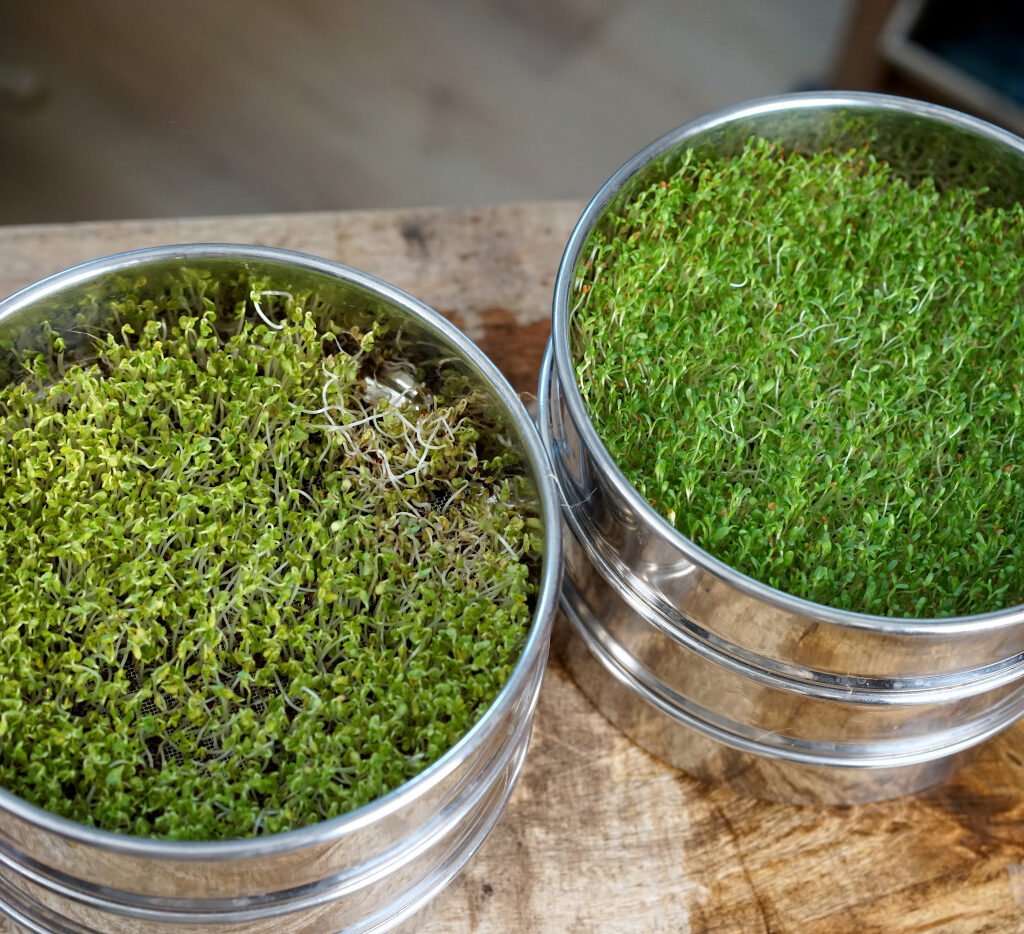
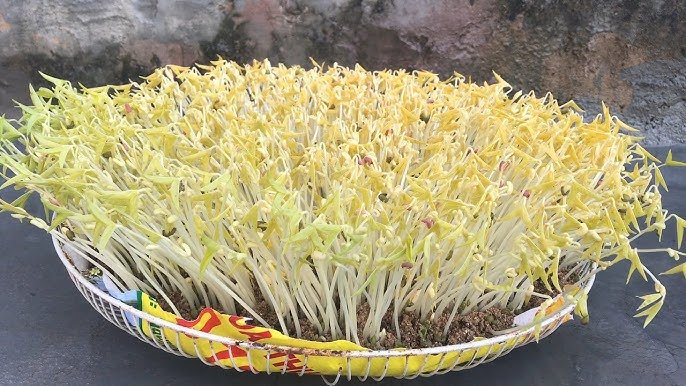
You’ll start to see small white shoots emerging from the beans by Day 3. By Day 5, the sprouts should be longer and plump, filling most of the jar.


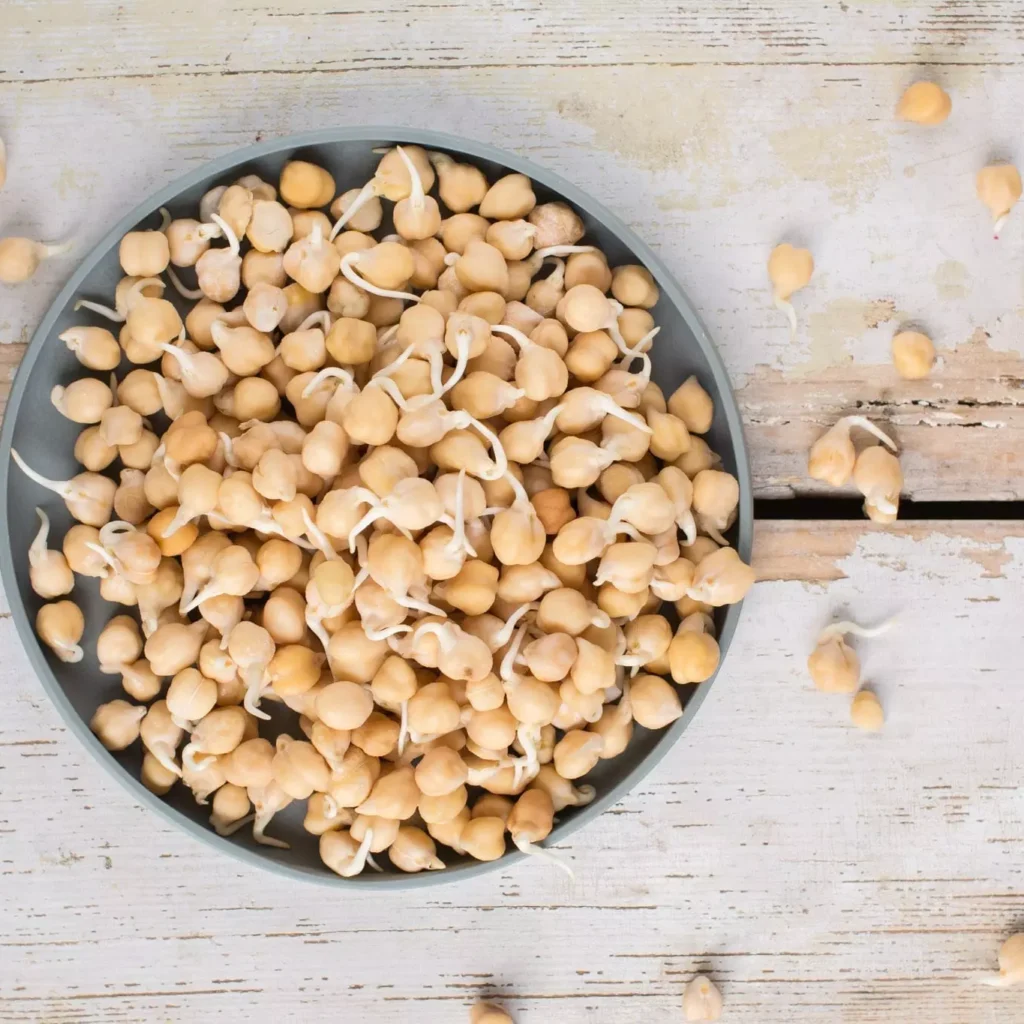
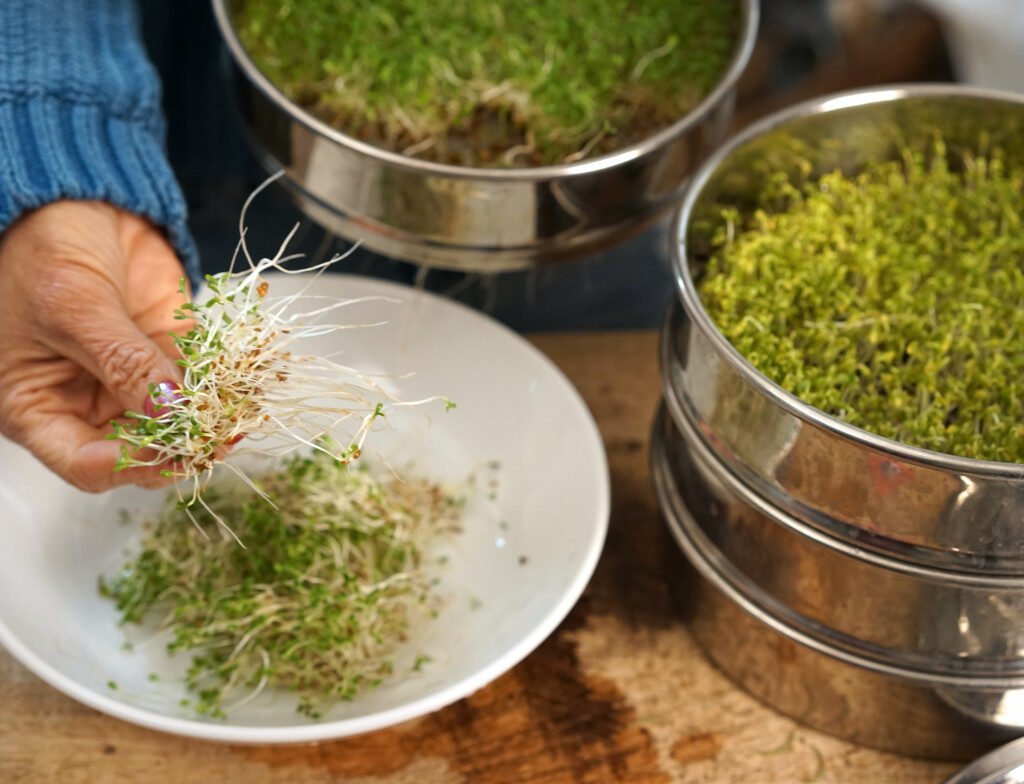
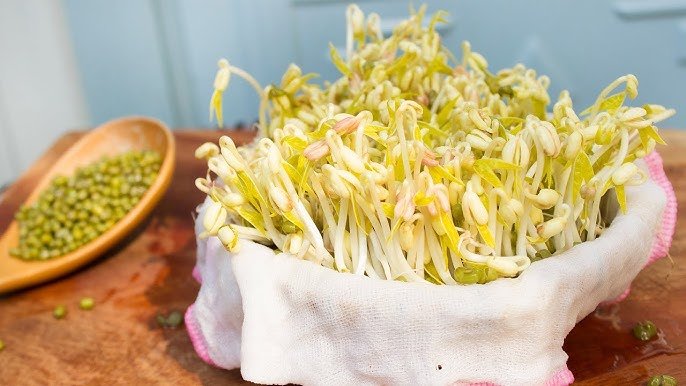
Day 6: Harvest Time!

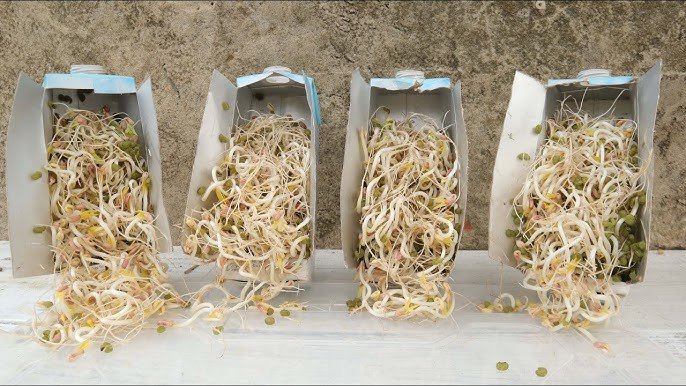
By Day 6, your bean sprouts should be fully grown—white, crunchy, and ready to eat. Rinse them one last time and drain well. You can store them in an airtight container in the refrigerator for up to 4–5 days.

Make sure they are completely dry before refrigeration to prevent spoilage.


How to Use Bean Sprouts in Your Meals

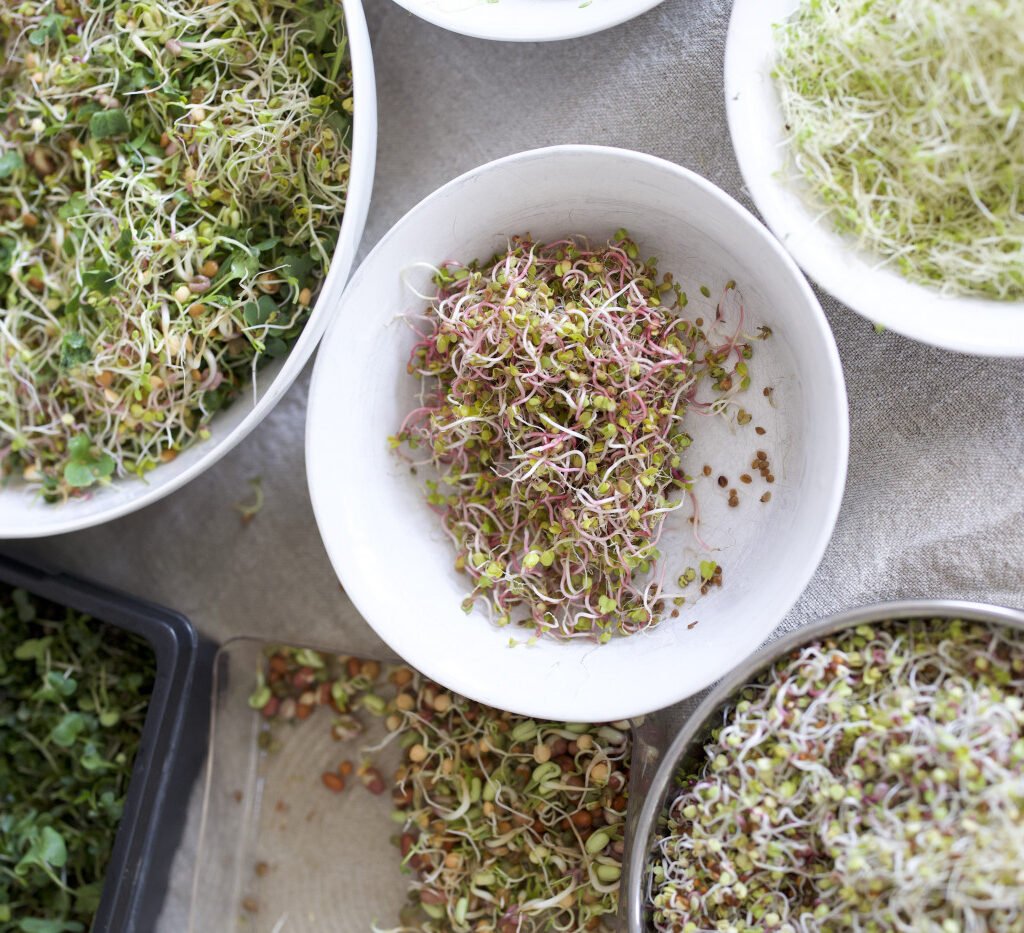
Bean sprouts are incredibly versatile and can be used in almost any dish for added crunch, nutrition, and freshness. Here are some delicious ways to enjoy them:

  1. Salads:
    Toss bean sprouts into green salads for a crisp texture and earthy flavor.
  2. Stir-Fries:
    Add sprouts at the end of your vegetable stir-fry to retain their crunch.
  3. Soups and Noodles:
    Use them as a garnish for Asian-style noodle soups or ramen bowls.
  4. Sandwiches and Wraps:
    Layer fresh sprouts in wraps, sandwiches, or burgers for extra nutrition.
  5. Smoothies:
    Add a handful to green smoothies for a subtle, earthy taste and a nutrient boost.

Tips for Perfect Sprouts Every Time

  • Keep them moist, not wet:
    Too much water can lead to mold. Always drain thoroughly after rinsing.
  • Avoid direct sunlight:
    Store in a dark, well-ventilated area for pale, crisp sprouts.
  • Use clean utensils:
    Hygiene is crucial—always wash your hands, jars, and cloths before handling sprouts.
  • Don’t overcrowd:
    Beans expand a lot as they sprout. Use a large enough container to allow air circulation.
  • Harvest early:
    Sprouts taste best when young and tender—don’t let them overgrow or they’ll turn fibrous.

Health Benefits of Bean Sprouts

Bean sprouts are not just tasty—they’re incredibly good for you. Here’s why they deserve a regular spot in your diet:

  1. High in Enzymes:
    The sprouting process multiplies enzymes that aid digestion and nutrient absorption.
  2. Boosts Immunity:
    Rich in antioxidants and vitamins, sprouts strengthen your immune system.
  3. Supports Weight Loss:
    Low in calories and high in fiber, sprouts keep you full for longer.
  4. Improves Heart Health:
    The potassium and magnesium in sprouts help regulate blood pressure and support heart function.
  5. Great for Skin and Hair:
    Vitamin C and E in sprouts promote glowing skin and healthy hair growth.

Sustainable and Eco-Friendly Gardening

One of the best parts about growing bean sprouts is that it’s completely eco-friendly. There’s no soil, no fertilizers, and no plastic waste. You can even reuse your sprouting water for watering other plants—it’s nutrient-rich and gentle.

It’s a small but meaningful way to reduce waste and grow your own food sustainably, right from your kitchen counter.


Troubleshooting Common Issues

Even though sprouting is simple, a few problems can arise if the conditions aren’t right. Here’s how to handle them:

  • Foul Smell:
    This usually means too much moisture. Drain thoroughly and reduce rinsing frequency.
  • Mold Growth:
    Mold occurs in warm, humid conditions. Rinse with cool water and ensure proper air circulation.
  • Slow Growth:
    Beans might be old or the temperature too cold. Use fresh beans and keep them in a slightly warm, dark place.

Final Thoughts

Growing bean sprouts is one of the easiest, most rewarding kitchen gardening activities you can do. In just six days, you’ll transform a handful of dry beans into a jar full of living, nutrient-rich food.

It’s not just about convenience—it’s about reconnecting with nature, even in the smallest of ways. Whether you’re a beginner gardener, a health enthusiast, or someone looking to reduce food waste, bean sprouting is the perfect start.

So go ahead—set aside a jar, soak some beans tonight, and in less than a week, you’ll have a fresh, homegrown superfood right in your kitchen!

How to Sprout Chickpeas (Garbanzo Beans) at Home: A Step-by-Step Guide to Nutritious Sprouts

How to Sprout Chickpeas (Garbanzo Beans) at Home: A Step-by-Step Guide to Nutritious Sprouts

Sprouting chickpeas, also known as garbanzo beans, is one of the easiest and most rewarding kitchen gardening activities you can do at home. Not only does sprouting increase their nutritional value, but it also makes them easier to digest, adds a pleasant crunch, and opens up countless culinary possibilities—from salads and sandwiches to stir-fries and hummus.

In this comprehensive guide, you’ll learn how to sprout chickpeas step-by-step, the best conditions for healthy sprouts, tips to avoid common problems, and creative ways to use them in your everyday meals. Let’s dive into how you can transform plain chickpeas into a living, nutrient-packed superfood right in your kitchen.


Why Sprout Chickpeas?

Before we begin, it’s helpful to understand why sprouting chickpeas is so beneficial. Chickpeas are a powerhouse of plant-based protein, fiber, vitamins, and minerals. When you sprout them, you unlock even more nutrients:

  • Improved digestion: Sprouting breaks down phytic acid and enzyme inhibitors, making nutrients more bioavailable and easier on your stomach.
  • Increased protein and vitamin content: The sprouting process boosts vitamin C, B vitamins, and amino acids.
  • Enhanced flavor and texture: Sprouted chickpeas have a fresh, slightly nutty crunch perfect for raw and cooked dishes.
  • No soil or garden needed: All you need is a jar, water, and time—it’s true kitchen gardening magic.

What You’ll Need

To get started, you only need a few basic items:

  • Dry chickpeas (garbanzo beans): Choose unpolished, organic beans for best results. Avoid split chickpeas—they won’t sprout.
  • Clean glass jar or bowl (preferably wide-mouthed)
  • Muslin cloth or sprouting lid to cover the jar
  • Rubber band or jar ring
  • Filtered water

Step 1: Selecting and Preparing the Chickpeas

Choose high-quality, whole chickpeas—preferably raw, organic, and meant for cooking (not roasted or salted).

Rinse the chickpeas thoroughly under running water to remove any dust or impurities. For one batch, use about ½ cup of dried chickpeas, as they will expand significantly after soaking and sprouting.


Step 2: Soak the Chickpeas

Place the rinsed chickpeas in your jar or bowl and add three times the amount of water (for ½ cup of chickpeas, use 1½ cups of water).

Let them soak for 8–12 hours or overnight. During this time, the beans will absorb water and nearly double in size.

Tips:

  • Keep the soaking jar in a cool, dark spot—away from direct sunlight.
  • If the weather is hot, change the water halfway through soaking to prevent fermentation.

Step 3: Drain and Rinse

After soaking, drain the water completely and rinse the chickpeas well.

Now, you’ll need to allow airflow while keeping the beans moist. To do this:

  1. Cover the jar opening with muslin cloth or a sprouting lid.
  2. Secure it with a rubber band.
  3. Tilt the jar upside down at a 45° angle to drain excess water (you can use a bowl or dish rack to hold it in position).

This helps prevent mold and ensures the beans get enough oxygen to sprout healthily.


Step 4: Rinse Twice Daily

Rinse and drain the chickpeas twice a day—once in the morning and once at night.

Each time:

  • Pour fresh, cool water into the jar.
  • Swirl gently.
  • Drain completely and return the jar to its tilted position.

Within 24–48 hours, you’ll notice small white sprouts emerging from the beans. The exact sprouting time depends on room temperature: warmer conditions speed up sprouting, while cooler ones slow it down.


Step 5: Harvest Your Sprouts

When the sprouts are about ¼ to ½ inch long, they’re ready to harvest! This usually takes 2–3 days after soaking.

Rinse them one last time, drain well, and let them air-dry for a few hours before storing.

Storage tip: Keep the sprouts in an airtight container in the refrigerator. They’ll stay fresh for up to 5 days.


Common Problems and How to Fix Them

Even though sprouting chickpeas is simple, a few issues can pop up if conditions aren’t right. Here’s how to troubleshoot:

  1. Foul smell or sliminess – Caused by poor drainage or stagnant water. Rinse more often and ensure good airflow.
  2. No sprouting – Old or processed beans may be the problem. Use fresh, organic whole chickpeas next time.
  3. Mold growth – Too much moisture or lack of ventilation. Rinse properly and tilt the jar at an angle to drain well.
  4. Hard sprouts – If you prefer softer sprouts, you can steam or blanch them lightly before eating.

How to Use Sprouted Chickpeas in Your Kitchen

Now comes the fun part—using your freshly sprouted chickpeas in delicious and healthy meals!

1. Raw Sprouted Chickpea Salad

Mix sprouts with chopped tomatoes, cucumber, onions, cilantro, lemon juice, salt, and pepper for a refreshing, protein-rich salad.

2. Sprouted Chickpea Hummus

Blend sprouted chickpeas with garlic, olive oil, lemon juice, tahini, and a pinch of cumin for a nutritious, enzyme-rich hummus.

3. Stir-fried Sprouts

Lightly sauté sprouted chickpeas with olive oil, mustard seeds, curry leaves, and spices for a quick, savory snack.

4. Sprouted Chickpea Curry

For a hearty meal, cook sprouted chickpeas in onion-tomato gravy with turmeric, cumin, and coriander powder. Serve with rice or flatbread.

5. Smoothie Add-In

Add a spoonful of sprouts to your green smoothie for an unexpected protein and fiber boost.


Extra Tips for Successful Sprouting

  • Avoid sunlight during the sprouting phase—light can make sprouts bitter.
  • Use cool, clean water—chlorinated or hot water can damage sprouts.
  • Don’t oversprout: Long sprouts (over 1 inch) can become tough and less tasty.
  • Clean your jars properly between batches to avoid bacteria buildup.
  • Experiment with mixed sprouts—combine chickpeas with lentils, mung beans, or fenugreek for a variety of textures and nutrients.

Health Benefits of Sprouted Chickpeas

Sprouted chickpeas are often called a living food because they’re bursting with enzymes, vitamins, and active nutrients. Here are some health benefits that make them a must-have:

  • Boosts Immunity: Rich in antioxidants, vitamins A, C, and E.
  • Supports Weight Loss: High in fiber, keeping you full for longer.
  • Improves Digestion: Live enzymes aid gut health and nutrient absorption.
  • Balances Blood Sugar: Slow-release carbs prevent spikes in glucose.
  • Enhances Heart Health: Lowers cholesterol and promotes better circulation.

Conclusion

Learning how to sprout chickpeas (garbanzo beans) at home is a simple yet powerful way to bring life and nutrition into your kitchen. With just water, time, and a bit of patience, you can transform dry beans into a living superfood packed with flavor and health benefits.

Sprouted chickpeas are not only easy to grow but also incredibly versatile. Whether you toss them in salads, blend them into hummus, or cook them into curries, they add a delicious crunch and a dose of wellness to every meal.

So, the next time you’re looking for an easy kitchen gardening project, grab a handful of chickpeas, soak them overnight, and watch the magic of sprouting unfold right before your eyes!

Grow Food in Your Kitchen: How to Sprout Lentils at Home for Fresh, Nutritious Harvests

Grow Food in Your Kitchen: How to Sprout Lentils at Home for Fresh, Nutritious Harvests

Imagine harvesting fresh, living food right from your kitchen counter—no soil, no sunlight, and no garden required! That’s the magic of lentil sprouts. Growing your own sprouts is one of the easiest and fastest ways to add nutrition, flavor, and freshness to your meals. In just a few days, you can transform ordinary lentils into crunchy, protein-packed sprouts bursting with vitamins and enzymes.

In this detailed guide, inspired by the YouTube video “Grow Food In Your Kitchen | How To Sprout Lentils At Home | Harvesting Sprouts | Kitchen Gardening,” you’ll learn step-by-step how to sprout lentils at home, from soaking and rinsing to harvesting and storing. We’ll also explore the benefits of sprouting, troubleshooting tips, and creative ways to use your homegrown lentil sprouts in the kitchen.

If you’ve ever wanted to grow food indoors without any special equipment, this is your perfect beginner’s project!


1. Why Sprout Lentils at Home?

Lentil sprouts are incredibly nutrient-dense and easy to grow. Sprouting unlocks the natural goodness stored inside the lentil seed, making it more digestible and enhancing its nutritional value.

Here’s why you should start sprouting lentils today:

  • Fast Growth: Ready to eat in 3–5 days.
  • No Soil Needed: Just water and air circulation.
  • Space-Saving: Grows right on your kitchen counter.
  • Highly Nutritious: Rich in protein, fiber, vitamins C and B, iron, and folate.
  • Budget-Friendly: One handful of lentils produces a jar full of sprouts.

Sprouting is also an eco-friendly, sustainable way to grow food year-round—perfect for small apartments or city homes.


2. What You’ll Need to Sprout Lentils

You don’t need fancy equipment to sprout lentils. A few simple kitchen items are enough:

Ingredients & Materials:

  • ½ cup dry lentils (green, brown, or red)
  • Filtered water
  • A glass jar or bowl
  • A sprouting lid, muslin cloth, or fine mesh cover
  • A rubber band (if using cloth)
  • A bowl or stand to hold the jar upside down for drainage

That’s it! Lentils are one of the most forgiving seeds to sprout, making them a great choice for beginners.


3. Choosing the Right Lentils for Sprouting

Not all lentils sprout equally well. To ensure successful germination:

  • Choose whole lentils (not split or polished).
  • Avoid pre-cooked or processed varieties.
  • Look for organic, untreated lentils—chemical-treated ones may not sprout.

Green and brown lentils sprout the best, while red lentils (which are often split) usually don’t germinate. If you’re unsure, buy lentils specifically labeled “for sprouting” from a health store or online.


4. Step-by-Step: How to Sprout Lentils at Home

Follow these simple steps to grow your own batch of crunchy, fresh lentil sprouts right in your kitchen.


Step 1: Measure and Rinse

Measure about ½ cup of dry lentils.
Place them in a bowl or jar and rinse thoroughly under cool running water. This removes dust or impurities and ensures a clean start for sprouting.


Step 2: Soak the Lentils

Soaking is the key step that “wakes up” the lentils.

  • Add 3 times the amount of water (1½ cups) to your rinsed lentils.
  • Let them soak for 8–12 hours or overnight at room temperature.

During soaking, lentils absorb water, swell up, and begin the germination process. You’ll notice tiny cracks in their outer skin after soaking—this means they’re ready for the next stage.


Step 3: Drain and Rinse

After soaking, pour off the water using a mesh strainer or sprouting lid.
Rinse the lentils again with fresh water, then drain completely.
It’s important to remove excess water to prevent mold or rot during sprouting.


Step 4: Sprouting Setup

Transfer the soaked lentils into your sprouting jar or container.
Cover the top with a breathable lid or muslin cloth, secured with a rubber band.
Tilt the jar at an angle (mouth facing downward) to allow any remaining water to drain out and air to circulate.
Place the jar in a dark, warm spot (like your kitchen counter or pantry) away from direct sunlight.


Step 5: Rinse and Drain Daily

Rinse your lentils 2–3 times daily with cool, clean water. Each time:

  • Swirl the lentils gently.
  • Drain thoroughly to avoid standing water.
  • Return the jar to its tilted position.

Within 24–36 hours, you’ll notice tiny white roots emerging. Continue rinsing daily until the sprouts reach your desired length—usually ½ to 1 inch long.


Step 6: Harvest and Store

Your lentil sprouts will be ready in about 3–4 days. Once they reach a length of about an inch, give them a final rinse and drain completely.

Spread them on a clean towel to remove extra moisture, then transfer them to an airtight container.
Store in the refrigerator for up to 5–7 days.

To keep them fresh longer, line the container with a paper towel to absorb any excess moisture.


5. Tips for Successful Sprouting

  • Use clean utensils and jars to prevent bacterial growth.
  • Avoid direct sunlight during sprouting—too much heat can spoil them.
  • Don’t oversoak—this can suffocate the seeds and cause rotting.
  • If you notice a musty smell, rinse more frequently or start over.
  • Cool, well-ventilated areas are ideal for sprouting in hot climates.

Once you get the hang of it, you can experiment with other seeds like mung beans, chickpeas, or alfalfa!


6. Nutritional Benefits of Lentil Sprouts

Sprouting transforms lentils into a superfood by unlocking their full nutritional potential. Here’s why sprouted lentils are so good for you:

NutrientBenefit
ProteinBuilds and repairs body tissues
FiberAids digestion and promotes gut health
Vitamin CStrengthens immunity and improves skin health
Iron & FolateBoosts energy and supports red blood cell production
EnzymesEnhance nutrient absorption and digestion
AntioxidantsHelp fight free radicals and reduce inflammation

Sprouting also reduces anti-nutrients like phytic acid, which can block mineral absorption, making the lentils easier to digest and more nutritious than raw or cooked ones.


7. Common Sprouting Problems and Fixes

ProblemPossible CauseSolution
Lentils not sproutingOld or treated lentilsUse fresh, organic, untreated lentils
Foul smellPoor drainage or excessive moistureRinse more frequently; ensure jar is tilted for airflow
Mold or slimeWarm temperature and no air circulationMove to a cooler spot; use a breathable lid
Sprouts too shortHarvested too earlyGive them another 12–24 hours to grow

By maintaining good hygiene and consistent rinsing, your sprouts will stay healthy and fresh.


8. Harvesting and Using Lentil Sprouts

Once your lentil sprouts are ready, it’s time to enjoy them! These little powerhouses are incredibly versatile in the kitchen.

Delicious Ways to Use Lentil Sprouts:

  • Raw Salads: Mix with chopped vegetables, olive oil, and lemon for a crunchy salad.
  • Smoothies: Add a handful for a nutrient boost.
  • Sandwiches & Wraps: Layer sprouts for a fresh, crisp bite.
  • Stir-Fries: Lightly sauté for 1–2 minutes to retain crunch.
  • Soups: Add at the end of cooking for extra texture.
  • Indian Style Chaat: Toss with tomatoes, onions, coriander, lemon, and spices for a flavorful snack.

Avoid overcooking—light steaming or stir-frying preserves their nutrients and crunchiness.


9. Expanding Your Kitchen Garden with Sprouts

Once you master lentil sprouting, you can expand your mini indoor “kitchen garden” with other seeds like mung beans, chickpeas, alfalfa, fenugreek, or mustard.

You can even use stackable sprouting trays or multiple jars to grow different sprouts at once. It’s a fun, educational, and rewarding way to introduce homegrown greens into your daily meals—all without needing outdoor space!


10. Health and Safety Tips

While sprouting is simple, hygiene is crucial because moist environments can encourage bacterial growth if not managed properly.
Follow these precautions:

  • Always rinse thoroughly and use clean jars.
  • If sprouts smell sour or slimy, discard them.
  • Refrigerate immediately after harvesting.
  • Optionally, lightly steam sprouts before eating to eliminate bacteria—especially for children or elderly individuals.

11. The Joy of Growing Food Indoors

Sprouting lentils is more than just a food project—it’s a small act of sustainable living. You’re growing living nutrition with almost no waste, no soil, and minimal resources. Watching dry seeds transform into vibrant green sprouts is a rewarding, meditative experience that connects you directly with your food.

It’s the perfect example of kitchen gardening at its simplest and healthiest—fresh food, grown by you, right on your countertop.


Conclusion

Growing lentil sprouts at home is one of the easiest and most satisfying ways to bring healthy, fresh, and sustainable food into your daily routine. With just a jar, some water, and a handful of lentils, you can harvest your own nutrient-packed greens in under a week—no garden required!

Whether you add them to salads, wraps, or stir-fries, these tiny sprouts deliver big health benefits. Plus, they’re fun to grow, kid-friendly, and a great step toward more eco-conscious, self-sufficient living.

So the next time you’re in your kitchen, grab a jar, soak some lentils, and start your home sprouting adventure. Within days, you’ll be harvesting your very own micro-garden—fresh, flavorful, and straight from your kitchen to your plate.

How to Grow Chives & Garlic Chives: Complete Guide from Seed to Kitchen

How to Grow Chives & Garlic Chives: Complete Guide from Seed to Kitchen

Few herbs are as versatile, aromatic, and easy to grow as chives and garlic chives. These hardy perennials belong to the onion family and can elevate your kitchen garden with both beauty and flavor. Their mild, onion-like or garlicky taste adds a delicious punch to soups, salads, omelets, and more. Plus, they’re among the easiest herbs to grow—from a sunny windowsill pot to your backyard garden bed.

In this detailed guide, we’ll walk through everything you need to know about growing chives and garlic chives—from sowing seeds and solving common problems to harvesting and using them in your kitchen. Whether you’re a beginner gardener or a seasoned grower, this “seed to kitchen” tutorial will help you cultivate thriving, flavorful plants year after year.


1. Understanding Chives vs. Garlic Chives

Before you start planting, it’s essential to know the difference between common chives and garlic chives—two close relatives that differ slightly in flavor, appearance, and growth habits.

Common Chives (Allium schoenoprasum)

  • Slender, hollow, round leaves with a mild onion flavor.
  • Produces purple-pink globe-shaped flowers in late spring.
  • Often used raw in salads, soups, and garnishes.

Garlic Chives (Allium tuberosum)

  • Flat, wider leaves with a mild garlic taste.
  • Produces white star-shaped flowers in mid to late summer.
  • Excellent for stir-fries, dumplings, and savory dishes.

Both varieties are perennial herbs, meaning they’ll return each year with minimal maintenance. Garlic chives tend to spread more aggressively, so they’re ideal for containers or garden borders.


2. Ideal Growing Conditions

Chives are incredibly adaptable, but providing the right environment ensures a healthier, more productive plant.

  • Sunlight: Full sun (at least 6 hours daily) is ideal, though they tolerate partial shade.
  • Soil: Rich, well-draining soil enriched with compost or organic matter.
  • pH Level: Slightly acidic to neutral (6.0–7.0).
  • Water: Keep the soil consistently moist but never waterlogged.
  • Temperature: Thrive in cool to moderate temperatures (15–25°C or 59–77°F).

You can grow chives in-ground, in raised beds, or containers—making them perfect for small-space or urban gardeners.


3. Propagation: Growing Chives from Seed or Division

There are two main ways to start your chive plants—from seed or by division.

Growing from Seed

  1. Sow indoors 6–8 weeks before the last frost date or directly outdoors once frost danger has passed.
  2. Fill seed trays or pots with a light, well-draining potting mix.
  3. Sprinkle seeds evenly and lightly cover them with a thin layer of soil (about ¼ inch).
  4. Mist with water to keep the surface moist.
  5. Seeds usually germinate in 7–14 days under warm, bright conditions.

Once seedlings reach 3–4 inches tall, thin or transplant them to their permanent home.

Propagation by Division

If you already have an established chive plant, division is the fastest way to expand your garden.

  1. In early spring or fall, dig up the plant gently.
  2. Separate the clump into smaller sections (each with roots attached).
  3. Replant divisions about 6–8 inches apart, watering well afterward.

This method revitalizes older plants and promotes fresh growth.


4. Planting Chives in the Garden or Containers

Whether you’re growing in beds or pots, proper spacing and setup are key.

In-Ground or Raised Beds:

  • Space plants 8–10 inches apart.
  • Plant in a sunny, well-drained area with compost-rich soil.
  • Water after planting and keep the soil evenly moist.

In Containers:

  • Use a 6–8 inch deep pot with drainage holes.
  • Fill with a high-quality potting mix.
  • Place in a sunny location such as a balcony, patio, or windowsill.

Container-grown chives tend to stay compact, making them easier to harvest and maintain.


5. Watering and Fertilizing

Chives prefer consistent moisture—not soggy, but never bone-dry.

  • Water 2–3 times per week, depending on weather.
  • Reduce watering in cooler months to prevent root rot.

For feeding:

  • Apply a balanced organic fertilizer (such as 10-10-10) once a month during active growth.
  • Alternatively, add a top dressing of compost or liquid seaweed fertilizer every few weeks.

Too much fertilizer, however, can lead to soft, weak leaves—so feed lightly and consistently.


6. Common Problems and Solutions

Chives are relatively pest-free, but a few issues can arise.

ProblemCauseSolution
Yellow leavesOverwatering or nutrient deficiencyImprove drainage and feed with compost tea
Powdery mildewPoor airflow, excessive moistureSpace plants properly; water at base; use neem oil spray
Aphids or thripsSap-sucking insectsSpray with neem oil or insecticidal soap
Root rotWaterlogged soilReduce watering; repot in well-drained soil

Regular trimming and airflow help prevent most diseases naturally.


7. Pruning and Maintenance

Frequent harvesting doubles as pruning! Cutting chives regularly encourages lush, new growth and prevents the leaves from becoming tough.

  • Trim every 2–3 weeks once plants are established.
  • Cut leaves about 2 inches above the soil.
  • Remove faded flower stalks to prevent self-seeding (especially for garlic chives).

For overwintering, simply allow the leaves to die back naturally—chives will regrow vigorously in spring.


8. Harvesting Chives and Garlic Chives

You can start harvesting when plants are about 6–8 inches tall, usually 60–75 days after sowing.

How to Harvest:

  • Use scissors or garden shears to snip leaves evenly across the clump.
  • Always leave 2 inches of growth so plants can recover quickly.
  • For garlic chives, you can also harvest flower buds before they open for stir-fries or garnishes.

With regular cutting, chives can provide fresh leaves throughout the growing season. Avoid harvesting too aggressively late in fall to allow plants to store energy for winter.


9. Using Chives in the Kitchen

Chives are incredibly versatile herbs that bring a subtle, fresh onion or garlic flavor to many dishes. Here are some delicious ways to use them:

  • Fresh garnish: Sprinkle chopped chives over baked potatoes, soups, or scrambled eggs.
  • Herb butter: Mix with butter, salt, and lemon juice for a savory spread.
  • Salads and dips: Blend into salad dressings, yogurt dips, or creamy sauces.
  • Stir-fries and dumplings: Use garlic chives for a gentle garlicky aroma in Asian dishes.
  • Herbal vinegar or oil: Infuse chives in vinegar or olive oil for flavored condiments.

Remember—chives lose flavor when cooked too long. Add them toward the end of cooking to preserve their delicate taste and aroma.


10. Saving Seeds and Propagating for Next Season

If you want to save chive seeds:

  1. Allow some flowers to mature fully on the plant.
  2. Once the blooms dry, the seed heads will turn brown.
  3. Shake the heads over a container to collect black seeds.
  4. Store in a cool, dry place for next year’s planting.

Alternatively, divide mature clumps every 2–3 years to rejuvenate plants and prevent overcrowding.


11. Growing Tips for Healthier Chives

To get the most out of your plants, keep these expert tips in mind:

  • Rotate crops: Avoid planting chives in the same spot year after year to prevent soil-borne issues.
  • Companion planting: Grow chives near carrots, tomatoes, or roses to deter pests naturally.
  • Deadhead flowers: Remove faded blooms to keep leaves tender and prevent self-seeding.
  • Mulching: Apply a thin mulch layer to retain soil moisture and suppress weeds.
  • Divide regularly: Every few years, divide clumps to maintain strong, flavorful growth.

12. Overwintering and Long-Term Care

Chives are hardy perennials that tolerate frost and even light snow. In colder regions:

  • Cut back dead foliage after the first frost.
  • Mulch with straw or dry leaves to insulate roots.
  • Potted chives can be moved indoors to a sunny window during winter.

In early spring, remove mulch, water thoroughly, and watch fresh green shoots emerge.


13. Benefits of Growing Chives

Beyond their culinary uses, chives bring many benefits to your home garden:

  • Pollinator-friendly: Their flowers attract bees and beneficial insects.
  • Natural pest deterrent: The sulfur compounds in chives repel aphids, beetles, and other pests.
  • Low maintenance: Once established, chives thrive with little care.
  • Perennial harvest: They regrow each year, offering a long-term, sustainable herb source.

Plus, they look stunning in garden borders, herb spirals, or even decorative pots on your kitchen windowsill.


Conclusion

Growing chives and garlic chives is a rewarding experience for every home gardener. From their delicate flavor to their ornamental appeal, these hardy herbs are both beautiful and useful. With the right soil, regular watering, and timely pruning, you’ll enjoy an endless supply of fresh, flavorful greens that enhance everything from simple omelets to gourmet dishes.

Whether you start from seed or divide an old clump, chives are forgiving, fast-growing, and virtually pest-free. Once established, they’ll keep rewarding you year after year with lush green leaves and charming blossoms.

So grab a packet of seeds or a starter clump, find a sunny corner in your garden—or even a small pot on your kitchen windowsill—and start your chive-growing journey from seed to kitchen today!

How to Grow Water Spinach (Kang Kong): Expert Tips for a Lush, Productive Harvest

How to Grow Water Spinach (Kang Kong): Expert Tips for a Lush, Productive Harvest

Water spinach, also known as Kang Kong, River Spinach, or Chinese Spinach, is one of the most popular leafy greens grown in tropical and subtropical regions. Loved for its crisp, hollow stems and tender leaves, this plant is a staple in many Asian cuisines, especially in stir-fries, soups, and salads. Its fast growth, high yield, and tolerance to wet conditions make it a rewarding crop for both beginners and experienced gardeners.

In this comprehensive guide, we’ll share the best growing tips for water spinach, including planting methods, ideal soil conditions, watering needs, and harvesting techniques. Whether you’re growing it in soil, water, or containers, you’ll learn how to enjoy a constant supply of fresh Kang Kong right from your home garden.


1. Understanding Water Spinach (Kang Kong)

Water spinach (Ipomoea aquatica) belongs to the morning glory family and thrives in warm, humid environments. It’s often grown in flooded fields, ponds, or containers with consistently moist soil. The plant grows rapidly—sometimes reaching maturity in as little as 4–6 weeks—and can be harvested multiple times throughout the growing season.

There are two main varieties:

  • Upland Water Spinach: Grows in soil with regular watering. Ideal for containers or raised beds.
  • Lowland Water Spinach: Thrives in standing water or flooded soil, commonly grown in wetlands.

Understanding which variety you have will help you create the best growing environment.


2. Choosing the Right Growing Location

Water spinach loves sunshine and moisture. Choose a location that receives at least 5–6 hours of sunlight daily and retains consistent moisture. If you live in a hot, dry region, partial shade during the hottest hours of the day helps prevent the leaves from wilting.

For home gardeners:

  • A container garden on your balcony or rooftop works perfectly.
  • A raised bed or small pond area can also mimic its natural wetland habitat.
  • In colder regions, you can grow it indoors near a sunny window or in a greenhouse.

3. Ideal Soil and Water Conditions

Although it’s called “water spinach,” Kang Kong doesn’t need to be submerged in water at all times unless you’re growing the lowland type. What it does require is consistently moist, nutrient-rich soil.

Soil Requirements:

  • Use loamy or sandy soil rich in organic matter.
  • Maintain a pH between 6.0 and 7.0.
  • Mix in compost or well-rotted manure before planting to boost nutrients.
  • Ensure good drainage, even if the soil remains wet—stagnant water can lead to root rot.

If you’re growing in containers, use a large pot (at least 12 inches deep) and line it with a plastic saucer to help retain moisture.


4. Propagation: Growing from Seeds or Cuttings

Water spinach can be grown easily from seeds or stem cuttings.

From Seeds:

  1. Soak the seeds in warm water for 8–10 hours to speed up germination.
  2. Fill seed trays or pots with rich, moist soil.
  3. Sow the seeds ½ inch deep, then cover lightly with soil.
  4. Keep the soil consistently moist.
  5. Germination takes 5–7 days under warm conditions.

Once seedlings have grown to 4–5 inches tall, they can be transplanted into larger containers or garden beds.

From Cuttings:

  1. Take 6–8 inch long cuttings from a healthy, mature plant.
  2. Remove the lower leaves and place the stems in water or directly in moist soil.
  3. Roots will begin forming in about 5–7 days.
  4. Once rooted, transfer them to your prepared garden bed or container.

Cuttings are faster and more reliable for propagation, especially if you already have a mature plant.


5. Planting and Spacing

Plant the seedlings or rooted cuttings about 8–10 inches apart to allow enough space for spreading. If you’re growing in rows, keep rows about 12 inches apart.

After planting, water thoroughly and maintain consistent soil moisture. In very hot weather, a mulch layer (such as straw or coconut husk) helps retain moisture and suppress weeds.


6. Watering and Feeding

Water spinach thrives in wet soil. Keep the soil consistently moist but not waterlogged. During dry or hot periods, water at least once or twice a day, depending on the temperature.

To boost growth, feed your Kang Kong with organic liquid fertilizer or compost tea every 2–3 weeks. You can also apply a balanced NPK fertilizer (10-10-10) lightly around the base of the plants for sustained growth.

If growing in water or hydroponically, change the water weekly and add nutrients as needed to keep plants healthy and productive.


7. Managing Pests and Diseases

Water spinach is generally hardy, but it can attract a few common pests:

  • Aphids: These tiny insects suck sap from leaves. Spray with neem oil or soapy water.
  • Leaf miners: Look for white tunnels on leaves; prune affected parts.
  • Snails and slugs: Handpick or use natural deterrents like crushed eggshells.

To prevent fungal diseases, avoid overcrowding and ensure good airflow. If grown in very humid areas, trim regularly to prevent dense growth.


8. Pruning and Maintenance

Regular pruning encourages bushy, vigorous growth. When your plants are about 12–15 inches tall, pinch off the growing tips to promote side shoots.

Every 10–14 days, you can cut back the stems to about 4–6 inches from the soil—this triggers new, tender shoots perfect for harvesting. Consistent trimming ensures you have a continuous supply of young, tasty leaves.


9. Harvesting Water Spinach

You can start harvesting water spinach about 30–40 days after planting. Use scissors or garden shears to cut the stems 5–6 inches above the soil line.

Harvest in the early morning when leaves are fresh and crisp. The plant will regrow rapidly, allowing you to harvest every 2–3 weeks throughout the growing season.

For best flavor:

  • Choose young, tender shoots.
  • Avoid letting plants flower, as leaves become fibrous and bitter after flowering.

10. Growing Water Spinach in Containers or Hydroponics

If you live in an apartment or have limited garden space, water spinach grows beautifully in containers or hydroponic setups.

Container Growing Tips:

  • Use a wide, deep container to accommodate spreading roots.
  • Keep the soil moist with a self-watering system or saucer underneath.
  • Place the pot in a sunny spot, like a balcony or rooftop.

Hydroponic Growing Tips:

  • Use a nutrient-rich water solution.
  • Maintain water pH between 6.0–6.8.
  • Use grow lights if natural sunlight is limited.
  • Change water weekly to prevent algae buildup.

This method ensures clean, soil-free greens that grow quickly and require minimal maintenance.


11. Storing and Using Water Spinach

After harvesting, wash the leaves thoroughly to remove soil and insects. Wrap them in a damp paper towel and store in the refrigerator for up to 3–4 days.

Water spinach is incredibly versatile in the kitchen:

  • Stir-fry with garlic and soy sauce.
  • Add to soups, stews, or noodle dishes.
  • Steam or sauté as a side dish.
  • Mix fresh shoots into salads for a crunchy texture.

12. Seasonal and Climate Considerations

Water spinach grows best in warm, humid weather (20–35°C). It’s sensitive to cold and frost, so if temperatures drop below 15°C, growth slows significantly.

In tropical climates, it can be grown year-round, while in temperate regions, it’s best planted in spring and summer. You can extend the growing season by starting plants indoors or using a greenhouse setup.


13. Common Problems and Quick Fixes

ProblemPossible CauseSolution
Yellowing leavesOverwatering or nutrient deficiencyReduce watering; apply compost or balanced fertilizer
Slow growthCold temperature or poor soilMove to warmer location; enrich soil
Leaf holesPests (caterpillars or beetles)Use organic insect control spray
WiltingDrought stressWater more frequently and mulch

Conclusion

Growing Water Spinach (Kang Kong) is one of the easiest and most rewarding gardening experiences you can have. With its rapid growth, minimal care needs, and continuous harvests, it’s a perfect addition to your home garden—whether you grow it in the ground, pots, or water.

By following these growing tips—choosing the right soil, keeping it consistently moist, feeding regularly, and pruning often—you’ll enjoy a lush harvest of fresh, nutritious greens all year round.

So grab a few seeds or cuttings, prepare a moist spot in your garden, and start growing your own River Spinach today!

Fresh, crisp, and flavorful—Kang Kong will soon become one of your favorite homegrown vegetables.

Picking Dandelion Greens and Planting Out Seedlings: A Complete Organic Gardening Guide

Picking Dandelion Greens and Planting Out Seedlings: A Complete Organic Gardening Guide

When most people see dandelions, they think of pesky weeds invading their lawns. But to organic gardeners and foragers, dandelion greens are a true treasure. Packed with nutrients, bursting with flavor, and remarkably easy to grow, dandelions are one of nature’s most giving plants. In this comprehensive guide inspired by the video “Picking Dandelion Greens and Planting Out Seedlings,” we’ll explore how to harvest dandelion greens the right way, how to grow them from seed, and how to plant out your seedlings for a continuous supply of these incredible greens.

Whether you’re new to gardening or already cultivating your own organic patch, this guide will show you how to make the most of this resilient, nutrient-dense green that’s been cherished for centuries.


Why Grow and Pick Dandelion Greens?

Dandelions (Taraxacum officinale) have been valued for their culinary and medicinal uses for thousands of years. Every part of the plant — leaves, flowers, and roots — is edible and beneficial. The greens, in particular, are a superfood powerhouse, rich in vitamins A, C, and K, as well as calcium, iron, and potassium.

Here’s why you should consider growing and picking dandelion greens:

  • Highly Nutritious: They support liver health, aid digestion, and act as a natural detoxifier.
  • Easy to Grow: Dandelions thrive in poor soil where many plants struggle.
  • Perennial and Hardy: Once established, they return year after year.
  • Versatile in the Kitchen: Delicious raw, sautéed, or added to soups and teas.
  • Pollinator-Friendly: Their bright yellow blooms attract bees and beneficial insects.

So, rather than pulling them out as weeds, consider cultivating them purposefully for both health and sustainability.


Picking Dandelion Greens: The Right Way to Harvest

When harvesting dandelion greens, timing is everything. The younger the leaves, the milder and more tender they’ll be. Older leaves tend to have a stronger, more bitter taste — still edible but better cooked than eaten raw.

1. Best Time to Pick

  • The ideal time to pick dandelion greens is in early spring or late fall, when the weather is cool.
  • Leaves harvested before the plant flowers are the sweetest.
  • After flowering, bitterness increases — although you can still blanch or cook them to mellow the flavor.

2. Where to Harvest

If you’re foraging dandelions, make sure to harvest from clean, chemical-free areas — away from roadsides, lawns treated with pesticides, or public parks.

If you’re growing your own organically, you can confidently harvest without worry.

3. How to Pick Dandelion Greens

  • Use scissors or a small knife to snip off outer leaves near the base, leaving the inner ones to keep growing.
  • Avoid pulling up the entire plant unless you plan to harvest the roots as well.
  • Rinse leaves thoroughly to remove any soil or debris.

Harvest regularly to encourage new growth and extend your picking season.


Planting Out Dandelion Seedlings

Dandelions can be grown easily from seeds or by transplanting seedlings. While they often self-seed in the wild, cultivating them intentionally gives you more control over spacing, soil quality, and harvest timing.

1. Starting Seeds Indoors

If you want an early start or live in a cooler region, sow dandelion seeds indoors 4–6 weeks before the last frost.

  • Seed Depth: Sow seeds just ¼ inch deep.
  • Soil Mix: Use a light, organic seed-starting mix.
  • Moisture: Keep the soil evenly moist but not waterlogged.
  • Light: Place seedlings in a sunny window or under grow lights for 6–8 hours a day.

Seedlings usually emerge within 7–10 days. Once they’ve developed a few true leaves, they’re ready to be hardened off for transplanting outdoors.

2. Preparing the Garden Bed

Dandelions aren’t picky about soil, but for the best greens, they prefer fertile, well-draining soil rich in organic matter.

  • Location: Choose a sunny to partially shaded spot.
  • Soil Prep: Mix in compost or aged manure before planting.
  • pH Level: Slightly acidic to neutral soil (6.0–7.0) works best.

3. Transplanting Seedlings Outdoors

After the danger of frost has passed, transplant your seedlings into the prepared bed.

  • Spacing: Plant seedlings about 8–10 inches apart.
  • Watering: Water well after planting and keep soil consistently moist.
  • Mulching: Apply a layer of mulch to retain moisture and prevent weeds.

Within a few weeks, you’ll notice new growth and can begin light harvesting once the leaves reach about 4–6 inches long.


Caring for Dandelion Plants

Once established, dandelions are extremely low-maintenance. In fact, they often thrive with little intervention. But to grow lush, tender greens, it helps to follow a few organic care practices.

Watering

Keep the soil evenly moist, especially during dry periods. Deep watering once a week encourages strong roots and tender leaves.

Feeding

Dandelions don’t need heavy feeding, but they’ll appreciate a boost of nutrients every few months. Top-dress the soil with compost, worm castings, or organic fertilizer to support continuous growth.

Weeding

Because dandelions have long taproots, they compete well with weeds. Still, keeping the surrounding area tidy helps ensure your plants get maximum nutrients and airflow.

Pest Control

Dandelions are generally pest-resistant, but slugs and aphids might occasionally appear.

  • Handpick slugs in the evening or use natural barriers like crushed eggshells.
  • Spray aphids with a gentle soap-and-water solution.
  • Encourage beneficial insects like ladybugs and lacewings.

Harvesting and Regrowing

Dandelions are perennials, meaning once planted, they’ll keep coming back. The key to continuous harvest is regular picking — it encourages the plant to send out new leaves and prevents it from bolting too quickly.

Harvest Cycle

  • First Harvest: About 8–10 weeks after planting.
  • Frequency: Pick every few weeks throughout the growing season.
  • Regrowth: Leave at least a few inner leaves each time so the plant can regenerate.

You can also harvest dandelion flowers and roots for other uses — the flowers make lovely herbal tea or wine, while the roots can be roasted and brewed as a coffee alternative.


How to Use Dandelion Greens in the Kitchen

Dandelion greens are extremely versatile and can be enjoyed both raw and cooked. Their earthy, tangy flavor makes them a refreshing addition to many dishes.

Here are a few ideas:

  • Fresh Salads: Mix young, tender leaves with spinach, arugula, or lettuce. Add lemon juice and olive oil for a zesty salad.
  • Sautéed Greens: Lightly sauté with garlic and olive oil to mellow the bitterness.
  • Soups and Stews: Add to vegetable or bean soups for a nutrient boost.
  • Smoothies: Blend with fruits, spinach, and a splash of citrus juice.
  • Pesto: Combine dandelion greens with nuts, garlic, and olive oil for a unique twist on classic pesto.

For best flavor, use freshly picked greens and avoid overcooking — just a quick blanch or sauté keeps their vibrant taste and nutrients intact.


Companion Planting and Garden Benefits

Dandelions are more than just edible greens — they’re excellent companion plants that benefit the garden ecosystem.

  • Their deep taproots pull nutrients from deep in the soil, bringing minerals closer to the surface for other plants.
  • The flowers attract pollinators like bees, supporting biodiversity.
  • Their leaves, when decomposed, enrich compost with valuable minerals.

Dandelions pair well with vegetables like carrots, onions, and lettuce. However, avoid planting them too close to shallow-rooted crops, as their deep roots can compete for space.


Organic Tips for Growing Dandelions Successfully

To make your dandelion patch thrive organically, keep these simple practices in mind:

  • Rotate your greens: Don’t grow dandelions in the same bed every year to prevent soil depletion.
  • Feed the soil: Focus on enriching the soil with compost instead of synthetic fertilizers.
  • Avoid overharvesting: Always leave some leaves for the plant to continue regenerating.
  • Collect seeds: Let some plants flower and go to seed for natural self-sowing next season.

Following these methods ensures that your garden remains balanced, healthy, and self-sustaining — the essence of true organic gardening.


Final Thoughts: A Green Worth Keeping

Picking dandelion greens and planting out seedlings is more than just gardening — it’s about reconnecting with nature’s abundance. These hardy plants teach us resilience, sustainability, and appreciation for what’s often overlooked.

With just a bit of care, your garden can become a reliable source of fresh, nutrient-packed greens that come back year after year. Whether you’re harvesting from wild patches or cultivating your own dandelion bed, you’ll discover that these humble greens are far from ordinary — they’re a gift from the earth, ready to nourish your body and garden alike.

So next time you see those bright yellow flowers or jagged green leaves, don’t pull them out — pick them, plant them, and enjoy one of nature’s most generous greens.

Growing Organic Garden Sorrel: A Complete Guide to Cultivating This Zesty Green with Tips from Nicola Chatham

Growing Organic Garden Sorrel: A Complete Guide to Cultivating This Zesty Green with Tips from Nicola Chatham

Sorrel is one of those underrated leafy greens that deserves a permanent spot in every home garden. With its tangy, lemony flavor and hardy growth habit, sorrel not only adds zest to your meals but also brings a lush green touch to your garden nearly all year round. In this guide, inspired by Nicola Chatham’s insights on “Growing Organic Garden Sorrel,” you’ll learn everything you need to know about growing, harvesting, and enjoying this delightful perennial green organically.


What Is Garden Sorrel?

Garden sorrel (Rumex acetosa) is a leafy perennial herb native to Europe and parts of Asia. It’s known for its tart, citrusy leaves that make an excellent addition to salads, soups, sauces, and even smoothies. Belonging to the buckwheat family, sorrel is both nutritious and ornamental, thriving in many climates with minimal care.

There are a few common varieties of sorrel worth noting:

  • Common Sorrel: Traditional variety with long, pointed leaves and a strong lemony flavor.
  • French Sorrel: Smaller, rounder leaves and a milder taste — great for delicate dishes.
  • Red Vein Sorrel: Eye-catching with green leaves streaked with red veins; adds beauty and tang to any plate.

Sorrel is also rich in vitamins A and C, iron, and antioxidants, making it not just tasty but also highly nutritious.


Choosing the Right Spot for Sorrel

One of the reasons gardeners like Nicola Chatham love growing sorrel is its adaptability. It’s hardy, easy to maintain, and thrives in both garden beds and containers.

Here’s what sorrel prefers:

  • Sunlight: Sorrel grows well in full sun to partial shade. In very hot regions, partial shade helps prevent leaves from becoming too bitter.
  • Soil: It loves fertile, well-draining soil with plenty of organic matter. Sorrel isn’t fussy about soil type but does best when it’s rich in compost.
  • pH Level: Slightly acidic to neutral soil (6.0–7.0) is ideal.

Before planting, loosen the soil and enrich it with well-rotted compost or aged manure. This not only improves fertility but also enhances moisture retention — something sorrel enjoys.


Propagation: Growing Sorrel from Seeds or Divisions

Sorrel can be propagated in two main ways — from seeds or root divisions. Nicola Chatham often recommends growing from root divisions if you want a quicker harvest, but starting from seeds is just as rewarding.

1. Growing Sorrel from Seeds

  • Timing: Sow sorrel seeds in early spring after the danger of frost has passed.
  • Planting Depth: Sow seeds about ¼ inch deep.
  • Spacing: Space plants about 12–18 inches apart to give them room to spread.
  • Germination: Seeds typically germinate in 1–2 weeks. Keep the soil consistently moist during this period.

Once seedlings are large enough to handle, thin them out or transplant them to their permanent position.

2. Growing Sorrel from Root Divisions

If you already have a mature sorrel plant, you can divide the roots in early spring or autumn.

  • Dig up the clump carefully.
  • Separate it into smaller sections, each with at least one growing bud.
  • Replant divisions immediately in prepared soil, water thoroughly, and mulch.

Dividing sorrel every 2–3 years keeps the plants vigorous and productive.


Caring for Your Sorrel Organically

Once established, sorrel is a low-maintenance perennial that can thrive for years with a little attention. Nicola emphasizes the importance of organic growing methods — feeding the soil naturally, avoiding synthetic fertilizers, and encouraging biodiversity.

Here’s how to care for sorrel organically:

Watering

Sorrel prefers consistent moisture but not soggy conditions. Water deeply once or twice a week, depending on the weather. Mulching around the plants helps retain moisture and suppress weeds.

Feeding

Every few months, add a layer of compost or worm castings around the base of the plant. This slow-release organic feed keeps your sorrel lush and healthy.

Weeding

Keep the area around your sorrel weed-free, especially when the plants are young. Mulching with straw, leaves, or grass clippings helps a lot.

Pest Control

Sorrel is generally pest-resistant, but aphids and slugs may occasionally appear. Use these organic methods to handle them:

  • Spray aphids with a mild soap-and-water solution.
  • Hand-pick slugs at dusk or use natural deterrents like crushed eggshells around the base of the plants.
  • Encourage beneficial insects such as ladybugs and lacewings in your garden.

Harvesting Sorrel

Sorrel grows quickly and can be harvested within 8–10 weeks of sowing. The key is to harvest young, tender leaves — they have the best flavor.

How to harvest sorrel properly:

  • Use scissors or a knife to snip the outer leaves, allowing the inner ones to keep growing.
  • Avoid pulling leaves by hand as it may damage the crown of the plant.
  • Continuous harvesting encourages new growth and prevents the plant from bolting (sending up flower stalks).

If your sorrel starts to flower, pinch off the flower stems to prolong leaf production. However, if you want to save seeds, let a few flowers mature and dry naturally.


Culinary Uses of Sorrel

Nicola Chatham often highlights the versatility of sorrel in the kitchen. Its bright, tangy flavor brings freshness to many dishes.

Here are some creative ways to use sorrel:

  • In Salads: Mix young sorrel leaves with lettuce, spinach, or arugula for a refreshing twist.
  • In Soups: Classic French sorrel soup combines sorrel, potatoes, onions, and cream for a deliciously tart dish.
  • In Sauces: Puree sorrel with butter or yogurt to make a zesty sauce for fish or chicken.
  • In Smoothies: Add a few leaves to green smoothies for a natural, citrusy flavor.
  • As a Spinach Substitute: Sorrel can be lightly steamed or sautéed like spinach. Its tartness mellows when cooked.

Tip: Use sorrel sparingly when raw, as its oxalic acid content gives it a strong tang. Cooking reduces this sharpness.


Managing Sorrel Year-Round

One of the joys of growing sorrel is its long productivity. It’s a hardy perennial that can survive light frosts and returns year after year with minimal care.

Seasonal tips:

  • Spring: New leaves emerge — perfect time for harvesting and dividing plants.
  • Summer: Provide shade or extra water during very hot weather to prevent bitterness.
  • Autumn: Continue harvesting until frost. Mulch plants before winter to protect roots.
  • Winter: In mild climates, sorrel remains green; in colder areas, it dies back but re-emerges in spring.

If you live in a very cold zone, consider growing sorrel in containers so you can move them to a sheltered spot during freezing months.


Companion Planting with Sorrel

Sorrel makes an excellent companion plant in the garden. Its strong scent can deter pests, and it grows well alongside many vegetables.

Good companions:

  • Strawberries
  • Onions
  • Cabbage family crops
  • Herbs like thyme and parsley

Avoid planting sorrel too close to legumes like peas or beans, as it prefers slightly different soil conditions.


Why Choose Organic Sorrel?

Nicola Chatham’s organic gardening philosophy centers around sustainability, soil health, and balance. By growing sorrel organically, you not only produce healthier greens but also nurture the ecosystem in your garden.

Organic growing means:

  • No harmful pesticides or synthetic fertilizers.
  • Healthier soil through composting and mulching.
  • Attracting pollinators and beneficial insects.
  • Producing nutrient-dense, chemical-free food for your family.

Sorrel is an excellent plant for beginner organic gardeners — it’s forgiving, fast-growing, and continuously productive.


Final Thoughts: The Joy of Growing Sorrel

Growing organic garden sorrel is both rewarding and practical. It’s a perennial that keeps giving — thriving through seasons, offering a steady supply of zesty greens, and bringing biodiversity to your garden. With the simple, organic practices shared by Nicola Chatham, anyone can cultivate sorrel successfully, even in small spaces or containers.

So, whether you’re a seasoned gardener or a beginner looking to add something new and flavorful to your plot, give sorrel a try. Its refreshing tang, minimal maintenance needs, and sustainable nature make it a must-have addition to any organic home garden.

The Complete Guide on How to Propagate Purslane Easily at Home

The Complete Guide on How to Propagate Purslane Easily at Home

Purslane (Portulaca oleracea) is one of those wonderful garden plants that is both edible and ornamental. Known for its succulent, slightly tangy leaves and its ability to thrive in poor soil and hot, dry conditions, purslane is a resilient and fast-growing plant that every home gardener should know about. Whether you love it for its nutritional value or its bright yellow flowers, propagating purslane is incredibly easy — and you can have an endless supply of this healthy green with just a few simple steps.

In this detailed guide, we’ll walk you through everything you need to know about propagating purslane — from understanding its growing habits and choosing the right cuttings to caring for new plants and harvesting. Let’s dive in!


What Is Purslane?

Purslane is a warm-season succulent herb that grows low to the ground and spreads quickly. It’s often considered a weed, but gardeners and chefs alike prize it for its high omega-3 fatty acid content, vitamins A, C, and E, and minerals such as magnesium and potassium. Its crisp texture and lemony flavor make it great for salads, stir-fries, and even smoothies.

Purslane is an annual, but because it grows so rapidly and self-seeds easily, it behaves almost like a perennial in many gardens. Once you have it, it tends to return year after year with little effort.


Why Propagate Purslane?

While you can grow purslane easily from seeds, propagation by cuttings is faster and guarantees that the new plants will be identical to the parent plant. Propagation also allows you to multiply your stock quickly, especially if you already have a healthy, mature plant.

Here are some key benefits of propagating purslane:

  • Fast growth: Cuttings root quickly, often within a few days.
  • Saves seeds: You don’t have to wait for flowers or collect seeds.
  • Clonal consistency: New plants will have the same flavor, texture, and growth pattern as the mother plant.
  • Continuous harvest: You can harvest mature plants while propagating new ones for ongoing production.

Best Time to Propagate Purslane

Purslane loves warm, sunny conditions, so the ideal time to propagate is during late spring through summer when temperatures range between 70–90°F (21–32°C). During these months, purslane cuttings root quickly and grow vigorously.

Avoid propagation during cold or rainy seasons, as excess moisture can cause rot and slow down root formation.


Step-by-Step Guide: How to Propagate Purslane

Propagating purslane is a simple and rewarding process that even beginner gardeners can master. Here’s a detailed step-by-step guide to help you succeed.


Step 1: Select a Healthy Parent Plant

Choose a mature, disease-free purslane plant with thick, green stems and healthy leaves. Avoid plants that are flowering or seeding, as energy is then diverted away from vegetative growth.

The healthiest cuttings come from non-flowering side shoots that are firm and succulent but not too woody.


Step 2: Take Cuttings

Using clean, sharp scissors or pruning shears, snip off 4–6 inch long cuttings from the mother plant.
Remove any leaves from the lower half of the stem — this part will go into the soil or water to develop roots.

Each cutting should have at least 3–4 leaf nodes, as these are the points where new roots will emerge.

Tip: Make the cut just below a node, since roots form most easily from this area.


Step 3: Let the Cuttings Callus (Optional but Recommended)

Lay the cuttings on a paper towel or a shaded tray for a few hours to let the ends dry and callus over.
This step helps prevent rotting once the cuttings are placed in soil or water, especially if your environment is humid.


Step 4: Choose Your Propagation Method

You can propagate purslane in either water or soil, and both methods work well. Here’s how to do each:

A. Propagating Purslane in Water

  1. Fill a small glass or jar with room-temperature water.
  2. Place the cuttings in the jar, ensuring that only the lower part of the stem is submerged.
  3. Keep the jar in a bright, warm spot with indirect sunlight.
  4. Change the water every 2–3 days to prevent stagnation.
  5. Within a week, you’ll notice tiny white roots forming from the submerged nodes.

Once the roots are about 1–2 inches long, you can transfer the cuttings to soil.

B. Propagating Purslane in Soil

  1. Prepare a small pot or tray with a well-draining soil mix — ideally sandy or loamy soil.
  2. Insert each cutting about 1–2 inches deep into the soil.
  3. Water lightly to moisten the soil but don’t overwater.
  4. Place the pot in a warm, sunny spot or on a windowsill.

In about 7–10 days, the cuttings should develop roots and start new growth.


Step 5: Transplanting Rooted Cuttings

Once your cuttings have developed strong roots, it’s time to transplant them into larger pots or directly into your garden bed.

  1. Choose a sunny location, as purslane thrives in full sunlight (6–8 hours a day).
  2. Prepare the soil by mixing in a little compost or organic matter for extra nutrients.
  3. Space the plants about 8–10 inches apart, as purslane spreads quickly.
  4. Water thoroughly after transplanting to help the roots settle.

Step 6: Caring for New Purslane Plants

After propagation, your young purslane plants will grow quickly with minimal care. Follow these tips to keep them healthy and productive:

  • Watering: Purslane is drought-tolerant but benefits from light watering during dry spells. Avoid overwatering, as too much moisture can lead to root rot.
  • Sunlight: Ensure they get at least 6 hours of direct sunlight daily.
  • Soil: Purslane grows best in sandy or well-draining soil with a pH of 6.0–7.5.
  • Fertilizer: Purslane rarely needs fertilizer. If the soil is poor, use a diluted organic liquid fertilizer once a month.
  • Pruning: Regularly pinch back the growing tips to encourage bushier growth and prevent legginess.

Harvesting Purslane

You can begin harvesting purslane just 3–4 weeks after propagation, once the plants are well-established and have produced plenty of leaves.

To harvest:

  • Cut the upper tender stems and leaves using scissors.
  • Avoid uprooting the entire plant — purslane will continue to regrow from its base.

Frequent harvesting actually encourages the plant to produce more new shoots, giving you a continuous supply throughout the season.


How to Use Purslane

Fresh purslane is a versatile ingredient with a crisp, slightly tangy flavor. Here are some great ways to use it:

  • In salads: Combine purslane leaves with tomatoes, cucumbers, and feta cheese for a refreshing summer salad.
  • In stir-fries: Add it at the end of cooking to retain its crunch.
  • In soups and stews: Purslane thickens broths slightly due to its mucilaginous texture.
  • As a smoothie green: Blend it with banana, lemon, and honey for a nutrient-packed drink.

You can also pickle purslane or use it as a garnish for grilled dishes.


Common Problems and Solutions

Even though purslane is easy to propagate and grow, a few issues can arise. Here’s how to troubleshoot them:

ProblemPossible CauseSolution
Cuttings rotting before rootingToo much moisture or poor drainageLet cuttings callus before planting and ensure good air circulation
Yellowing leavesOverwatering or poor soil drainageReduce watering frequency
Slow growthNot enough sunlightMove to a sunnier location
Pests (aphids, mealybugs)Sap-sucking insectsSpray with neem oil or insecticidal soap

Final Thoughts

Propagating purslane is one of the easiest and most satisfying gardening projects you can do. With just a few cuttings, a bit of sunlight, and minimal care, you can grow an endless supply of this nutrient-packed green all year long.

Whether you’re cultivating purslane for its culinary uses, its nutritional benefits, or its ground-covering beauty, propagation ensures you’ll always have a fresh source right at your fingertips.

So next time you spot purslane growing in your garden — or even between sidewalk cracks — don’t pull it out. Instead, snip a few stems, propagate them, and enjoy one of nature’s easiest and healthiest greens!

Discover the Insider Trick to Growing Tatsoi in Cold Seasons for Maximum Profits

Discover the Insider Trick to Growing Tatsoi in Cold Seasons for Maximum Profits

If you’re searching for a leafy green that thrives in cool weather, grows quickly, and fetches a high profit at market, Tatsoi might just be your new favorite crop. Often called spoon mustard or rosette bok choy, Tatsoi is an Asian leafy green prized for its mild, mustard-like flavor and glossy, spoon-shaped leaves. What’s even better is that it’s remarkably cold-tolerant—making it one of the best greens to grow in late fall, winter, and early spring.

In this detailed guide, we’ll uncover the insider tricks to growing Tatsoi in cold seasons—including planting techniques, temperature management, harvesting tips, and ways to maximize yield and profit. Whether you’re a home gardener, small farmer, or market grower, you can turn Tatsoi into a productive, high-return winter crop with a few smart growing strategies.


What Makes Tatsoi Perfect for Cold-Season Growing

Tatsoi (Brassica rapa var. rosularis) belongs to the same family as bok choy, kale, and mustard greens. It’s native to East Asia, where it’s been cultivated for centuries for soups, stir-fries, and salads. Unlike many leafy greens that struggle when temperatures dip, Tatsoi actually loves the cold.

Here’s why it stands out:

  • Frost-Hardy: Tatsoi can survive temperatures as low as -10°C (14°F) when mature. Its low, rosette shape helps protect the inner leaves from frost.
  • Fast Growing: You can harvest baby leaves in just 3–4 weeks and full-sized rosettes in 6–8 weeks, allowing for multiple harvests per season.
  • Compact & High Yield: Its tight, low-growing structure makes it ideal for greenhouses, tunnels, or compact raised beds, allowing more plants per square foot.
  • High Market Value: With growing consumer demand for Asian greens, Tatsoi sells at a premium, especially during off-season months.

These traits make Tatsoi a secret weapon for cold-weather profits and year-round gardening success.


Choosing the Right Variety and Growing Setup

When it comes to Tatsoi, selecting the right variety and environment makes a huge difference.

Recommended Varieties

  • ‘Rosette Tatsoi’ – Classic variety forming dark green, glossy leaves in a neat rosette.
  • ‘Asian Delight’ – Slightly upright habit, great for mixed greens and faster harvesting.
  • ‘Savoy Tatsoi’ – Crinkled leaves with a rich flavor, ideal for stir-fries.

Ideal Growing Setup

  1. Cold Frames or Low Tunnels: A simple and affordable setup that shields your Tatsoi from wind and frost.
  2. Unheated Greenhouses: Tatsoi thrives in these during winter with minimal heating needs.
  3. Raised Beds or Containers: Perfect for small spaces—just ensure good drainage and nutrient-rich soil.

If you’re growing commercially, succession planting in protected structures ensures steady supply even in midwinter.


How to Plant Tatsoi for Maximum Yield

Step 1: Prepare the Soil

Tatsoi prefers fertile, well-drained soil with a pH between 6.0 and 7.5. Before planting, work in plenty of organic compost or well-rotted manure. This boosts leaf production and enhances flavor.

Step 2: Sowing Seeds

You can sow Tatsoi directly in the ground or start it in trays for transplanting.

  • Direct Sowing: Plant seeds about ¼ inch deep and 2 inches apart in rows 8–10 inches apart.
  • Transplanting: Start seeds indoors 3–4 weeks before your last frost date and transplant when seedlings have 3–4 true leaves.

For continuous harvest, sow seeds every 2–3 weeks until early spring.

Step 3: Optimal Temperature

Tatsoi grows best in cool temperatures between 10°C and 20°C (50°F–68°F). When it’s too warm, it bolts quickly, but in cold weather, it forms dense, flavorful leaves.

If you’re growing outdoors, cover with frost cloth or row covers to protect young seedlings during severe frost.


Watering and Fertilizing Tips

Although Tatsoi tolerates cold, it still requires consistent moisture to grow tender, juicy leaves.

  • Watering: Keep soil evenly moist but not soggy. Drip irrigation or watering at the base helps prevent fungal issues.
  • Fertilization: Apply a balanced fertilizer (10-10-10) once or twice during the growing season. Over-fertilizing can lead to excessive leaf growth with reduced flavor.

A light feeding of fish emulsion or compost tea every few weeks provides excellent natural nutrients and boosts plant health in cooler conditions.


Insider Trick: Use Microclimates for Winter Growth

Here’s the insider trick that experienced growers use to make Tatsoi thrive in cold seasons: creating and managing microclimates.

Tatsoi is frost-tolerant but still benefits from a little environmental control. You can extend its growth period and improve yield by modifying small-scale growing conditions:

  1. Thermal Mass: Place water-filled jugs or dark stones around plants in tunnels or greenhouses. They absorb heat during the day and release it at night, keeping temperatures stable.
  2. Row Covers: Lightweight covers trap warmth and humidity, protecting young plants from frost while promoting faster growth.
  3. Mulching: Apply straw or leaf mulch around the base of plants to insulate the soil and maintain moisture.
  4. Wind Protection: Use simple barriers or grow Tatsoi near other taller crops to reduce wind stress and prevent drying out.

These small adjustments can boost Tatsoi yield by 30–40% in cold months, turning a modest winter crop into a steady source of income.


Pest and Disease Management

Tatsoi’s cool-season preference means fewer pest issues, but you should still stay alert for common threats.

Common Pests:

  • Aphids – Control with neem oil spray or by introducing ladybugs.
  • Flea Beetles – Use row covers early on and sprinkle diatomaceous earth.
  • Slugs & Snails – Remove by hand or use natural slug traps (beer traps work wonders).

Diseases:

  • Downy Mildew and Leaf Spot can appear in overly damp conditions. Ensure good airflow and avoid overhead watering.

Maintaining a consistent crop rotation and keeping your growing area clean are simple but powerful preventive steps.


Harvesting Tatsoi for Quality and Profit

You can harvest Tatsoi at various growth stages depending on your market or kitchen needs.

  • Baby Leaves (21–25 days): Ideal for mixed salad greens—tender, mild, and quick to sell.
  • Full Rosette (45–55 days): For fresh market sales, soups, and cooking greens.

Use a sharp knife to cut the rosette just above the crown. If the weather stays cool, Tatsoi will regrow for a second or even third harvest.

Store harvested leaves at 0–2°C (32–36°F) in a humid environment to keep them crisp and fresh for up to two weeks.


How to Maximize Profits with Tatsoi

Here are some practical tips for turning your Tatsoi harvest into a profitable venture:

  1. Market Niche: Sell as a premium Asian green or winter salad mix component. Its unique appearance and texture attract gourmet buyers.
  2. Succession Planting: Maintain staggered sowings for consistent supply throughout the winter.
  3. Value-Added Products: Offer washed, bagged baby Tatsoi or mix it with other greens for “winter salad blends.”
  4. Direct Sales: Farmers’ markets, local restaurants, and CSA boxes love locally grown, fresh Asian greens.
  5. Branding: Market your Tatsoi as cold-season sustainable produce—appealing to eco-conscious consumers.

Because it’s both rare and resilient, Tatsoi can fetch up to twice the price of common greens like spinach or lettuce in off-season markets.


Final Thoughts

Growing Tatsoi in cold seasons isn’t just about filling the winter gardening gap—it’s about turning cold weather into an opportunity. With its frost tolerance, quick growth, and premium market value, Tatsoi offers one of the best returns per square foot for small-scale farmers and home gardeners alike.

By leveraging simple microclimate tricks, protecting your plants with tunnels or covers, and maintaining regular planting schedules, you can enjoy steady harvests and strong profits all season long.

Whether you’re growing Tatsoi for family meals or market sales, this humble Asian green can become your winter gold—proof that the cold season doesn’t have to mean the end of fresh, green abundance.

Growing Mizuna in a Smart Vertical Garden: A Complete Guide for Fresh, Flavorful Greens All Year Round

Growing Mizuna in a Smart Vertical Garden: A Complete Guide for Fresh, Flavorful Greens All Year Round

Mizuna, a tender and peppery Japanese mustard green, has become a favorite among gardeners for its delicate flavor and easy-growing nature. Whether you’re short on space or simply want to make your garden more efficient, growing mizuna in a smart vertical garden is a brilliant way to enjoy fresh, nutritious greens all year long.

In this blog post, we’ll explore how to cultivate mizuna using vertical gardening systems — from choosing the right setup and planting techniques to maintenance, harvesting, and the many benefits this leafy green brings to your plate and lifestyle.


What Is Mizuna?

Mizuna (Brassica rapa var. nipposinica) is a leafy green vegetable native to Japan and part of the mustard family. Known for its feathery leaves and mild, peppery taste, mizuna is often used in salads, soups, and stir-fries.

It’s a cool-season crop that thrives in moderate temperatures, making it perfect for both indoor and outdoor vertical gardens. Mizuna grows quickly, can be harvested multiple times, and is exceptionally resilient — an ideal choice for beginners and experienced gardeners alike.


Why Grow Mizuna in a Smart Vertical Garden?

A smart vertical garden uses vertical space and automated watering systems to grow plants efficiently. It’s a perfect solution for urban dwellers or anyone looking to maximize yield in a small area. Here are some key benefits of growing mizuna vertically:

  1. Space Efficiency – Vertical gardens allow you to grow more plants per square foot. You can easily grow multiple varieties of greens, including mizuna, lettuce, and spinach, even on a balcony or patio.
  2. Smart Watering and Nutrient Control – Many vertical garden systems feature automatic irrigation and nutrient delivery, ensuring consistent moisture and optimal growth without overwatering.
  3. Cleaner and Healthier Greens – Since mizuna grows above ground, it’s less susceptible to pests, soil-borne diseases, and contamination.
  4. Faster Growth and Higher Yields – With the right smart garden setup, mizuna grows quickly — often ready for harvest in just 3–4 weeks after planting.
  5. Sustainability and Aesthetics – Vertical gardens save water, reduce soil waste, and add beauty to your living space, making them both eco-friendly and visually appealing.

Choosing the Right Smart Vertical Garden System

Before planting mizuna, choose a smart vertical garden system suited to your space and budget. Here are a few options:

  • Hydroponic Towers: Ideal for growing mizuna without soil. These towers use nutrient-rich water and automated systems to deliver everything the plant needs.
  • Wall-Mounted Systems: Great for balconies or patios, these setups allow you to grow greens vertically against a wall using small pots or planters.
  • Stacked Planters: A simple and affordable option where containers are stacked on top of each other, perfect for soil-based growing.

Make sure your vertical garden has good drainage, consistent water flow, and access to sunlight (at least 4–6 hours daily).


How to Plant Mizuna in a Smart Vertical Garden

Here’s a step-by-step guide to growing healthy mizuna in your vertical setup:

1. Choose the Right Variety

Mizuna comes in several varieties, such as:

  • Kyona Mizuna: Classic narrow leaves with mild flavor.
  • Red Mizuna: Attractive red-tinted leaves with slightly spicier taste.
  • Early Mizuna: Fast-maturing variety ideal for quick harvests.

All varieties do well in vertical gardens, but choose one that matches your climate and taste preferences.

2. Prepare the Growing Medium

For soil-based systems, use a light, well-draining mix with compost and coco peat. If you’re using a hydroponic system, fill your planting cells with rock wool, perlite, or hydroton.

3. Sow the Seeds

Sprinkle mizuna seeds lightly on the surface of the growing medium. Cover them with a thin layer of soil (about ¼ inch deep) and mist with water. Seeds germinate quickly — usually within 3–5 days.

4. Provide the Right Conditions

Mizuna prefers cool temperatures between 10°C and 24°C (50°F–75°F). In warmer climates, place your vertical garden in a shaded or semi-shaded area to prevent bolting (premature flowering).

Maintain consistent moisture — mizuna likes evenly damp soil but not soggy conditions. Smart vertical gardens with automatic watering make this easy.

5. Nutrient Feeding

Feed mizuna every two weeks with a balanced liquid fertilizer rich in nitrogen. If using a hydroponic setup, make sure your nutrient solution is specifically designed for leafy greens.

6. Light and Air Circulation

If you’re growing mizuna indoors, use LED grow lights to provide at least 12–14 hours of light daily. Good airflow prevents fungal issues and ensures strong, healthy leaves.


Caring for Mizuna Plants

Once your mizuna begins to grow, maintenance is simple:

  • Regular Trimming: Snip outer leaves as needed to encourage continuous growth.
  • Pest Control: Mizuna is generally pest-resistant, but watch for aphids or flea beetles. You can use neem oil spray or insecticidal soap as a natural deterrent.
  • Water Management: Don’t let the soil dry out. Smart irrigation systems can handle this automatically, but check periodically for blockages.
  • Temperature Management: If it gets too hot, provide shade. During colder months, you can move the system indoors or cover it with protective plastic.

Harvesting Mizuna

Mizuna grows fast! You can start harvesting baby leaves in about 3 weeks and mature leaves in 5–6 weeks.

To harvest:

  • Use scissors to snip the outer leaves about an inch above the base.
  • Leave the inner leaves intact for continued growth.
  • Regular harvesting encourages the plant to produce new leaves, extending your harvest season.

You can enjoy multiple harvests from the same plant before replanting.


Culinary Uses of Mizuna

Mizuna’s mild, slightly peppery taste adds a unique flavor to many dishes. Here are a few delicious ways to use your homegrown greens:

  1. Salads: Combine baby mizuna with arugula, spinach, and lettuce for a flavorful salad mix.
  2. Stir-Fries: Toss mizuna with garlic, sesame oil, and soy sauce for a quick side dish.
  3. Soups and Noodles: Add chopped mizuna at the end of cooking for a fresh, leafy texture.
  4. Smoothies: Blend young leaves with fruits and greens for a nutrient boost.
  5. Garnish: Use as a beautiful and edible garnish for sushi, grilled dishes, or ramen.

Benefits of Growing Mizuna at Home

Growing mizuna in a smart vertical garden isn’t just about convenience — it’s also great for your health and the environment:

  • Nutrient-Rich: Mizuna is packed with vitamins A, C, and K, along with calcium and antioxidants.
  • Supports Immune Health: Its nutrient profile strengthens the immune system and reduces inflammation.
  • Eco-Friendly Gardening: Vertical gardens use less water and soil, reducing environmental impact.
  • Fresh, Pesticide-Free Greens: You control what goes into your plants — no harmful chemicals.
  • Mental Well-Being: Gardening, even in small spaces, promotes relaxation and reduces stress.

Troubleshooting Common Mizuna Growing Problems

Even with a smart vertical system, a few issues can arise. Here’s how to handle them:

  • Bolting: Happens in high temperatures or stress. Keep mizuna cool and harvest regularly.
  • Yellow Leaves: Indicates nutrient deficiency — feed with balanced fertilizer.
  • Wilting: Usually due to underwatering or excessive heat. Adjust your watering schedule.
  • Pests: Aphids can be controlled using organic sprays or introducing ladybugs to your garden.

Final Thoughts

Growing mizuna in a smart vertical garden is a fantastic way to enjoy continuous, fresh greens right at home — no matter the season or available space. Its quick growth, resilience, and nutritional benefits make it an ideal crop for both new and experienced gardeners.

With the help of modern smart gardening technology, you can automate watering, reduce maintenance, and harvest healthy, flavorful leaves whenever you like. Whether you live in a city apartment, a suburban home, or have just a small balcony, mizuna can thrive beautifully in your vertical garden setup.

So, start planting today and enjoy the satisfaction of harvesting crisp, homegrown mizuna for your salads, soups, and stir-fries — straight from your smart vertical garden!