How to Grow Lime and Lemon Trees from Cuttings: The Easy, Fast Way to Multiply Your Citrus Plants

How to Grow Lime and Lemon Trees from Cuttings: The Easy, Fast Way to Multiply Your Citrus Plants

If you love the refreshing tang of homegrown limes and lemons but don’t want to wait years for seeds to mature, growing citrus trees from cuttings is the perfect solution. Propagating lime and lemon trees from clippings is not only fast but also incredibly rewarding. You can clone your favorite healthy trees, ensuring the same quality of fruit, fragrance, and flavor.

In this detailed guide, you’ll learn everything you need to know about growing lime and lemon trees from cuttings—the right way. From selecting the perfect branch to caring for your new plant until it’s ready to thrive in a pot or garden, we’ll cover it all step by step.


Why Grow Lime and Lemon Trees from Cuttings?

Growing citrus trees from cuttings offers several advantages over planting from seeds:

  1. Faster Growth: Seed-grown trees can take up to 5–7 years to produce fruit, while cuttings can start fruiting within 2–3 years.
  2. True to the Parent Plant: Cuttings are genetic clones of the parent tree, meaning the new plant will produce the same high-quality fruit.
  3. Cost-Effective: You can propagate multiple trees from a single healthy plant, saving money.
  4. Better Survival Rate: Cuttings often adapt faster to their growing conditions compared to young seedlings.

If you have a productive lime or lemon tree—or know someone who does—cuttings are the easiest and most efficient way to grow new citrus trees.


1. Selecting the Right Cutting

The success of growing lime or lemon trees from cuttings starts with choosing a healthy parent plant.

  • Pick a disease-free, mature, and fruit-bearing tree for the best results.
  • Choose a semi-hardwood branch—a stem that’s not too young or too old, typically 6 to 8 months old.
  • Each cutting should be about 6–8 inches long and pencil-thick with at least 3–5 leaf nodes.

Pro Tip: Morning is the best time to take cuttings, as the plant tissues are fully hydrated and turgid.


2. Preparing the Cuttings

Once you’ve selected the right stems, preparation is key:

  1. Use sterilized pruning shears to make clean cuts just below a leaf node.
  2. Remove any flowers or fruit from the stem, as they drain energy from rooting.
  3. Trim off the lower leaves, leaving 2–3 leaves at the top. This reduces moisture loss through transpiration.
  4. Optionally, you can cut the leaves in half to minimize water loss further.

3. Using Rooting Hormone (Optional but Recommended)

Rooting hormone significantly boosts your chances of success, especially for citrus trees that can be slow to root.

  • Dip the cut end of each stem into rooting powder or gel containing indole-3-butyric acid (IBA).
  • Tap off any excess powder before planting.

This step encourages faster root formation and helps prevent fungal infections.


4. Choosing the Right Growing Medium

The rooting medium plays a crucial role in the early success of your cuttings. It should be light, sterile, and well-draining to allow oxygen flow and prevent rot.

A perfect mix can be:

  • 1 part perlite
  • 1 part coarse sand
  • 1 part coco peat or peat moss

Alternatively, you can use a ready-made seed starting mix available at garden centers.

Fill small containers or nursery pots with this mix and water it lightly before inserting the cuttings.


5. Planting the Lime or Lemon Cuttings

Here’s how to do it properly:

  1. Use a pencil or stick to make a small hole in the moist soil.
  2. Insert each cutting about 2–3 inches deep, ensuring at least one node is below the soil surface.
  3. Firm the soil gently around the base of the cutting.
  4. Water thoroughly to settle the soil and eliminate air pockets.

6. Creating the Ideal Environment for Rooting

Lime and lemon cuttings root best in warm, humid, and bright conditions—but not direct sunlight.

  • Cover the cuttings with a clear plastic bag or dome to create a mini greenhouse. This traps humidity and warmth.
  • Make sure the plastic doesn’t touch the leaves. You can use sticks or wire hoops to hold it up.
  • Place the pots in a bright, indirect light location, such as near a window or under a shade net.
  • Maintain a temperature of 24–28°C (75–82°F).

If you have one, a heat mat under the pot can greatly speed up root development.


7. Watering and Maintenance During Rooting

Keeping the moisture level just right is crucial during the rooting phase.

  • Water the cuttings lightly and regularly to keep the soil moist but never soggy.
  • Mist the leaves occasionally to maintain humidity inside the cover.
  • Avoid overwatering—excess moisture can lead to root rot and fungal growth.

After about 3–5 weeks, gently tug on the cuttings. If you feel resistance, it means roots have started forming.


8. Transplanting Rooted Cuttings

Once the cuttings have developed a healthy root system (usually after 6–8 weeks), it’s time to transplant them.

Steps:

  1. Prepare a 6–10 inch pot filled with nutrient-rich citrus potting mix or a blend of garden soil, compost, and sand (in a 2:1:1 ratio).
  2. Carefully remove the rooted cutting from the propagation mix.
  3. Plant it in the new pot, keeping the root ball intact.
  4. Water gently and place the pot in partial sunlight for a week to help it adjust.

After about 10–14 days, move your young lime or lemon plant to a sunnier spot where it can get 6–8 hours of direct sunlight daily.


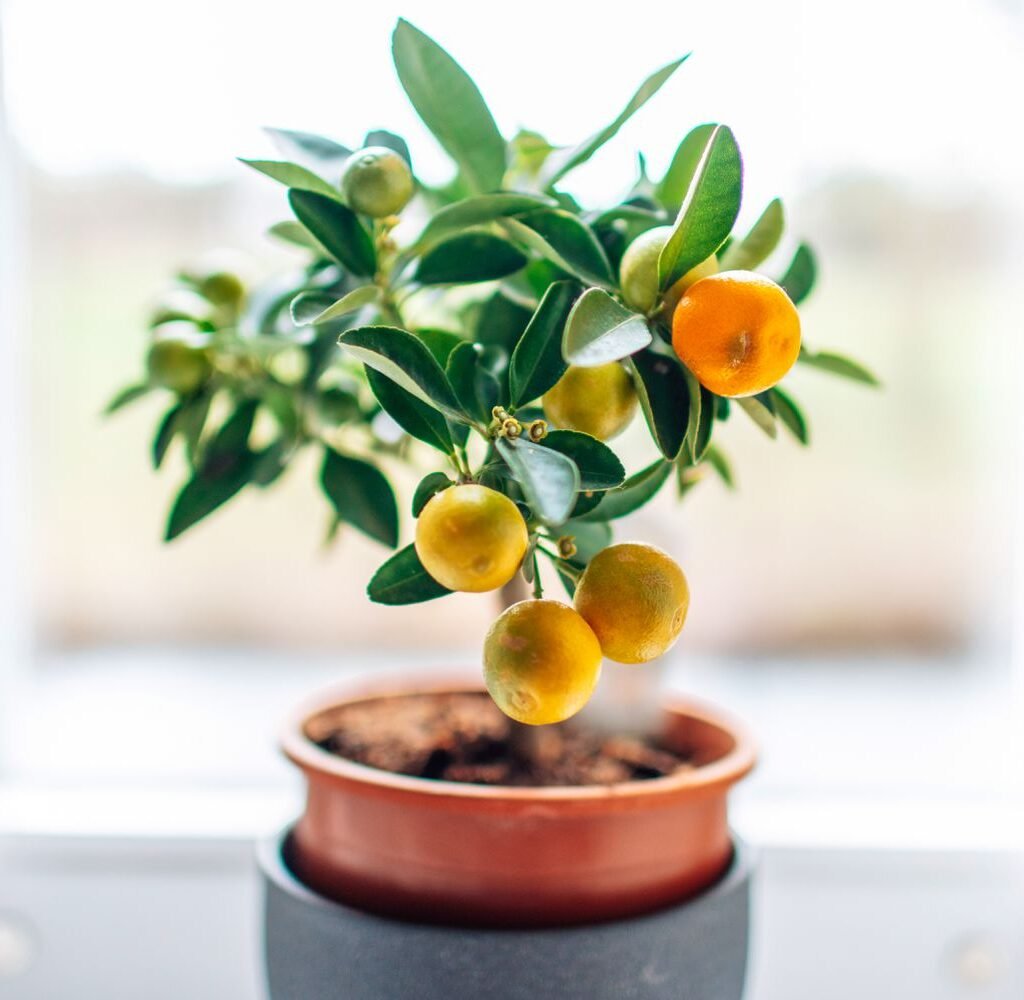
9. Caring for Your New Lime or Lemon Tree

Now that your cutting has become a young plant, proper care ensures healthy growth and future fruiting.

Watering:

Keep the soil consistently moist, especially during the first few months. Once the plant establishes, allow the top inch of soil to dry out before watering again.

Sunlight:

Citrus trees love the sun. Give them plenty of light, but protect young plants from harsh midday rays for the first few weeks.

Feeding:

Start feeding after 6–8 weeks using a balanced citrus fertilizer rich in nitrogen and micronutrients like magnesium and iron. Feed every 4–6 weeks during the growing season (spring to late summer).

Pruning:

Trim weak or crossing branches to encourage a strong structure. Prune lightly to shape your tree and promote airflow.


10. Hardening Off Outdoor Plants

If you plan to grow your lime or lemon tree outdoors, you need to harden it off before permanent planting.

  • Gradually expose the plant to outdoor conditions over 7–10 days.
  • Start with a few hours in light shade and increase sunlight exposure daily.
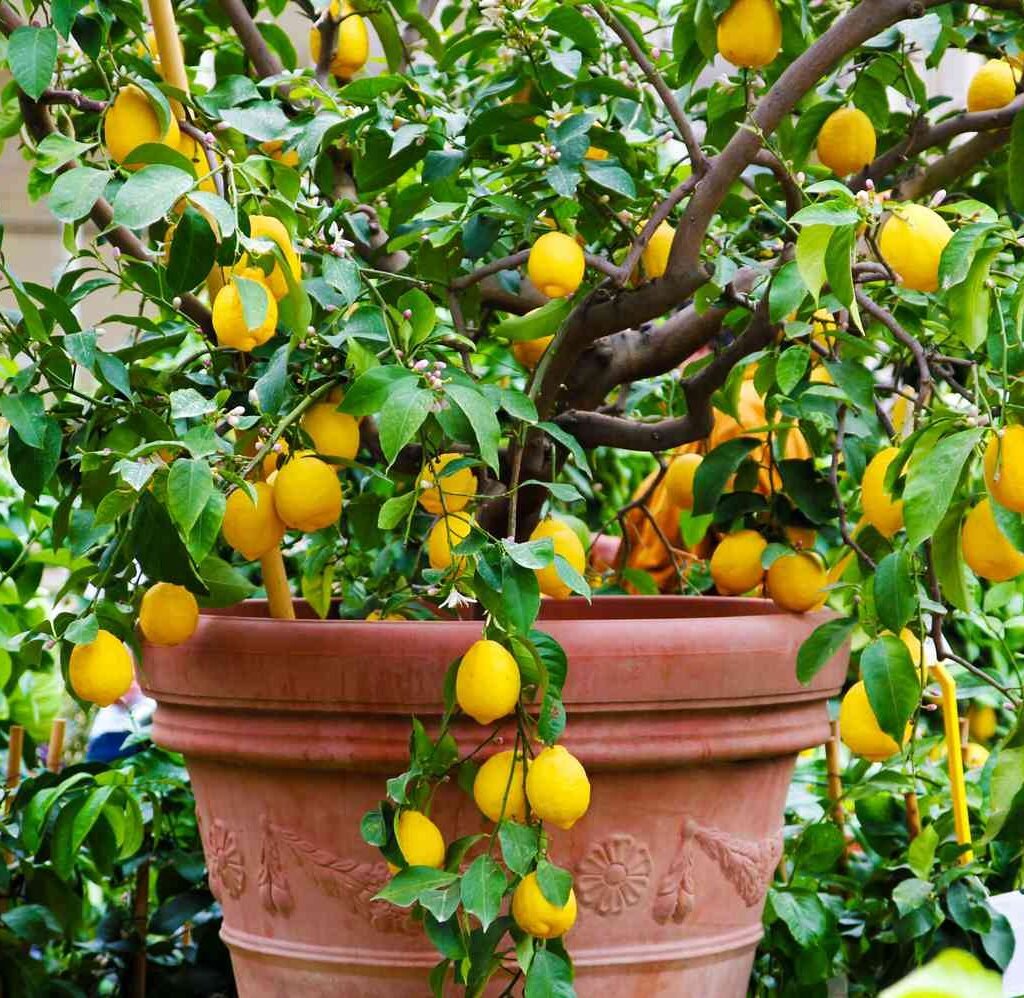
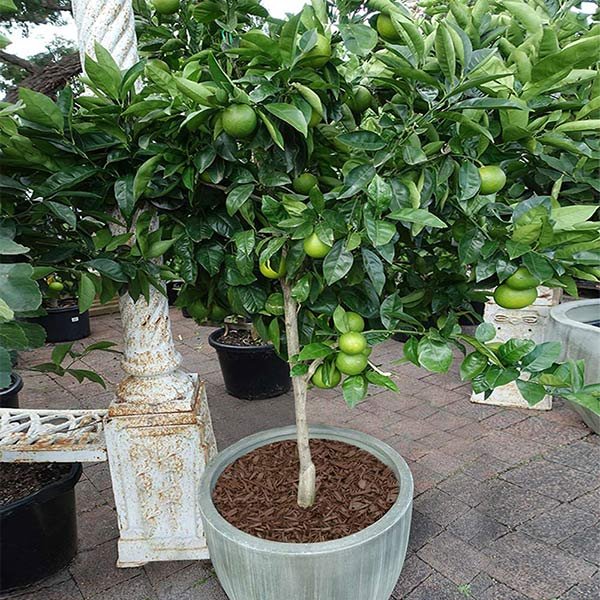
  • After hardening, transplant it into a large container (18–24 inches wide) or directly into the garden.

11. Common Problems and Solutions

Here are some quick tips to overcome common challenges when propagating and growing lime and lemon trees:

  • Leaves Dropping: Often caused by sudden temperature changes or underwatering. Maintain stable conditions.
  • Fungal Growth: Too much humidity or poor ventilation can lead to mold—air out your propagation cover daily.
  • Slow Rooting: Try using rooting hormone and ensure warmth around the base of the cuttings.

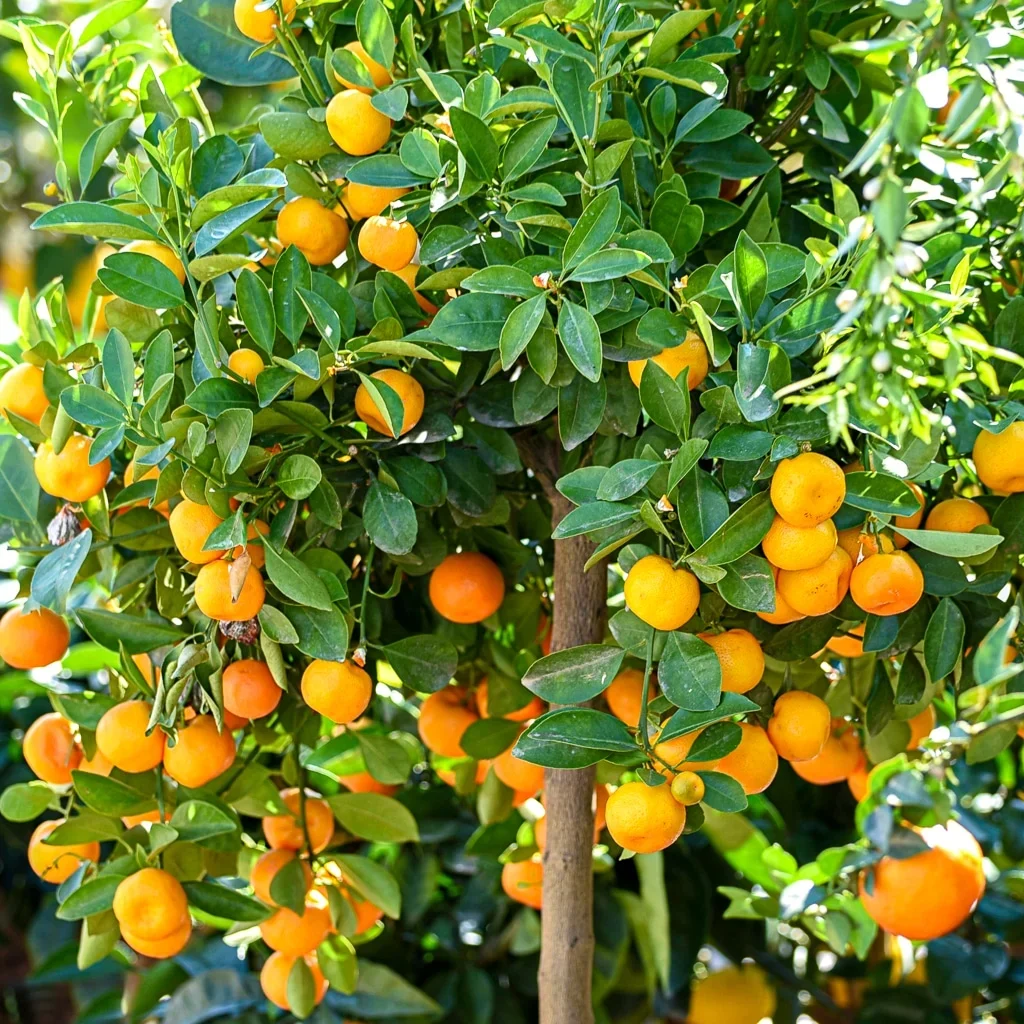
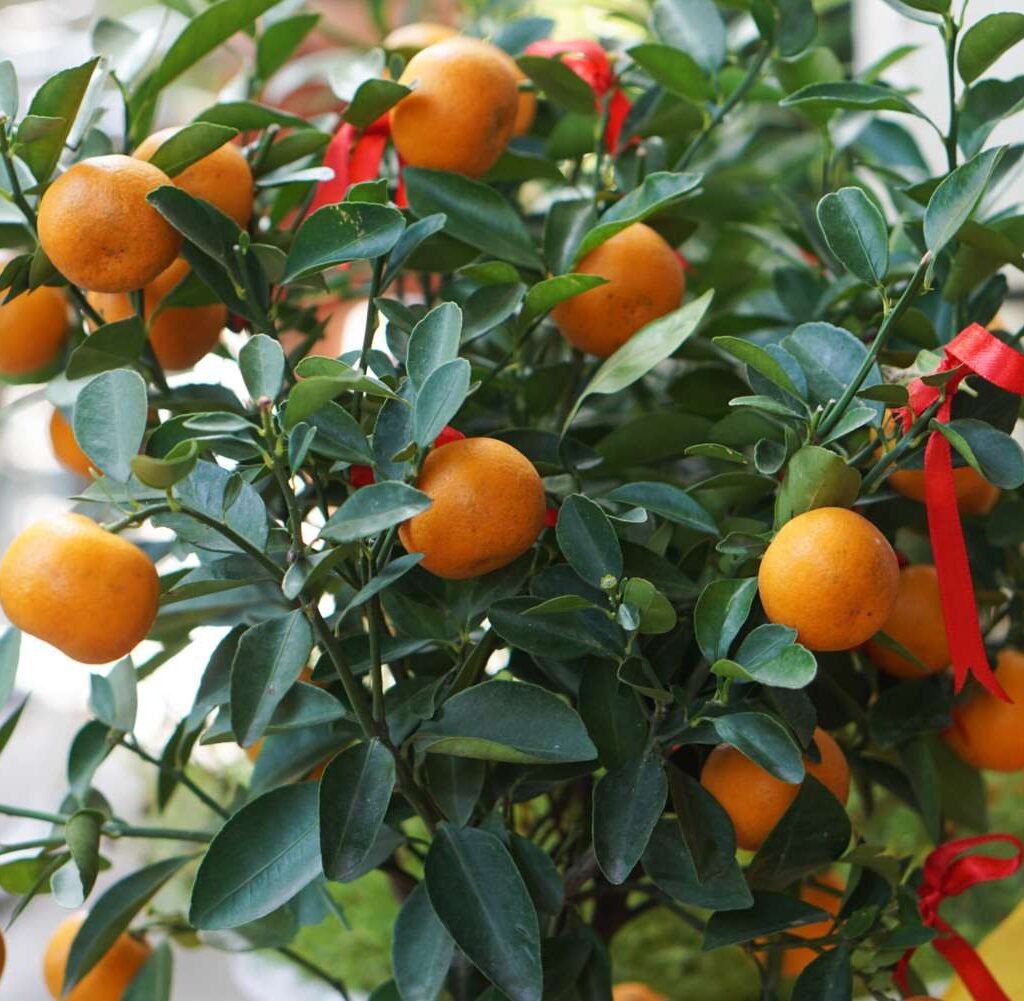
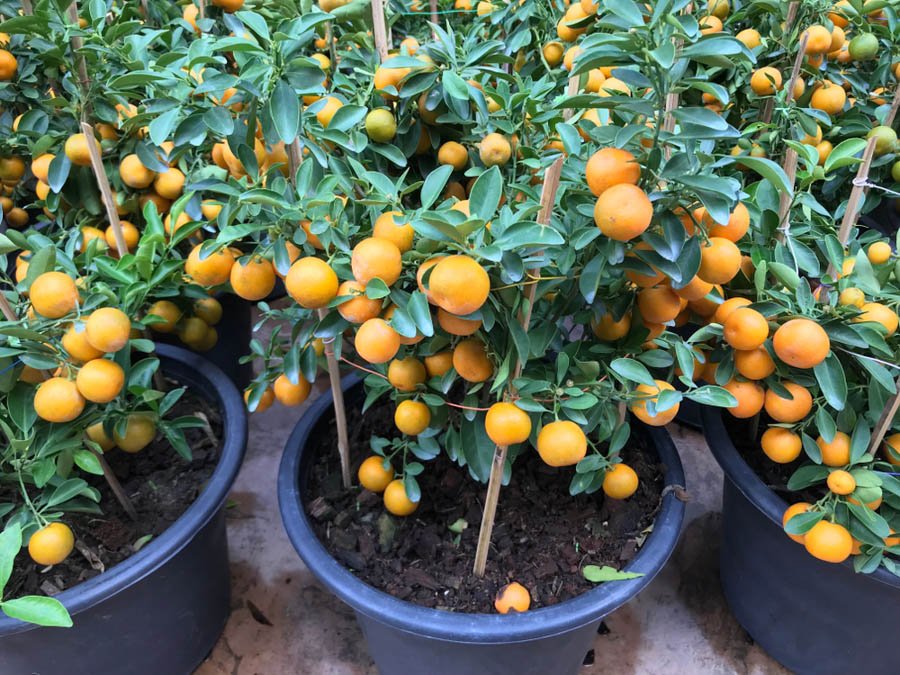
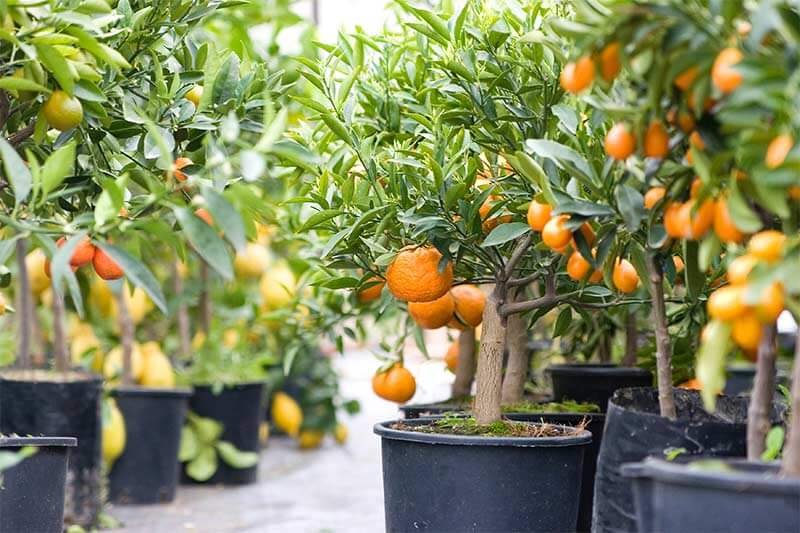
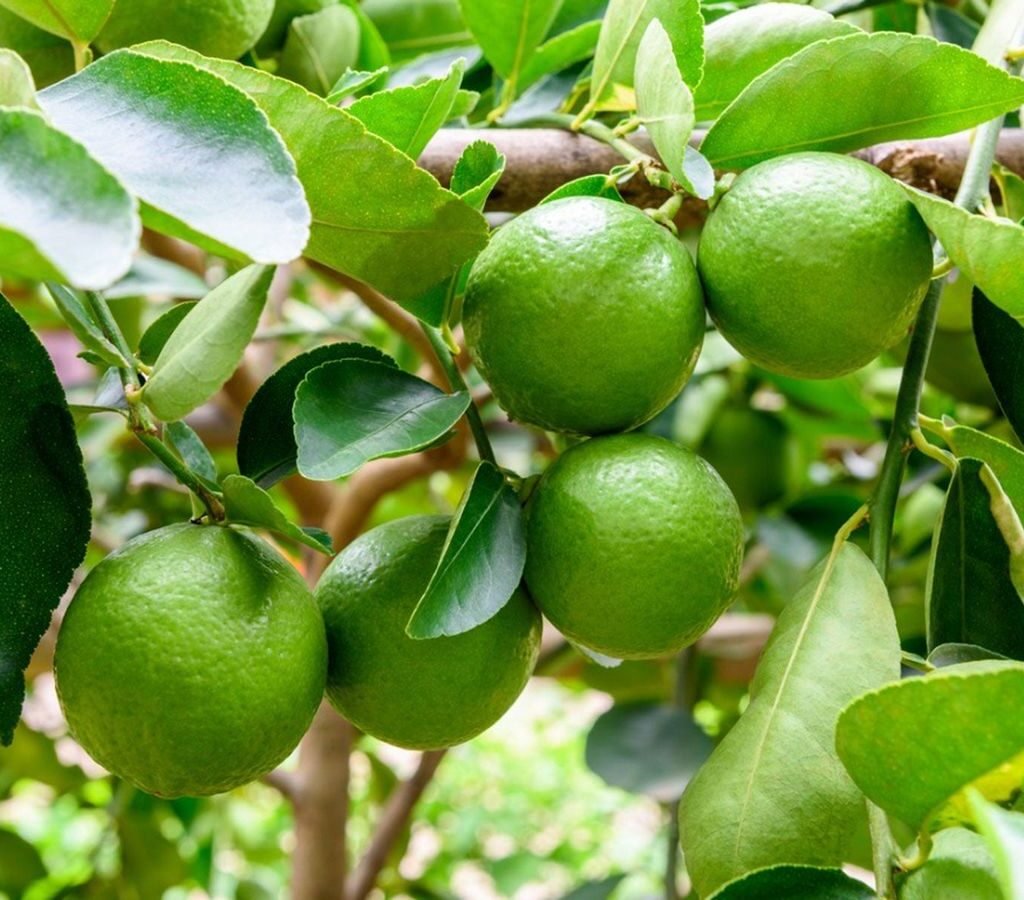
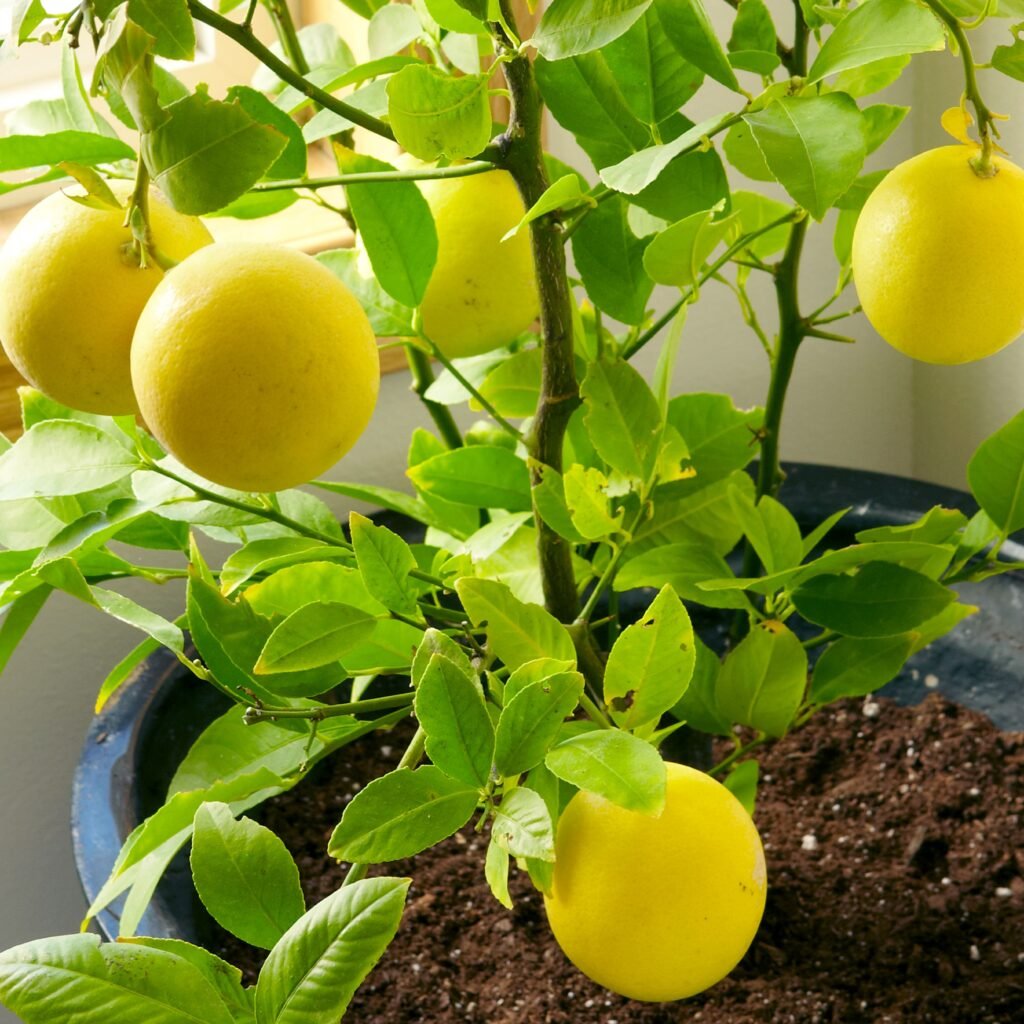
12. When to Expect Flowers and Fruit

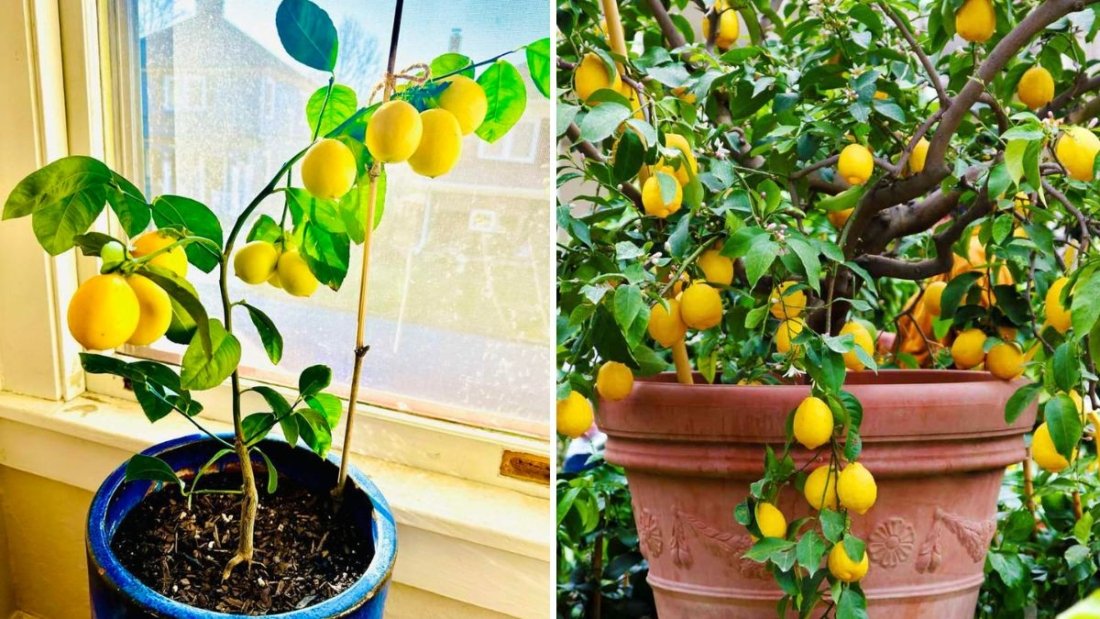
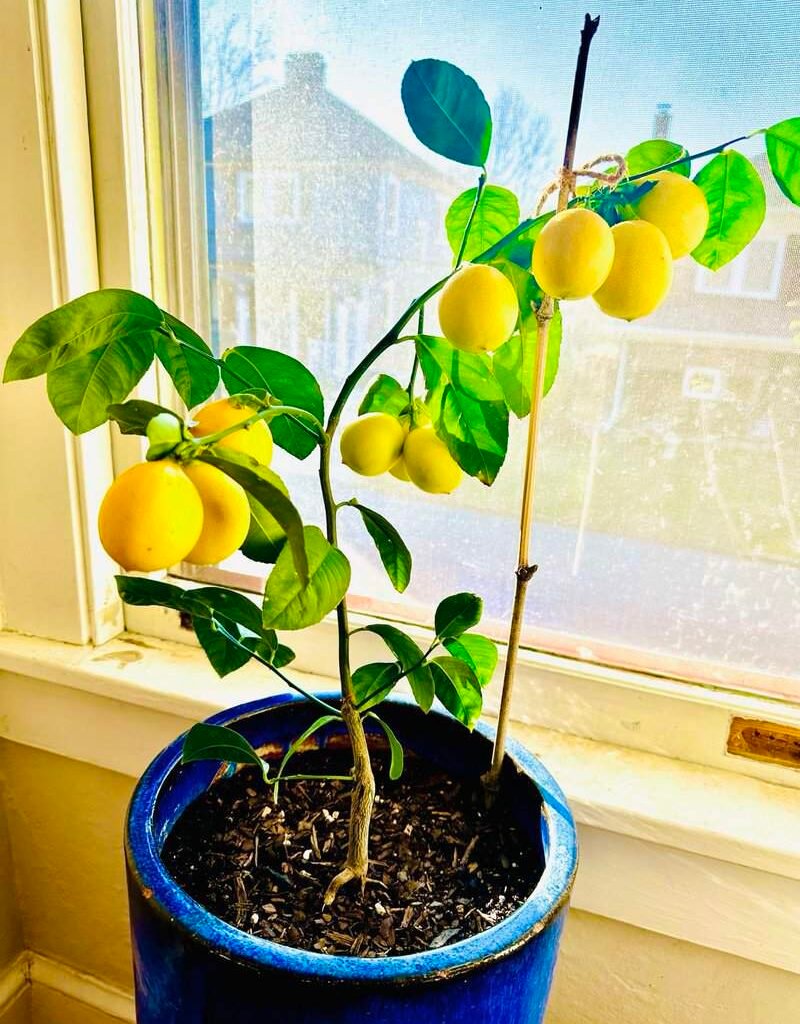
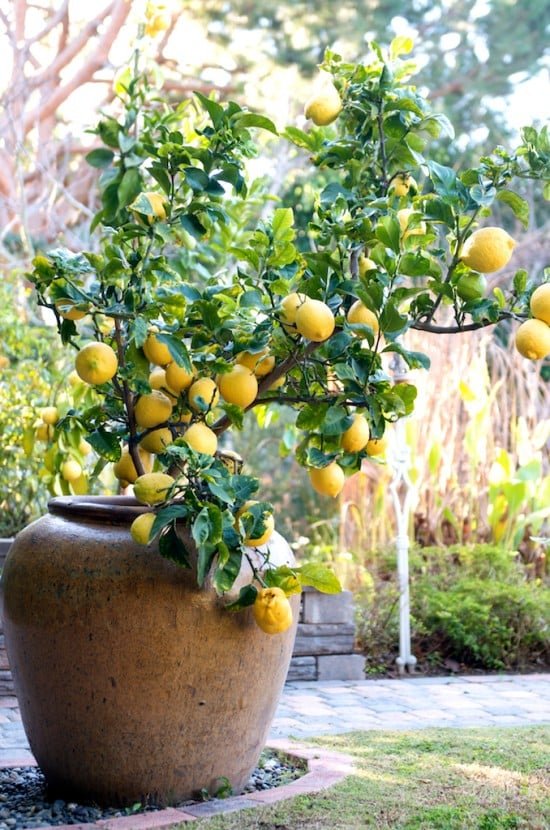
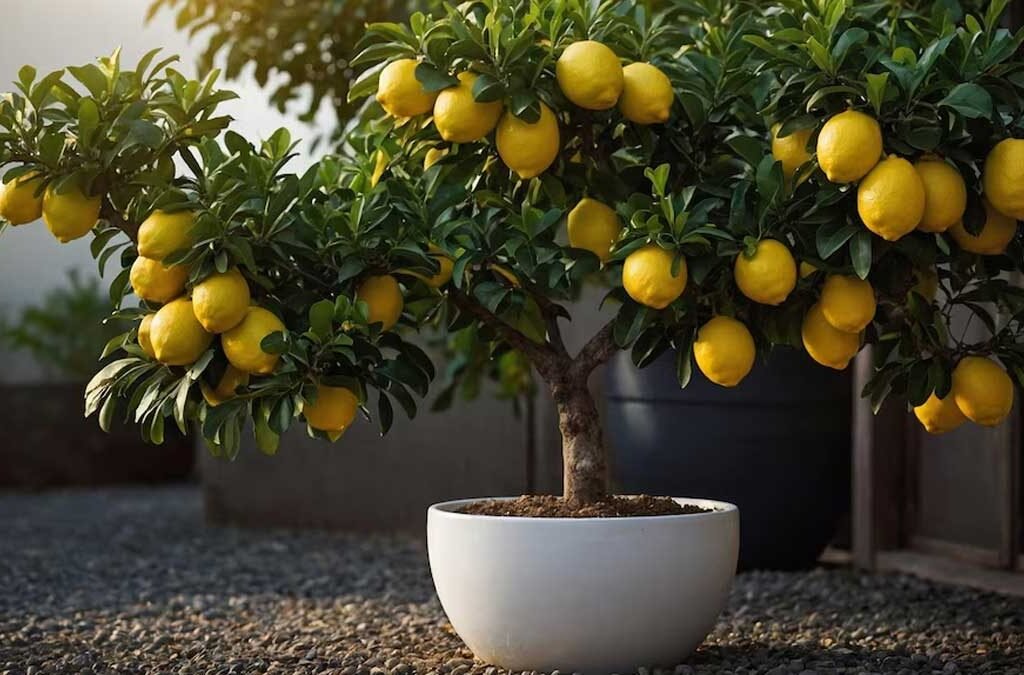
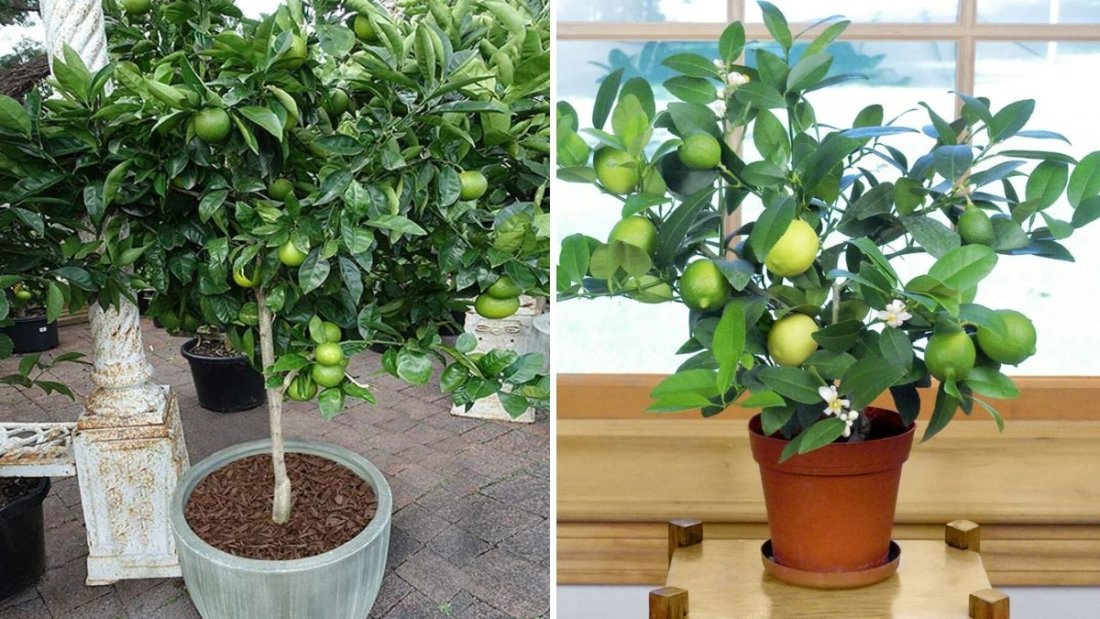
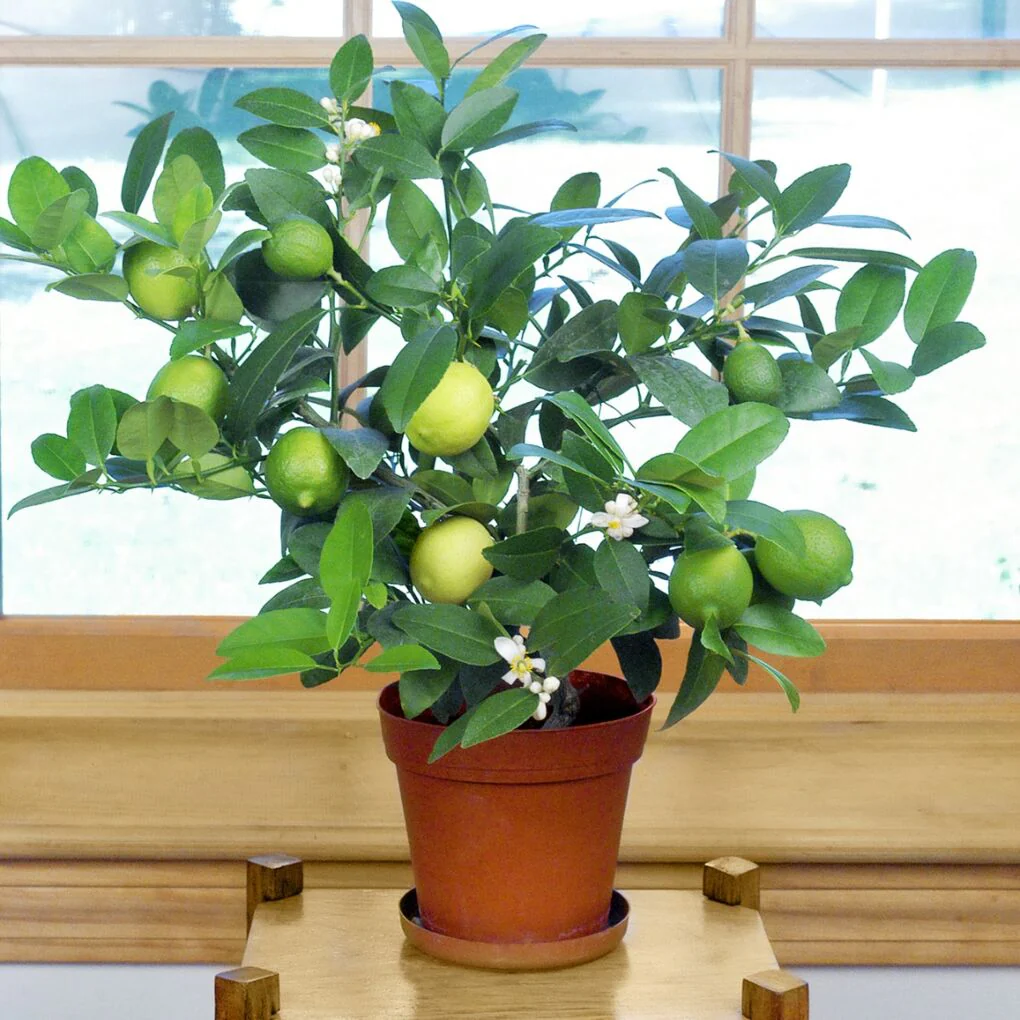
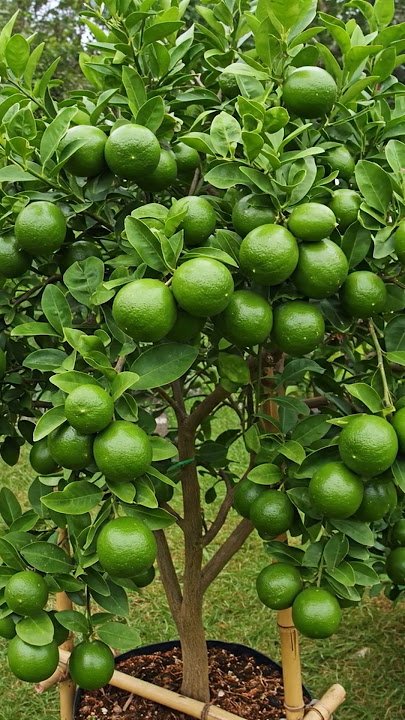
With good care, your lime or lemon tree grown from cuttings can start flowering and fruiting within 2–3 years.

You’ll notice small, white, fragrant blossoms—these will eventually become the bright green or yellow fruits you’ve been waiting for. Once your tree starts fruiting, regular pruning, fertilizing, and watering will keep it productive for many years.


13. Overwintering and Indoor Care

If you live in a cooler climate, bring your lime or lemon plant indoors when temperatures drop below 10°C (50°F).

  • Place it near a south-facing window for maximum sunlight.
  • Water less frequently but ensure the roots never dry out completely.
  • Mist the leaves occasionally or use a humidifier to maintain healthy humidity levels.

This ensures your tree remains vibrant and ready to flourish again once spring arrives.


Final Thoughts

Growing lime and lemon trees from cuttings is one of the easiest and most satisfying ways to expand your home citrus garden. With just a few simple steps—selecting healthy stems, providing the right conditions, and giving them consistent care—you can enjoy lush, fruit-bearing trees right from your patio or balcony.

Not only does this method save time and money, but it also gives you control over the quality and health of your plants. Whether you want to fill your home with the scent of citrus blossoms or enjoy fresh, homegrown limes and lemons in your drinks and dishes, this simple propagation technique is the way to go.

How to Grow Meyer Lemons in Containers: A Complete Step-by-Step Guide for Home Gardeners

How to Grow Meyer Lemons in Containers: A Complete Step-by-Step Guide for Home Gardeners

Growing Meyer lemons in containers is one of the most rewarding gardening experiences you can have. These small, fragrant citrus trees not only produce deliciously sweet and tangy fruits but also fill your home or balcony with a refreshing lemony scent. Whether you have limited space or just want the joy of picking fresh lemons right from your patio, this guide will show you exactly how to grow Meyer lemons in containers successfully—from choosing the right pot to harvesting juicy fruits.


Why Choose Meyer Lemons?

Meyer lemons are a hybrid between a traditional lemon and a sweet orange, which gives them their signature flavor—a perfect balance of tart and sweet. They’re less acidic than regular lemons, have thin, smooth skin, and are perfect for cooking, baking, or making lemonade.

Another major advantage? Meyer lemons grow exceptionally well in containers, making them ideal for urban gardeners and those living in colder regions. You can easily move the pot indoors during winter and back outside once the temperatures rise.


1. Choosing the Right Container

The first and most important step in growing Meyer lemons successfully is choosing the right pot.

  • Size: Start with a pot that’s at least 18–24 inches deep and wide. As the tree matures, you can move it to a larger pot (up to 30 gallons). The bigger the container, the better the root growth and fruit production.
  • Material: Choose a clay, ceramic, or high-quality plastic pot. Ensure it has multiple drainage holes to prevent waterlogging, which can cause root rot.
  • Drainage: Place a layer of small stones or broken terracotta at the bottom to help excess water escape easily.

2. Selecting the Right Soil Mix

Meyer lemon trees love well-draining, nutrient-rich soil. Regular garden soil is too heavy and can hold too much moisture.

  • Use a high-quality potting mix formulated for citrus or other fruiting trees.
  • Mix in perlite or coarse sand for better aeration.
  • You can also add compost or well-rotted manure to enrich the soil and provide essential nutrients.
  • Keep the soil slightly acidic, with a pH between 5.5 and 6.5.

3. Choosing a Healthy Meyer Lemon Tree or Growing from Seed

You can either buy a young grafted Meyer lemon plant from a nursery or grow it from seed.

  • Grafted plants are highly recommended because they produce fruit within 1–2 years and are more disease-resistant.
  • Seed-grown trees, while fun to grow, can take 5–7 years or more to produce fruit and may not have the same quality as the parent plant.

If you decide to grow from seed:

  1. Extract seeds from a ripe Meyer lemon.
  2. Wash off the pulp and let them dry for a few hours.
  3. Plant seeds about ½ inch deep in a small container filled with moist potting mix.
  4. Cover with plastic wrap to create a greenhouse effect and keep the soil warm.
  5. Germination usually takes 2–3 weeks.

4. Planting Your Meyer Lemon Tree

Once you have your young plant ready:

  1. Fill the container halfway with potting mix.
  2. Place the tree in the center, ensuring the root ball sits a few inches below the rim of the pot.
  3. Fill around the roots with more soil, firming it gently.
  4. Water thoroughly to settle the soil around the roots.

Make sure the graft union (the bump on the lower trunk) stays above the soil line to prevent rot.


5. Watering and Moisture Management

Meyer lemon trees need consistent moisture but hate soggy soil.

  • Water deeply when the top 2 inches of soil feel dry to the touch.
  • In summer, this might mean watering 2–3 times a week; in winter, reduce to once every 10–14 days.
  • Use lukewarm water and ensure the pot drains completely.
  • Misting the leaves occasionally helps maintain humidity, especially in dry climates or indoors.

6. Providing Adequate Sunlight

Meyer lemons are sun-lovers! They need at least 6–8 hours of direct sunlight daily to thrive.

  • If growing indoors, place the pot near a south-facing window.
  • Use grow lights if natural sunlight is insufficient, especially in winter months.
  • Rotate the pot every few weeks so that all sides of the plant receive equal light exposure.

7. Fertilizing for Healthy Growth

Feeding your lemon tree regularly is crucial for strong growth and abundant fruiting.

  • Use a slow-release citrus fertilizer or a liquid fertilizer high in nitrogen and micronutrients like magnesium, zinc, and iron.
  • Fertilize every 4–6 weeks during the growing season (spring to summer).
  • Stop feeding in winter when the plant’s growth slows down.

If you notice yellowing leaves, it could indicate a nitrogen deficiency—a clear sign your tree needs a feeding boost.


8. Pruning and Maintenance

Pruning helps shape your tree, encourage new growth, and improve airflow.

  • When to prune: Late winter or early spring before new growth starts.
  • How to prune:
    • Remove any dead or diseased branches.
    • Cut off any suckers growing below the graft union.
    • Trim lightly to maintain a balanced shape.

Regular pruning also encourages better fruit production and makes your container tree look neat and healthy.


9. Pollination Tips

Meyer lemons are self-pollinating, meaning one tree can produce fruit on its own. However, pollination rates increase if bees or pollinators visit the flowers.

If you’re growing your tree indoors, you can hand-pollinate by gently brushing a cotton swab or small paintbrush inside each flower to transfer pollen. This simple trick can greatly increase your fruit yield!


10. Protecting Your Tree from Pests and Diseases

Common pests include aphids, spider mites, and scale insects. To manage them naturally:

  • Spray the leaves with a mixture of neem oil and water.
  • Keep the plant clean by wiping dust off the leaves.
  • Avoid overwatering, as it encourages fungal infections like root rot.

If you notice sticky leaves, curling foliage, or white webbing, inspect closely and take action early.


11. Winter Care and Temperature Management

Meyer lemon trees prefer temperatures between 15°C to 30°C (60°F to 85°F).

  • If you live in a cold region, bring your container indoors before the first frost.
  • Keep it in a bright, warm location away from cold drafts.
  • Reduce watering but maintain moderate humidity by placing a humidifier or tray of water near the plant.

During winter dormancy, your tree may shed some leaves, which is normal. They’ll regrow once spring arrives.


12. Harvesting Your Meyer Lemons

Meyer lemons typically take 6–9 months to mature after flowering.

  • The fruits are ready to harvest when they turn deep yellow with a slight orange tint and feel slightly soft to the touch.
  • Use scissors or pruning shears to cut the fruit from the branch rather than pulling it off.

Harvesting regularly encourages new blooms and keeps your plant productive throughout the year.


13. Common Problems and Quick Fixes

  • Yellow Leaves: Usually caused by nutrient deficiency or overwatering.
  • No Flowers or Fruits: Insufficient sunlight or lack of fertilizer.
  • Leaf Drop: Sudden temperature changes or dry indoor air.

Address these issues early, and your Meyer lemon tree will bounce back beautifully.


Final Thoughts

Growing Meyer lemons in containers is a fantastic way to bring the taste and scent of citrus right to your home, even if you don’t have a garden. With proper care, your tree will reward you with fragrant flowers and juicy lemons year after year.

Whether you’re placing it on a sunny balcony or near a kitchen window, a Meyer lemon tree is a perfect combination of beauty, fragrance, and productivity—making it one of the best fruit trees you can grow in pots.

How to Grow Oranges in Containers at Home: A Complete Step-by-Step Guide for Beginners

How to Grow Oranges in Containers at Home: A Complete Step-by-Step Guide for Beginners

Fresh, juicy oranges don’t just belong to large orchards — you can grow them right on your balcony, terrace, or patio! With a bit of care and the right setup, orange trees thrive beautifully in containers, rewarding you with fragrant blossoms and delicious fruit.

If you’ve ever dreamed of plucking homegrown oranges straight from your own potted tree, this detailed guide is for you. In this post, you’ll learn how to grow oranges in containers at home — from choosing the best variety to proper watering, feeding, and harvesting techniques.


1. Why Grow Oranges in Containers?

Container gardening is a great way to enjoy citrus trees, even if you have limited space. Orange trees adapt very well to pots, making them ideal for urban gardeners or apartment dwellers.

Benefits of Growing Oranges in Containers:

  • Perfect for balconies, terraces, patios, or small gardens.
  • Easy to move indoors during cold or rainy seasons.
  • Allows you to control soil quality, water, and sunlight.
  • Adds fragrance and tropical charm to your space.
  • With proper care, you can enjoy fresh, organic oranges from your own home.

2. Choosing the Right Orange Variety for Containers

Not all orange trees are suitable for pots — some can grow quite large. The key is to select dwarf or semi-dwarf orange varieties, which stay compact but still produce full-sized, flavorful fruits.

Best Orange Varieties for Containers:

  • Calamondin (Citrus mitis): A small, ornamental variety that produces tart, mini-sized oranges.
  • Dwarf Valencia: Produces sweet, juicy oranges perfect for juicing.
  • Trovita Orange: Tolerates cooler climates and thrives in containers.
  • Dwarf Washington Navel: A popular choice for its sweet flavor and easy maintenance.
  • Kinnow or Mandarin varieties: Compact and easy to grow in pots.

Tip: Choose self-pollinating varieties if you’re growing just one tree. Otherwise, plant two different citrus varieties nearby for better pollination and yield.


3. Selecting the Perfect Container

Your orange tree’s health depends heavily on the size and type of container you use. The roots need ample room to grow and spread.

Ideal Pot Size:

  • Minimum 18–24 inches deep and 20–24 inches wide.
  • Use a container that can hold at least 40–60 liters of soil.

Container Materials:

  • Plastic or fiberglass pots: Lightweight, durable, and easy to move.
  • Terracotta or clay pots: Breathable and stable but heavier.
  • Wooden barrels: Offer good insulation for roots.

Ensure the pot has drainage holes at the bottom. Orange trees dislike soggy roots, so good drainage is essential to prevent rot.


4. Best Soil Mix for Potted Orange Trees

Orange trees need well-draining, slightly acidic, nutrient-rich soil. A high-quality potting mix will ensure good aeration and moisture retention.

Recommended Soil Mix:

  • 1 part garden loam or topsoil
  • 1 part compost or well-rotted manure
  • 1 part sand or perlite for drainage
  • Optional: Add a handful of bone meal or citrus fertilizer before planting

Soil pH: Between 5.5 and 7.0 is ideal. Avoid heavy clay soil or pure sand — oranges prefer a balanced mix that drains well but retains nutrients.


5. How to Plant Orange Trees in Containers

Planting your orange tree correctly is crucial for healthy growth. Follow these simple steps:

Step 1: Fill your container halfway with the prepared soil mix.
Step 2: Remove the orange sapling or grafted plant from its nursery pot carefully, keeping the root ball intact.
Step 3: Place the plant in the center of the pot, ensuring the graft union (the swollen part above the roots) stays above the soil line.
Step 4: Fill in the remaining soil, pressing gently to remove air pockets.
Step 5: Water thoroughly to settle the soil and roots.

Pro Tip: Add a layer of organic mulch (dry leaves, straw, or bark chips) on top to help retain soil moisture.


6. Sunlight and Temperature Requirements

Orange trees love sunlight — it’s the key to sweet, juicy fruits and strong growth.

Sunlight:

  • Provide 6–8 hours of direct sunlight daily.
  • If growing indoors, place near a south-facing window or use a grow light.

Temperature:

  • Ideal range: 20°C–32°C (68°F–90°F).
  • Protect from frost; oranges are sensitive to cold.
  • Move the pot indoors or cover it during chilly winters.

If your area experiences frequent cold snaps, consider using a portable greenhouse or fleece wraps to protect your plant.


7. Watering Your Orange Tree

Citrus trees enjoy consistent moisture but hate standing water. Finding the right balance is key.

Watering Tips:

  • Water deeply whenever the top 2 inches of soil feel dry.
  • Reduce watering during winter when the plant’s growth slows.
  • Avoid frequent shallow watering; this encourages weak roots.
  • Ensure your container drains well after each watering.

To improve humidity, you can mist the leaves occasionally or place a water tray nearby — especially in dry indoor environments.


8. Fertilizing Your Orange Tree

Oranges are heavy feeders and require regular fertilization to stay healthy and produce fruit.

Fertilizer Schedule:

  • Use a citrus-specific fertilizer every 4–6 weeks during the growing season (spring through summer).
  • Choose a balanced mix like NPK 10-10-10 or one rich in nitrogen and micronutrients (iron, magnesium, and zinc).
  • Stop fertilizing in late fall or winter to let the plant rest.

Organic Alternatives: Compost tea, seaweed extract, or banana peel fertilizer provide natural nutrients.

Tip: Yellowing leaves often signal a nutrient deficiency — increase feeding or add trace minerals.


9. Pruning and Shaping Your Orange Tree

Pruning keeps your tree compact, encourages fruiting, and improves airflow.

When to Prune:

  • Late winter or early spring before new growth begins.
  • Light pruning after fruit harvest.

How to Prune:

  • Remove dead, weak, or crossing branches.
  • Cut back long, leggy shoots to maintain a rounded shape.
  • Remove suckers (small shoots growing from the base) — they steal energy from the main plant.

Pruning also allows sunlight to reach all parts of the tree, promoting uniform fruit ripening.


10. Pollination and Flowering

Most container-grown oranges are self-pollinating, meaning you don’t need another tree for fruit production. However, natural pollination can be improved with insects or hand-pollination.

To Hand-Pollinate:

  • Use a small paintbrush or cotton swab.
  • Gently transfer pollen from one flower to another.
  • Do this during the blooming period (usually spring).

More pollination means more fruit — and that’s what every home gardener wants!


11. Pest and Disease Management

Container-grown orange trees are less prone to pests, but occasional problems can occur.

Common Pests:

  • Aphids: Cluster on new shoots; wash off or use neem oil.
  • Spider mites: Cause leaf curling; increase humidity and spray organic miticide.
  • Scale insects: Appear as brown bumps; wipe off with soapy water.

Common Diseases:

  • Root rot: Avoid overwatering.
  • Leaf spot or mold: Improve air circulation and avoid wetting leaves.

Regularly inspect leaves and stems, especially the undersides, to catch problems early.


12. Overwintering and Cold Care

If you live in a region with cold winters, your orange tree will need protection during dormancy.

Winter Care Tips:

  • Move the pot indoors when temperatures drop below 10°C (50°F).
  • Place it near a sunny window or under a grow light.
  • Water sparingly — just enough to keep the soil slightly moist.
  • Avoid fertilizing until spring.

In mild climates, simply cover the tree with fleece or plastic during frosty nights.


13. Flowering to Fruiting: What to Expect

Orange trees grown from grafted plants may start flowering within 1–2 years in containers. The flowers are small, white, and beautifully fragrant.

After pollination, small green fruits will appear, gradually turning orange over the next few months.

Tips for Better Fruit Production:

  • Ensure consistent sunlight and watering.
  • Feed regularly with potassium-rich fertilizer during fruiting.
  • Avoid moving the pot too often once flowers appear — it may cause fruit drop.

Patience is key; homegrown oranges usually take 8–12 months from flower to harvest.


14. Harvesting Oranges

Oranges don’t continue ripening after harvest, so timing is important.

How to Know When Oranges Are Ready:

  • The fruit has turned a rich orange color.
  • It feels firm yet slightly soft to touch.
  • The peel releases easily when twisted from the branch.

Taste one fruit before harvesting the rest — sweetness increases with time. Harvest carefully to avoid damaging the branches.


15. Repotting and Long-Term Care

Your orange tree will eventually outgrow its pot. Repot every 2–3 years to refresh the soil and encourage healthy growth.

Repotting Steps:

  1. Choose a pot one size larger than the current one.
  2. Remove the tree gently, trim damaged roots, and discard old soil.
  3. Refill with fresh potting mix and replant.
  4. Water thoroughly and keep in partial shade for a few days.

With proper care, a potted orange tree can live and fruit for 10–20 years!


Final Thoughts

Growing oranges in containers at home is simpler than it seems — all you need is sunshine, patience, and consistent care. From the sweet aroma of blossoms to the joy of harvesting fresh fruit, every step is incredibly rewarding.

Whether you live in a city apartment or a cozy home with limited space, container orange gardening brings a piece of the tropics right to your doorstep. Start small, choose the right variety, and follow these tips — soon, you’ll be enjoying homegrown oranges bursting with flavor and freshness!

How to Grow Banana Trees in Pots Easily: A Complete Guide for Beginners

How to Grow Banana Trees in Pots Easily: A Complete Guide for Beginners

Growing a banana tree in a pot might sound exotic or difficult, but it’s actually quite simple — and incredibly rewarding. With the right care, sunlight, and watering routine, you can enjoy lush tropical foliage and even delicious homegrown bananas right on your balcony, terrace, or backyard patio.

In this comprehensive guide, we’ll cover everything you need to know about how to grow banana trees in pots easily — from choosing the best variety and preparing the soil to caring for your plant year-round. Whether you’re a beginner gardener or simply want to add a tropical touch to your home, this step-by-step guide is for you.


1. Why Grow Bananas in Pots?

Banana trees are tropical plants that love warmth, sunlight, and humidity — but they can thrive beautifully in containers too. Growing them in pots gives you flexibility and control over soil, space, and weather exposure.

Benefits of Growing Banana Trees in Pots:

  • Perfect for small gardens, balconies, or terraces.
  • Easy to move indoors during cold or rainy seasons.
  • Helps control growth size and manage root spread.
  • Provides a decorative tropical touch to any space.
  • With the right care, they can even bear fruit in containers!

2. Choosing the Right Banana Variety for Pots

Not all banana plants are suited for container growing. Some varieties grow over 10 feet tall, which makes them difficult to manage in pots. The best choice for container gardening is a dwarf or compact banana variety that stays small but still produces beautiful foliage and fruit.

Best Banana Varieties for Containers:

  • Dwarf Cavendish: Compact, hardy, and produces full-sized sweet bananas.
  • Dwarf Rajapuri: Strong, wind-tolerant, and fruit-bearing.
  • Dwarf Red Banana: Striking red-purple fruit and ornamental leaves.
  • Dwarf Lady Finger (Sucrier): Sweet, small fruits with delicious flavor.
  • Truly Tiny Banana: Perfect for indoor or balcony growing; reaches only 3 feet tall.

Tip: If you live in a cooler region, go for cold-tolerant varieties like ‘Dwarf Orinoco’ or ‘Super Dwarf Cavendish’.


3. Selecting the Right Container

Banana trees have large, fast-growing root systems that need space to expand. The right pot ensures healthy root development and prevents stunted growth.

Ideal Pot Size:

  • Minimum 20–24 inches deep and 20–25 inches wide.
  • Use a container that can hold at least 50–60 liters of soil.

Container Material Options:

  • Plastic or fiberglass pots: Lightweight and easy to move around.
  • Terracotta pots: Breathable but heavier; helps maintain root temperature.
  • Grow bags or barrels: Affordable and allow excellent drainage.

Make sure your pot has several drainage holes to avoid waterlogging, as bananas dislike soggy roots.


4. Preparing the Perfect Soil Mix

Banana trees are heavy feeders that love nutrient-rich, well-draining soil. The soil should hold moisture but never stay waterlogged.

Ideal Soil Mix for Banana Plants:

  • 1 part garden soil
  • 1 part compost or well-rotted manure
  • 1 part cocopeat or peat moss for moisture retention
  • A handful of sand or perlite for good aeration

You can also add a slow-release organic fertilizer or a handful of bone meal while preparing the soil for better root development.

pH Range: Bananas grow best in soil with a pH between 5.5 and 7.0.


5. Planting the Banana Tree in a Pot

Once your pot and soil mix are ready, it’s time to plant your banana.

Step-by-Step Planting Guide:

  1. Fill the pot halfway with your soil mix.
  2. Place the banana sucker (young plant) or tissue-cultured sapling in the center.
  3. Ensure the base of the stem is about 2 inches below the rim of the pot.
  4. Fill in the remaining soil and gently press it down to remove air pockets.
  5. Water the plant thoroughly after planting.

Tip: If you’re planting a banana sucker, remove any dried roots or leaves before planting to help it establish quickly.


6. Sunlight and Temperature Requirements

Banana trees thrive in warm, sunny conditions. For the best results:

  • Place your pot in a spot that gets at least 6–8 hours of direct sunlight daily.
  • Ideal temperature: 20–30°C (68–86°F).
  • Protect the plant from strong winds that can damage the large leaves.

If you live in a colder region, move your banana plant indoors or to a greenhouse during winter. Banana trees are tropical, and frost can easily kill them.


7. Watering the Banana Tree

Banana plants love moisture, but too much water can cause root rot. The goal is to keep the soil evenly moist — not soggy.

Watering Tips:

  • Water deeply 2–3 times per week during warm weather.
  • Reduce watering frequency in winter or during the dormant period.
  • Always check the top 2 inches of soil — if dry, it’s time to water.
  • Mist the leaves occasionally to increase humidity, especially indoors.

Adding mulch on top of the soil helps retain moisture and keeps roots cool.


8. Feeding and Fertilizing

Banana trees are heavy feeders that need a consistent nutrient supply to grow strong stems and lush foliage.

Fertilizer Schedule:

  • Use a balanced fertilizer (NPK 10-10-10) every 2–4 weeks during the growing season.
  • Add organic compost or manure every month to keep the soil fertile.
  • For fruiting plants, switch to a potassium-rich fertilizer (e.g., 8-10-12) to encourage flowering and fruit development.

Pro Tip: Sprinkle wood ash or banana peels (rich in potassium) around the base for a natural nutrient boost.


9. Pruning and Maintenance

Proper pruning helps your banana tree stay healthy and encourages fruit production.

How to Prune:

  • Remove dead or yellowing leaves regularly.
  • Once your main stem has produced fruit, cut it down to the base.
  • Allow only 1–2 healthy suckers (new shoots) to grow at a time to avoid overcrowding.

Mulching:
Add organic mulch (like straw, dried leaves, or coconut husk) around the plant base. This helps regulate temperature, retain moisture, and prevent weed growth.


10. Managing Pests and Diseases

Container-grown bananas are relatively pest-free, but it’s still wise to watch out for potential problems.

Common Pests:

  • Aphids and spider mites: Spray with neem oil or insecticidal soap.
  • Mealybugs: Wipe off using a soft cloth dipped in soapy water.
  • Banana weevils: Keep the soil clean and use organic pest deterrents.

Common Diseases:

  • Fungal root rot: Caused by overwatering; ensure good drainage.
  • Leaf spot: Remove infected leaves and use organic fungicide sprays.

Healthy soil and proper watering are the best defenses against most banana plant issues.


11. Flowering and Fruiting in Pots

A well-cared-for banana tree can start flowering within 9–15 months after planting. Once the flower (called the inflorescence) appears, small banana fruits begin forming.

Tips for Encouraging Fruit Production:

  • Provide at least 8 hours of sunlight daily.
  • Maintain consistent watering and feeding.
  • Keep the plant warm (above 20°C).
  • Avoid frequent repotting during fruiting season.

Once fruits appear, continue watering and feeding regularly until they mature. Depending on the variety, the fruits usually ripen within 3–6 months after flowering.


12. Overwintering and Cold Protection

If you live in an area with cold winters, your potted banana will need protection.

Winter Care Tips:

  • Move the pot indoors or to a greenhouse when temperatures drop below 10°C (50°F).
  • Cut back old leaves and reduce watering.
  • Keep the soil slightly moist, not dry or soggy.
  • In milder climates, wrap the pot with burlap or bubble wrap to protect roots.

With proper care, your banana plant will resume strong growth in spring.


13. Repotting and Long-Term Care

As your banana tree grows, it will eventually outgrow its pot. Repot every 2–3 years or when roots start circling inside the container.

Steps for Repotting:

  1. Choose a pot one size larger than the current one.
  2. Remove the plant carefully without damaging the roots.
  3. Trim away old or damaged roots.
  4. Refill with fresh soil mix and replant the banana.

This refreshes the soil and ensures your plant gets enough space and nutrients for continuous growth.


14. Harvesting Bananas

Harvest time depends on the variety, climate, and care. Typically, bananas are ready to harvest 3–6 months after flowering.

How to Know When Bananas Are Ready:

  • The fruits turn plump and the angles start to round off.
  • The skin color lightens from deep green to pale yellow-green.
  • Harvest when the first few fruits begin to ripen.

Cut the entire bunch with a clean knife and hang it in a shaded area for the rest to ripen evenly.


Final Thoughts

Growing banana trees in pots is easier than you might think! With the right dwarf variety, a spacious container, and a little care, you can transform your balcony or garden into a tropical oasis. The lush green leaves, exotic appearance, and the satisfaction of harvesting your own bananas make the effort totally worthwhile.

Whether you grow them for fruit or simply for their beautiful foliage, potted banana plants bring a touch of the tropics to any home. Just remember to keep them warm, well-fed, and properly watered — and they’ll reward you with vibrant growth and possibly even bunches of sweet, homegrown bananas!

How to Grow Apples in Containers: A Complete Step-by-Step Guide for Home Gardeners

How to Grow Apples in Containers: A Complete Step-by-Step Guide for Home Gardeners

Growing apples in containers may sound challenging, but with the right approach, it’s not only possible — it’s incredibly rewarding! Whether you live in an apartment with a sunny balcony or have limited garden space, container-grown apple trees can bring you beautiful blossoms, lush foliage, and even delicious fruits right at home.

In this detailed guide, we’ll walk you through everything you need to know about how to grow apples in containers — from choosing the right variety and container to pruning, feeding, and harvesting. Let’s get started!


1. Why Grow Apples in Containers?

Growing apples in pots is perfect for urban gardeners and small-space dwellers. Unlike traditional orchard growing, container apple trees offer flexibility — you can move them around for sunlight, protect them from frost, and even grow multiple varieties in limited space.

Here are a few benefits:

  • Space efficiency: Ideal for balconies, patios, and terraces.
  • Mobility: You can move the tree to sunnier or sheltered spots as needed.
  • Pest control: Easier to monitor and manage diseases or pests.
  • Decorative appeal: Apple trees add beauty with their blossoms and compact foliage.

2. Choosing the Right Apple Variety for Containers

Not every apple tree thrives in a pot. The key is selecting dwarf or semi-dwarf varieties, which stay compact and produce fruit efficiently. These are grafted onto rootstocks that control their growth and size.

Best Apple Varieties for Containers:

  • ‘Honeycrisp’ – Sweet, crisp, and perfect for eating fresh.
  • ‘Golden Delicious’ – Reliable and adaptable to container conditions.
  • ‘Fuji’ – Compact and highly productive in pots.
  • ‘Gala’ – Early bearing and easy to grow.
  • ‘Red Sentinel’ – A crabapple variety known for its ornamental and edible fruits.

Tip: Choose self-fertile varieties (like ‘Golden Delicious’ or ‘Egremont Russet’) if you have space for only one pot. Otherwise, plant two different varieties for better cross-pollination and higher yields.


3. Selecting the Right Container

Apples need ample space for their roots to spread, even when grown in pots. Choosing the right size and material ensures healthy root growth and prevents waterlogging.

Ideal Container Size:

  • Minimum 18–24 inches deep and 20–25 inches wide.
  • Use a pot that holds at least 40–50 liters of soil.

Container Material:

  • Plastic or fiberglass: Lightweight and easy to move.
  • Terracotta: Breathable but heavier; great for stable outdoor positioning.
  • Wooden barrels or half wine casks: Provide insulation and rustic charm.

Make sure the container has adequate drainage holes at the bottom — apples don’t like “wet feet.”


4. Best Soil Mix for Potted Apples

Apples prefer well-draining, nutrient-rich soil with a slightly acidic to neutral pH (around 6.0–7.0).

Recommended Potting Mix:

  • 1 part garden loam
  • 1 part compost or well-rotted manure
  • 1 part perlite or coarse sand for aeration

You can also buy a premium fruit tree potting mix from garden centers for convenience. Before planting, place a layer of small stones or broken pot pieces at the bottom for better drainage.


5. How to Plant an Apple Tree in a Container

Follow these steps to ensure your tree starts off strong:

Step 1: Fill your container halfway with the potting mix.
Step 2: Gently remove the apple sapling from its nursery pot, taking care not to disturb the roots.
Step 3: Place the tree in the center of the container — make sure the graft union (the swollen area on the trunk) sits above the soil line.
Step 4: Fill in the remaining soil, lightly pressing around the base to eliminate air pockets.
Step 5: Water thoroughly to settle the soil.

Pro Tip: Mulch the top with straw, wood chips, or compost to retain moisture and regulate temperature.


6. Watering and Feeding Your Potted Apple Tree

Watering:
Container apple trees dry out faster than those in the ground. Keep the soil consistently moist but never waterlogged.

  • Water deeply whenever the top 2 inches of soil feel dry.
  • Reduce watering slightly in winter when growth slows down.

Feeding:
Apples are heavy feeders, especially in pots where nutrients deplete faster.

  • Use a balanced fruit tree fertilizer (10-10-10) every 4–6 weeks during the growing season (spring to early summer).
  • Alternatively, apply slow-release organic fertilizer in spring and top-dress with compost mid-season.
  • Stop feeding after midsummer to allow the tree to harden off for winter.

7. Pruning and Training Your Apple Tree

Pruning keeps your tree healthy, compact, and productive.

When to Prune:

  • Late winter or early spring before new growth begins.
  • Light pruning in summer to shape the canopy and remove unwanted shoots.

How to Prune:

  1. Remove dead, diseased, or crossing branches.
  2. Maintain an open center to let light and air reach inner branches.
  3. Keep the height manageable — around 4–6 feet for container trees.

Training Tips:
Use stakes or trellises to support young branches. You can also train your apple as an espalier (flat against a wall or fence) to save even more space and enhance fruiting.


8. Pollination Tips for Better Fruit Set

Most apple trees need cross-pollination to set fruit, which means pollen from another variety helps them produce apples.

If you’re growing just one tree, choose self-pollinating varieties. But if space allows, grow two different apple varieties that bloom around the same time.

You can also attract pollinators like bees by planting lavender, marigolds, or borage near your container.


9. Pest and Disease Management

Container apples can still face common pests and diseases, so regular inspection is key.

Common Problems:

  • Aphids: Small sap-sucking insects; wash them off with water or neem oil spray.
  • Codling moths: Use pheromone traps or organic insecticidal soap.
  • Powdery mildew: Prune affected areas and spray with sulfur-based fungicide.
  • Apple scab: Prevent by ensuring good air circulation and removing fallen leaves.

Keep your tree clean by removing debris, fallen fruits, and dead leaves around the base.


10. Winter Care for Potted Apple Trees

In colder climates, container roots are more exposed to freezing temperatures. To protect your apple tree:

  • Move the pot to a sheltered spot or unheated garage during extreme cold.
  • Wrap the container with burlap, bubble wrap, or straw insulation.
  • Avoid overwatering — soil should stay slightly moist but not soggy.

In mild climates, simply mulch heavily and cover the soil surface to protect the roots.


11. Harvesting Apples from Containers

Depending on the variety, apples are usually ready for harvest between late summer and early fall.

Signs your apples are ready:

  • Skin color deepens and looks vibrant.
  • Apples come off the branch easily when lifted and twisted.
  • Seeds inside are brown and firm.

Harvest gently to avoid bruising. You can enjoy them fresh, or store them in a cool, dry place for several weeks.


12. Repotting and Long-Term Care

Every 2–3 years, repot your apple tree into fresh soil to replenish nutrients and encourage new root growth.

  • Gently prune off a few outer roots before repotting.
  • Trim back top growth to balance the root system.
  • Use new, nutrient-rich potting mix for the best results.

With proper care, container apple trees can live and produce fruit for 10–15 years or even longer.


Final Thoughts

Growing apples in containers brings the joy of fruit gardening within everyone’s reach — no matter your space or experience level. With the right dwarf variety, quality soil, regular feeding, and a little patience, you can enjoy crisp, homegrown apples right from your patio or balcony.

Start small, observe how your tree responds, and you’ll soon master the rhythm of container apple growing. Each season, as you watch those blossoms turn into sweet fruits, you’ll realize just how rewarding this little green adventure can be.

How to Grow and Care for Edamame Plants: From Nursery to Harvest (Complete Step-by-Step Guide)

How to Grow and Care for Edamame Plants: From Nursery to Harvest (Complete Step-by-Step Guide)

Edamame — also known as young soybeans — are not only delicious and nutritious but also surprisingly easy to grow in your home garden or containers. Whether you’re a beginner gardener or a seasoned grower, understanding how to nurture edamame plants from nursery to harvest will reward you with a plentiful, protein-packed crop.

In this complete guide (inspired by “How to Grow and Care for Edamame Nursery Plant Part 4: Harvest”), we’ll take you through every stage of the process — from caring for young nursery plants to harvesting mature pods bursting with flavor.


1. What is Edamame and Why Grow It?

Edamame (Glycine max) is the immature form of soybeans, harvested before the pods fully harden. These bright green pods are rich in protein, fiber, and antioxidants, making them a favorite among health-conscious gardeners.

Benefits of growing edamame:

  • High in plant-based protein.
  • Improves soil fertility by fixing nitrogen.
  • Grows easily in containers or garden beds.
  • Yields nutritious, fresh produce within 2–3 months.

If you enjoy snacking on steamed edamame or adding it to stir-fries and salads, growing your own ensures fresher, tastier results with zero chemicals.


2. Understanding the Edamame Growth Cycle

To grow edamame successfully, it’s important to know its growth stages:

  1. Germination: Seeds sprout within 5–7 days after planting.
  2. Seedling stage: True leaves emerge, forming a small nursery plant.
  3. Vegetative growth: The plant grows taller, forming lush green foliage.
  4. Flowering: Small purple or white blooms appear.
  5. Pod formation: Pods develop and fill with tender beans.
  6. Harvest: Pods turn plump and slightly fuzzy, ready to pick and eat.

Each stage requires slightly different care, so let’s dive into how to manage each one effectively.


3. Preparing for Transplanting Nursery Plants

If you’ve started your edamame from seeds in small pots or trays, your next step is transplanting the nursery plants into containers or garden beds.

Best time to transplant:
When seedlings are about 4–6 inches tall and have at least two sets of true leaves.

Steps:

  1. Choose the right location: Edamame loves full sun — at least 6 hours daily.
  2. Prepare the soil: Use loose, well-draining soil enriched with compost.
  3. Spacing: Plant seedlings about 12 inches apart in rows spaced 18 inches apart.
  4. Transplant gently: Avoid disturbing the roots. Place each seedling at the same depth it was growing in the nursery tray.
  5. Water thoroughly: Keep the soil moist after transplanting to help roots establish quickly.

If growing in containers, choose a 12-inch deep pot with good drainage and plant 2–3 seedlings per container.


4. The Ideal Soil Mix for Edamame

Edamame plants grow best in slightly acidic to neutral soil (pH 6.0–7.0). The soil should be rich in organic matter but light enough for root aeration.

Recommended mix:

  • 50% garden soil
  • 25% compost or well-rotted manure
  • 20% coco peat or peat moss
  • 5% sand or perlite for drainage

Since edamame belongs to the legume family, it forms root nodules that fix nitrogen — meaning it naturally enriches your garden soil over time!


5. Watering and Moisture Needs

Edamame requires consistent moisture throughout its growth, especially during flowering and pod development. However, overwatering can lead to root rot.

Watering tips:

  • Keep soil evenly moist, not soggy.
  • Water deeply twice a week during dry weather.
  • Mulch the soil with straw or leaves to conserve moisture.
  • Avoid wetting leaves to prevent fungal infections.

During flowering and pod formation, moisture stress can cause flower drop or small, empty pods — so stay consistent with watering during these stages.


6. Fertilizing Your Edamame Plants

Since edamame is a nitrogen-fixing plant, it doesn’t need heavy nitrogen fertilizers. Instead, focus on a balanced feeding to encourage healthy growth and abundant pods.

Fertilizing schedule:

  • Before planting: Mix compost or vermicompost into the soil.
  • Mid-growth: Add organic potassium and phosphorus (like banana peel compost or bone meal) to support flowering and pod development.
  • Avoid overfeeding: Too much nitrogen promotes leafy growth instead of pods.

You can also spray seaweed extract or compost tea every 2–3 weeks to boost nutrient uptake naturally.


7. Light and Temperature Requirements

Edamame thrives in warm weather.

Ideal growing conditions:

  • Temperature: 70°F–85°F (21°C–29°C).
  • Sunlight: 6–8 hours of full sun daily.
  • Climate: Best grown in spring and summer or early fall in warm regions.

In cooler climates, start plants indoors and move them outside after the last frost. Avoid extreme cold or heavy rains during flowering, as these can affect pod formation.


8. Caring for Edamame Plants

Once your edamame plants are growing steadily, regular maintenance will help ensure a healthy and productive crop.

Care tips:

  • Weeding: Keep the area weed-free — weeds compete for nutrients and water.
  • Mulching: Add organic mulch to maintain soil temperature and reduce evaporation.
  • Support: While edamame plants are usually self-supporting, taller varieties may benefit from light staking or netting.
  • Pest control: Watch for aphids, caterpillars, or bean beetles. Spray neem oil every 10–15 days as a preventive measure.

Healthy plants should grow compact and bushy, with small clusters of pods forming after about 50–60 days.


9. Flowering and Pod Development Stage

Around 6–8 weeks after transplanting, you’ll notice small, delicate purple or white flowers forming on your edamame plants. These blooms mark the beginning of pod development.

What to do during this stage:

  • Continue consistent watering.
  • Avoid disturbing plants — flowers are delicate.
  • Add a potassium-rich feed to promote plump pod formation.
  • Keep an eye out for pests, especially during this tender phase.

Within a few weeks, pods will start forming and gradually swell as the beans inside mature.


10. Harvesting Edamame

The most exciting part — harvest time!

Edamame is ready for harvest about 75–100 days after planting. The pods should be:

  • Bright green and slightly fuzzy.
  • Plump but not yellow or hard.
  • About 2–3 inches long, containing 2–3 beans each.

Harvesting steps:

  1. Check for maturity — pods should be filled but not dry.
  2. Use scissors or garden shears to snip the pods off the plant.
  3. Alternatively, pull up the entire plant if all pods have matured together.

Harvesting at the right time ensures the beans are tender, sweet, and packed with flavor.


11. How to Enjoy Your Fresh Harvest

Freshly harvested edamame can be prepared and enjoyed in many delicious ways!

To cook:

  1. Rinse pods thoroughly.
  2. Boil in salted water for 3–5 minutes until bright green.
  3. Drain and serve hot with sea salt or chili flakes.

You can also steam, stir-fry, or roast them for a healthy snack. Inside the pod, the beans pop out easily — buttery, nutty, and full of nutrition.


12. Post-Harvest Care and Storage

If you’ve harvested more than you can eat right away, don’t worry — edamame stores beautifully.

Storage options:

  • Refrigerate: Keep fresh pods in a zip-lock bag for up to 5 days.
  • Freeze: Blanch pods in boiling water for 2–3 minutes, then cool in ice water and freeze. They’ll stay fresh for up to 6 months.
  • Dry: For longer storage, you can also dry the beans and use them as mature soybeans later.

13. Saving Seeds for the Next Season

If you’d like to save seeds for replanting, leave a few plants unharvested. Allow the pods to dry naturally on the plant until they turn brown and brittle.

Collect and store the dried beans in an airtight jar in a cool, dry place — they’ll stay viable for next season’s planting.


14. Common Problems and Solutions

ProblemLikely CauseSolution
Yellow leavesOverwatering or poor drainageWater less frequently, ensure good drainage
Few or no podsToo much nitrogen fertilizerSwitch to phosphorus and potassium feed
Pests (aphids, beetles)Insects feeding on leaves/podsUse neem oil or garlic spray
Dropping flowersHeat stress or droughtMaintain consistent watering and mulch

By maintaining balanced care, your edamame crop will thrive beautifully.


15. Why You’ll Love Growing Edamame

Growing edamame offers more than just a tasty harvest — it’s a rewarding gardening experience. These hardy plants:

  • Enrich your soil naturally.
  • Require minimal maintenance.
  • Produce delicious, protein-packed snacks.
  • Grow well in limited spaces and containers.

Plus, watching the pods fill and ripen is deeply satisfying — it’s like growing your own mini soybean farm right at home.


Final Thoughts

From nurturing nursery plants to harvesting vibrant green pods, growing edamame is a simple, sustainable, and rewarding journey for any gardener. With the right balance of sunlight, soil, and care, you can enjoy multiple flushes of tender, flavorful beans throughout the growing season.

So whether you’re cultivating edamame in raised beds or containers on your balcony, remember: with a little patience and consistent care, those small nursery plants can give you a generous, healthy harvest.

How to Grow Ginger and Turmeric from Skin: The Easiest Way to Grow and Eat Your Own Harvest in Containers or Raised Beds

How to Grow Ginger and Turmeric from Skin: The Easiest Way to Grow and Eat Your Own Harvest in Containers or Raised Beds

Did you know that you can grow both ginger and turmeric right from the skins you normally throw away — and even eat them too? Yes! Those thin peels are packed with life and potential. With the right setup, you can grow a generous supply of these tropical superfoods in containers or raised garden beds, all while keeping your garden eco-friendly and sustainable.

This guide will walk you through how to grow ginger and turmeric from skins, the best soil mix, container setup, watering tips, and how to harvest a huge, healthy crop — all while getting the most out of your plants.


1. Why Grow Ginger and Turmeric from Skin?

Both ginger and turmeric belong to the same plant family (Zingiberaceae), and they share many growing habits. These rhizomes are powerhouses of flavor and nutrition — used in cooking, teas, and even home remedies.

Growing them from skins — the outer peel — may sound unusual, but it’s an effective, zero-waste gardening method that recycles your kitchen scraps into thriving plants.

Here’s why it’s worth doing:

  • Eco-friendly: Reduces waste by using kitchen peels as planting material.
  • Cost-effective: No need to buy new rhizomes or seeds.
  • Nutrient-rich: You can grow organic, chemical-free ginger and turmeric.
  • Small-space friendly: Perfect for balconies, patios, or raised garden beds.

Even better — the skins are edible! They’re loaded with antioxidants, fiber, and essential oils. You can wash and use them in teas, smoothies, or stews, while keeping a few pieces aside to sprout new plants.


2. Understanding How It Works

Ginger and turmeric reproduce through rhizomes, not seeds. Each small section — even a peel — contains growth nodes or “eyes.” When placed in the right conditions (moisture, warmth, and light), these nodes can sprout and grow into new plants.

It’s similar to how potatoes sprout from their eyes. With patience and the right environment, even a thin skin of ginger or turmeric can grow roots and shoots.


3. Collecting and Preparing the Skins

Start by selecting fresh, healthy, organic ginger and turmeric. Organic rhizomes are best because store-bought non-organic ones may have been treated with chemicals that inhibit sprouting.

Steps to prepare:

  1. Wash thoroughly to remove dirt.
  2. Peel carefully — try to keep the skin slightly thick (1–2 mm) to ensure it includes some living tissue and buds.
  3. Save your peels in a bowl of water for a few hours to hydrate them.
  4. Optional pre-sprouting: Place the peels on moist paper towels or coco peat for 5–7 days in a warm spot (around 25–30°C).

Soon, you’ll notice tiny green or white buds emerging — these are your future plants!


4. Choosing Containers or Raised Beds

Both ginger and turmeric grow horizontally rather than deep into the soil. That means you need wide containers or raised beds with loose, rich soil.

For containers:

  • Depth: At least 12 inches deep.
  • Width: 14–18 inches wide.
  • Drainage: Must have holes at the bottom.

For raised beds:

  • Height: Around 10–12 inches.
  • Spacing: Keep at least 6–8 inches between each planting spot.

Fabric grow bags, terracotta pots, or wooden boxes are all excellent options. Raised beds are ideal if you plan to grow large quantities.


5. The Perfect Soil Mix

Ginger and turmeric need loose, well-draining, nutrient-rich soil to spread their rhizomes freely.

Ideal soil mix:

  • 40% garden soil
  • 30% compost or well-rotted cow manure
  • 20% coco peat or peat moss
  • 10% sand or perlite for aeration

You can also mix in a handful of neem cake powder or bone meal for natural pest resistance and slow nutrient release.

Before planting, moisten the soil lightly — it should feel damp but not soggy.


6. How to Plant Ginger and Turmeric Skins

Planting ginger and turmeric from skins is simple and fun.

Here’s how to do it:

  1. Lay the skins flat on the soil surface, ensuring the bud side faces up.
  2. Cover lightly with about 1 inch of soil.
  3. Water gently — just enough to moisten the soil.
  4. Keep in a warm, shaded location with indirect sunlight (around 4–5 hours daily).

If you’re using both ginger and turmeric, plant them in separate containers or keep at least 12 inches apart in raised beds, as turmeric takes slightly longer to mature.


7. Watering and Moisture Management

Consistent moisture is key — but overwatering is the biggest mistake gardeners make with ginger and turmeric.

Watering tips:

  • Keep the soil evenly moist, not soggy.
  • During summer, water every 2–3 days or when the top inch of soil feels dry.
  • Use mulch (like straw or dry leaves) to retain moisture and protect roots from heat.

If growing indoors or on a balcony, mist occasionally to maintain humidity — these plants love tropical conditions.


8. Providing Light and Temperature

Both ginger and turmeric are warm-weather crops. They thrive in temperatures between 75°F and 90°F (24°C to 32°C).

They prefer bright, indirect sunlight — too much harsh sun can scorch their leaves. A partially shaded area or dappled light is perfect.

If your region has cool winters, move the containers indoors during cold months or cover your raised beds with a plastic sheet or greenhouse film.


9. Feeding Your Plants for Strong Growth

To encourage healthy growth and large rhizomes, feed your plants regularly with organic fertilizers.

Feeding schedule:

  • At planting: Mix compost or cow manure into the soil.
  • Every 4 weeks: Add compost tea, seaweed extract, or diluted fish emulsion.
  • After 3 months: Use a potassium-rich fertilizer (like banana peel compost) to help rhizomes bulk up.

Avoid chemical fertilizers — organic nutrients build healthier soil and more flavorful harvests.


10. Caring for Ginger and Turmeric Plants

As your plants grow, they’ll develop lush green leaves resembling bamboo or canna plants.

Care tips:

  • Keep soil loose — gently aerate it once a month.
  • Remove weeds to prevent competition for nutrients.
  • Watch for pests like aphids or mites — use neem oil spray once every 10 days as a preventive measure.
  • Prune yellowing leaves occasionally to promote airflow.

Both plants love humidity — misting leaves occasionally helps them thrive.


11. Harvesting Ginger and Turmeric

Patience pays off!
Ginger and turmeric typically take 8–10 months to reach full maturity. You can start harvesting baby ginger or baby turmeric after 4–5 months if you prefer a milder flavor and tender texture.

Signs they’re ready to harvest:

  • Leaves begin to yellow and dry out.
  • Stems turn light brown.

How to harvest:

  1. Carefully dig around the base of the plant.
  2. Gently lift the rhizomes out of the soil.
  3. Shake off excess dirt and wash clean.

You can either harvest the entire plant or cut off portions of the rhizomes and leave the rest to regrow.


12. How to Eat Ginger and Turmeric Skins

One of the biggest secrets of this growing method is that the skins themselves are edible and nutritious. They contain antioxidants, anti-inflammatory compounds, and essential oils.

Ways to use them:

  • Add to smoothies or juices for a health boost.
  • Boil in tea with honey and lemon.
  • Toss into soups or curries for extra flavor.
  • Dry and grind into powder for spice mixes.

Always wash the skins thoroughly before consuming to remove any dirt.


13. Storing Your Homegrown Ginger and Turmeric

To store your harvest:

  • Short-term: Keep in a cool, dry place for up to 2 weeks.
  • Medium-term: Refrigerate in a breathable bag or wrap in a paper towel for 2–3 months.
  • Long-term: Peel, slice, and freeze in airtight containers for year-round use.

You can also dehydrate and powder them for homemade spices!


14. Common Problems and How to Fix Them

Even with easy-growing plants like ginger and turmeric, a few issues can arise.

ProblemCauseSolution
Yellowing leaves earlyOverwatering or poor drainageCheck soil moisture, improve drainage
Rhizomes rottingFungal infection or soggy soilUse neem cake, reduce watering
No sproutingToo cold or dryMove to warmer spot, keep soil moist
Small rhizomesPoor nutrition or crowdingFeed more often, provide space

Consistent care and balanced watering solve most problems quickly.


15. Saving Skins for the Next Season

After harvest, keep a few healthy skins or small rhizome pieces with visible buds.
Let them air dry for 1–2 days and store in a cool, dry place until the next planting season.

This way, you can continue regrowing your own ginger and turmeric — for free — year after year!


Final Thoughts

Growing ginger and turmeric from skin is one of the simplest and most rewarding gardening hacks you can try. It’s a fantastic zero-waste project that turns everyday kitchen scraps into lush, productive plants — even if you only have a balcony or a small garden bed.

With the right soil, warmth, and moisture, you’ll be harvesting baskets of aromatic ginger and golden turmeric in just a few months. Plus, you’ll enjoy knowing that every part of your plant — even the skins — can be used and appreciated.

How to Grow Ginger in Containers and Get a Huge Harvest: A Complete Step-by-Step Guide

How to Grow Ginger in Containers and Get a Huge Harvest: A Complete Step-by-Step Guide

Growing ginger in containers is one of the most rewarding gardening experiences you can have — even if you don’t have a large backyard. This fragrant, flavorful root not only enhances your meals but also offers incredible health benefits. The best part? You can easily grow it in pots right on your balcony, patio, or kitchen garden and enjoy a huge harvest with just a little care.

In this complete guide, we’ll walk you through everything you need to know — from choosing the right ginger rhizomes to harvesting a bountiful crop.


1. Why Grow Ginger in Containers?

Ginger (Zingiber officinale) is a tropical plant that thrives in warm, humid conditions. But with a bit of creativity, you can grow it successfully even in cooler climates by using containers. Growing ginger in pots has several advantages:

  • Perfect for small spaces: Ideal for apartment balconies, patios, or terrace gardens.
  • Easy to control: You can manage soil moisture, temperature, and sunlight more effectively.
  • Portable: Move containers indoors during cold weather or excessive rain.
  • Less pest and disease problems: Container growing helps keep rhizomes healthier.

If you love fresh, homegrown ingredients and want to add a tropical touch to your container garden, ginger is a perfect choice.


2. Choosing the Right Ginger Variety

Before planting, it’s important to choose the right type of ginger. Most grocery store ginger can sprout and grow successfully, but for the best results, select organic ginger rhizomes. Non-organic ones are often treated with growth inhibitors that prevent sprouting.

Look for varieties such as:

  • Common culinary ginger: Ideal for everyday cooking.
  • Baby ginger: Harvested earlier, tender, and milder in flavor.
  • Turmeric (Curcuma longa): A close relative that grows similarly, known for its golden hue and medicinal value.

Pro tip: Visit a local nursery or order online for certified disease-free ginger roots.


3. Preparing the Ginger for Planting

Once you’ve got your ginger rhizomes, preparation is key.

Steps:

  1. Select healthy rhizomes: Choose plump, firm pieces with visible “eyes” or growth buds.
  2. Cut into sections: If your rhizome is large, divide it into 2–3-inch pieces, each with at least one growth bud.
  3. Pre-sprout (optional but effective): Soak the pieces in warm water overnight to remove chemicals and encourage sprouting.
  4. Pre-germinate: Place the soaked rhizomes in a moist paper towel or cocopeat tray for about a week until small shoots appear.

Pre-sprouting helps ginger establish faster when planted in containers.


4. Choosing the Right Container

Ginger roots spread horizontally rather than deep into the soil. Therefore, the ideal container should be wide and shallow.

  • Container size: At least 12 inches deep and 14–16 inches wide.
  • Drainage: Make sure the pot has good drainage holes to prevent waterlogging.
  • Material: Plastic, terracotta, or fabric grow bags all work well. Fabric pots are excellent because they provide better aeration and prevent root rot.

If you plan to grow multiple rhizomes, use one large container or several medium-sized ones for better yields.


5. Best Soil Mix for Growing Ginger

Ginger loves loose, well-draining soil rich in organic matter. Heavy clay or compacted soil can stunt growth and cause rot.

Ideal soil mix:

  • 40% garden soil
  • 30% compost or well-rotted cow manure
  • 20% coco peat or peat moss
  • 10% sand or perlite for better drainage

Mix everything well and fill your container, leaving about 2 inches of space from the rim.


6. Planting Ginger Rhizomes

Here’s how to plant ginger correctly:

  1. Lay rhizomes horizontally with buds facing upward.
  2. Cover with 1–2 inches of soil. Don’t bury too deep — shallow planting encourages sprouting.
  3. Water lightly to moisten the soil, not soak it.
  4. Place the pot in a warm, shaded area with indirect sunlight (about 4–5 hours of light daily).

Within 2–3 weeks, you’ll notice green shoots emerging from the soil — that’s your ginger starting to grow!


7. Watering and Mulching

Ginger needs consistent moisture but dislikes soggy soil. Overwatering is one of the most common mistakes gardeners make.

Watering tips:

  • Keep the soil consistently moist but not waterlogged.
  • Water deeply once or twice a week, depending on your climate.
  • In hot, dry weather, mist the soil surface lightly between waterings.

Adding a layer of mulch (such as straw, dried leaves, or compost) helps retain moisture, suppress weeds, and keep roots cool.


8. Providing Light and Temperature

Ginger thrives in warm, humid environments — between 75°F and 85°F (24°C to 29°C).
It prefers indirect sunlight, as too much direct sun can scorch the leaves. If you live in a cooler region, place the container in a greenhouse or a sunny indoor area.

During winter, move your containers indoors or cover them with protective material to avoid frost damage.


9. Feeding Your Ginger Plants

For a lush and productive ginger plant, regular feeding is essential.

Fertilizing schedule:

  • At planting: Mix compost or organic manure into the soil.
  • Every 3–4 weeks: Apply a liquid fertilizer like seaweed extract or compost tea.
  • Mid-growth stage: Use a potassium-rich fertilizer to promote strong rhizome development.

Avoid nitrogen-heavy fertilizers in excess — they may cause too much leafy growth and smaller rhizomes.


10. Managing Pests and Diseases

Container-grown ginger is relatively pest-free, but keep an eye out for:

  • Aphids and spider mites: Spray with neem oil solution weekly.
  • Rhizome rot: Avoid overwatering and ensure proper drainage.
  • Fungal infections: Add organic fungicide or cinnamon powder to the soil occasionally.

Healthy soil and moderate watering are the best preventive measures.


11. Pruning and Maintenance

Remove any yellowing or damaged leaves to allow better air circulation.
If shoots grow too densely, thin them slightly to encourage healthy rhizome expansion.

Keep the container weed-free — weeds compete for nutrients and can crowd the ginger roots.


12. Harvesting Ginger for Maximum Yield

Ginger takes about 8–10 months to mature fully. However, you can start harvesting baby ginger after 4–5 months when the rhizomes are tender and less fibrous.

How to harvest:

  1. Gently dig around the base using your hands or a small trowel.
  2. Remove the entire plant or cut off part of the rhizome and let the rest keep growing.
  3. Shake off soil and rinse thoroughly.

If you want a huge harvest, allow the plants to grow for at least 8 months until the leaves start to yellow and dry — that’s the sign of full maturity.


13. Storing and Using Your Homegrown Ginger

Once harvested, wash the rhizomes and let them air dry for a day. Store them in:

  • Cool, dry place for up to a few weeks.
  • Refrigerator: In a paper towel or breathable bag for 2–3 months.
  • Freezer: Peel and store slices in airtight containers for long-term use.

You can also set aside a few healthy pieces to replant next season — your self-sustaining ginger supply!


14. Common Mistakes to Avoid

To ensure a big harvest, avoid these common errors:

  • Overwatering or waterlogged soil.
  • Planting in compact or clay-heavy soil.
  • Exposing plants to harsh direct sunlight.
  • Neglecting fertilization during mid-growth.
  • Harvesting too early.

With patience and proper care, your container-grown ginger can yield an abundant harvest every season.


15. Bonus Tip: Regrow Ginger Easily

After harvesting, save a few pieces with healthy buds.
Let them dry for a day or two and replant them using the same method. Ginger is a perennial, meaning you can keep regrowing it year after year!


Final Thoughts

Growing ginger in containers is a simple yet satisfying process that anyone — from beginners to seasoned gardeners — can enjoy. With the right soil, moisture, and temperature, your ginger plants will flourish, giving you a continuous supply of aromatic, flavorful rhizomes.

Whether you use it in teas, curries, or homemade remedies, there’s nothing quite like the taste of freshly harvested ginger from your own container garden.

When and How to Harvest Horseradish: A Complete Guide to Digging, Preparing, and Enjoying This Spicy Root

When and How to Harvest Horseradish: A Complete Guide to Digging, Preparing, and Enjoying This Spicy Root

Few garden crops deliver the same bold, fiery punch as horseradish. This pungent root vegetable has been prized for centuries for its sharp, sinus-clearing flavor and countless culinary uses—from zesty sauces to pickled condiments. But to fully enjoy its flavor and potency, knowing when and how to harvest horseradish is crucial.

In this comprehensive guide, we’ll walk through everything you need to know about harvesting and preparing horseradish—from recognizing when it’s ready to dig up, to cleaning, peeling, and storing it properly. Whether you’ve grown it in your garden or inherited a patch that’s been spreading for years, this guide will help you make the most of every root.


What Makes Horseradish So Special?

Horseradish (Armoracia rusticana) is a hardy perennial plant from the mustard family (Brassicaceae), related to cabbage, radish, and wasabi. It’s best known for its powerful aroma and spicy flavor, which intensifies when the root cells are crushed.

What’s fascinating about horseradish is that its heat isn’t capsaicin-based like chili peppers—it comes from volatile compounds called isothiocyanates, which are released when the root is grated or chopped. These compounds give fresh horseradish that eye-watering kick and distinctive taste we associate with roast beef, seafood, or cocktail sauces.

Besides its bold flavor, horseradish offers several benefits:

  • High in vitamin C and antioxidants
  • Natural digestive aid
  • Antibacterial properties
  • Boosts metabolism and circulation

But to enjoy all of these, timing and proper preparation are key.


When to Harvest Horseradish

The timing of your harvest can make a huge difference in flavor, texture, and storage quality.

1. Ideal Harvest Season

Horseradish is usually ready for harvest in late fall, after the first few frosts. The cold weather helps concentrate the root’s oils and sharpness, giving it a stronger flavor. In most regions, this means October through early December.

If you live in a mild climate, you can also harvest in early spring before new growth begins. However, fall-harvested roots generally have the best taste and storage potential.

2. Signs Your Horseradish Is Ready

Here’s how to tell when it’s time to dig up your horseradish:

  • The leaves begin to yellow or die back, signaling the plant is entering dormancy.
  • The root crown feels thick and firm when gently probed.
  • Plants are at least one year old—horseradish roots need a full growing season to develop size and flavor.

If you planted horseradish this spring, it’s best to wait until the following fall for your first harvest.


How to Harvest Horseradish

Harvesting horseradish requires a bit of effort, but the results are well worth it. The roots can grow deep and wide, so patience and care are important to avoid damaging them.

1. Loosen the Soil First

Start by cutting back the leaves to about 2–3 inches above the crown. Use a garden fork or spade to loosen the soil around the plant, starting about 6–8 inches away from the crown to avoid slicing into the main root.

2. Lift the Root Gently

Carefully lift the root from underneath, shaking off excess soil as you go. Horseradish roots can reach depths of up to 18 inches or more, so take your time.

You’ll likely find several roots growing from a central crown—the thick main root (the one you’ll prepare and eat) and several side roots or “sets” that can be replanted for next year’s crop.

3. Select the Best Roots

Choose firm, thick, straight roots for preparation. These are the ones with the most flavor and easiest texture to work with. Save smaller side roots (about pencil thickness) to replant in spring.


Replanting for Next Season

Horseradish is a perennial, meaning it can grow back year after year. To maintain productivity and prevent overcrowding, it’s a good idea to dig up and divide the roots every fall.

After harvesting:

  • Select a few healthy, pencil-thick side roots about 8–10 inches long.
  • Replant them at a 45-degree angle, about 2 inches below the soil surface, with the top end slanted upward.
  • Space plants 18 inches apart to allow for proper root development.

This ensures a continuous supply of fresh horseradish for years to come.


Cleaning and Preparing Fresh Horseradish

Once your roots are harvested, it’s time to prepare them for storage or immediate use.

1. Washing the Roots

Rinse roots thoroughly under cool running water to remove soil. Use a brush or scrub pad to clean off any stubborn dirt. Horseradish roots can be knobby, so make sure to get into all crevices.

2. Peeling

Using a vegetable peeler or small knife, peel off the thin brown outer layer to reveal the white, aromatic flesh underneath. If the root is particularly large or fibrous, trim away any woody sections.

3. Cutting into Pieces

Cut the peeled root into smaller sections, about 2–3 inches long. This makes it easier to grate or blend later.

Tip: Work in a well-ventilated area! Freshly grated horseradish releases strong fumes that can make your eyes water.


How to Make Fresh Horseradish Sauce

Homemade horseradish sauce is easy to make and much more flavorful than store-bought versions. Here’s a simple method:

Ingredients:

  • 1 cup peeled, chopped horseradish root
  • ½ cup white vinegar
  • 2 tablespoons cold water
  • ½ teaspoon salt
  • Optional: sugar or cream for milder flavor

Instructions:

  1. Place the chopped horseradish and water in a food processor or blender. Pulse until finely grated.
  2. Wait 30–60 seconds after grating before adding vinegar—this timing controls the heat level.
    • Add vinegar immediately for a milder flavor.
    • Wait a minute or more for a hotter, more intense flavor.
  3. Add salt and blend until smooth.
  4. Transfer to a clean glass jar, seal tightly, and refrigerate.

Freshly prepared horseradish will keep in the fridge for 3–4 weeks, though the flavor gradually mellows over time.


Storing Fresh Horseradish

If you’re not using all your harvest right away, there are several ways to preserve it:

1. Refrigeration

Wrap unpeeled roots in a damp paper towel and place them in a plastic bag in the vegetable crisper. They’ll stay fresh for 1–2 months.

2. Freezing

Grate or chop horseradish and mix with a little vinegar before freezing in airtight containers or ice cube trays. While freezing can dull the flavor slightly, it’s a great option for long-term storage.

3. Pickling

Pickled horseradish is another traditional way to preserve it. Combine grated horseradish with vinegar, sugar, and salt, then store in sterilized jars. This method not only extends shelf life but also adds a tangy kick perfect for sauces and marinades.


Culinary Uses for Horseradish

Horseradish’s fiery flavor complements a wide range of dishes across cuisines. Here are some popular ways to enjoy it:

  1. Classic Roast Beef Sauce:
    Mix prepared horseradish with sour cream or mayonnaise for a creamy, spicy sauce that pairs beautifully with roasted meats.
  2. Seafood Companion:
    Combine horseradish with ketchup and lemon juice for a homemade cocktail sauce—perfect for shrimp or oysters.
  3. Flavor Booster:
    Add a spoonful to mashed potatoes, deviled eggs, or salad dressings for extra zing.
  4. Fermented Condiment:
    Blend with beets to make traditional Eastern European beet-horseradish relish (known as ćwikła in Polish cuisine).
  5. Medicinal Uses:
    Fresh horseradish has long been used as a natural remedy for colds, sinus congestion, and digestive issues.

A Few Cautions When Handling Horseradish

  • Ventilation is key: The fumes can be intense when grating or blending fresh roots. Open a window or use a fan if possible.
  • Avoid touching your eyes: Always wash your hands thoroughly after handling raw horseradish.
  • Use gloves if you have sensitive skin: The enzymes can cause mild irritation in some people.

Growing Tips for Future Harvests

If you’re planning to grow horseradish again, here are a few quick tips:

  • Plant in full sun and loose, rich soil for best results.
  • Water regularly but don’t overwater—horseradish prefers slightly moist, not soggy, soil.
  • Harvest annually to prevent roots from becoming woody or invasive.
  • Rotate planting areas every few years to avoid disease buildup.

Horseradish is a resilient, low-maintenance crop that thrives with minimal attention. Once established, it often produces enough roots to share with friends or trade with fellow gardeners.


Final Thoughts

Harvesting and preparing horseradish is one of the most satisfying experiences for home gardeners. Few plants offer such a powerful mix of flavor, health benefits, and ease of growth. By timing your harvest right and following proper preparation methods, you can enjoy fresh, fiery horseradish all year long.

Whether you love it in sauces, salads, or as a traditional side for hearty meals, fresh horseradish brings a unique, invigorating flavor to the table that store-bought versions simply can’t match.

So grab your garden fork, dig up those roots, and discover why freshly prepared horseradish is one of the most rewarding—and flavorful—harvests your garden can offer.

Daikon Radishes: The Multi-Purpose Root Vegetable Every Gardener Should Grow

Daikon Radishes: The Multi-Purpose Root Vegetable Every Gardener Should Grow

If you’re looking to add a highly versatile, fast-growing, and nutrient-packed vegetable to your garden, Daikon radishes are the perfect choice. Known for their crisp texture, mild flavor, and incredible adaptability, these white radishes are not just another root crop—they’re a garden powerhouse. Whether you’re a seasoned gardener or just starting out, growing daikon radishes can bring numerous benefits to your soil, your kitchen, and even your overall gardening strategy.

In this article, we’ll dive into everything that makes daikon radishes a must-grow plant: from their multiple uses and soil-improving qualities to planting, harvesting, and practical tips to get the most out of this amazing vegetable.


What Is Daikon Radish?

Daikon (Raphanus sativus var. longipinnatus) is a type of winter radish that originated in East Asia. The word “daikon” means “big root” in Japanese—and rightly so! These radishes can grow impressively long, sometimes reaching 18 inches or more. Unlike the small, spicy red radishes many gardeners are familiar with, daikons are larger, milder, and have a juicy, crisp texture.

They come in several varieties—some long and white, others round, green-topped, or even purple. Common types include ‘Miyashige,’ ‘Minowase,’ and ‘April Cross.’ Each offers a slightly different flavor and texture, but all share one key trait: versatility.


Why You Need to Grow Daikon Radishes

Daikon radishes are not just edible; they are multi-functional garden heroes. Here’s why they deserve a place in every garden:

1. Excellent Soil Breaker and Improver

Daikon radishes are often called “tillage radishes” for a good reason. Their long taproots grow deep into the soil, naturally aerating compacted ground and breaking up hardpan layers that prevent water and nutrients from reaching plant roots.

When the radishes decompose after the season, they leave behind open channels that improve drainage, soil structure, and root penetration for future crops. It’s nature’s way of tilling the soil—without machinery!

2. Perfect for Cover Cropping

Gardeners often use daikon radishes as a cover crop to reduce erosion, suppress weeds, and add organic matter back into the soil. Their leafy tops shade out weeds, while their roots store nutrients that are later released as they break down. This makes them an excellent addition to crop rotation systems or organic gardening plans.

3. Nutrient Scavenger

Daikon roots reach deep into the soil, pulling up nutrients—especially nitrogen and potassium—that shallow-rooted plants can’t access. These nutrients are then stored in the radish and released back into the topsoil once the plant decomposes, enriching your garden naturally.

4. Delicious and Nutritious Food Source

Of course, daikon radishes are also fantastic in the kitchen! Their mild, slightly sweet flavor makes them suitable for salads, stir-fries, soups, and pickles. You can eat them raw, roasted, sautéed, or fermented. Even the leafy greens are edible and packed with vitamins A, C, and calcium.

5. Fast-Growing and Low-Maintenance

Daikons grow quickly—usually ready for harvest in just 50 to 70 days. They thrive in cool weather, making them a great fall or early spring crop. Once planted, they require minimal care beyond regular watering and a bit of weeding.

6. Natural Pest Control

Another hidden benefit is that daikon can act as a trap crop for pests like flea beetles and nematodes. These insects are drawn to daikon roots and leaves, sparing your more delicate crops from damage.


When and Where to Plant Daikon Radishes

Daikon radishes prefer cool weather and loose, well-drained soil. In most regions, they are planted in late summer or early fall so they can mature as temperatures drop.

Ideal Growing Conditions:

  • Sunlight: Full sun (at least 6 hours per day)
  • Soil Type: Loose, loamy soil; avoid heavy clay unless well-amended
  • Soil pH: Slightly acidic to neutral (6.0 to 7.0)
  • Temperature Range: 50°F to 75°F (10°C to 24°C)

If your garden soil is heavy or compacted, consider growing daikon radishes in raised beds or deep containers. The deep taproot needs plenty of vertical space to grow straight and healthy.


How to Plant Daikon Radishes

  1. Prepare the Soil:
    Loosen the top 8–12 inches of soil and remove stones or debris. Add compost or aged manure for nutrients.
  2. Sow Seeds:
    Plant seeds about ½ inch deep and 2 inches apart in rows spaced 12–18 inches apart.
  3. Thin Seedlings:
    Once seedlings are 2–3 inches tall, thin them to 4–6 inches apart. Crowding can lead to misshapen roots.
  4. Watering:
    Keep the soil consistently moist but not soggy. Irregular watering can cause cracking.
  5. Fertilization:
    Daikons don’t need heavy feeding. A light side dressing of compost mid-season is often enough.

Caring for Daikon Radishes

Daikon radishes are hardy, but a few simple care tips can help ensure a great harvest:

  • Weeding: Keep the area weed-free to reduce competition for nutrients.
  • Mulching: Apply a layer of mulch to retain moisture and suppress weeds.
  • Pests: Watch out for flea beetles, root maggots, and aphids. Using row covers or neem oil sprays can help control them naturally.
  • Bolting Prevention: Avoid planting during hot weather, as daikons can bolt (flower prematurely) in heat.

Harvesting Daikon Radishes

You’ll know it’s time to harvest when the top of the root starts to show above the soil surface—usually 50 to 70 days after sowing. The radish should be firm and thick but not woody.

To harvest:

  • Loosen the soil around the root with a garden fork or hand tool.
  • Gently pull the radish out by the base of the greens.

Don’t wait too long—overgrown daikons can become fibrous and lose their flavor.


Culinary Uses of Daikon Radishes

Daikon radishes are incredibly versatile in the kitchen. Here are some popular ways to enjoy them:

  1. Raw in Salads:
    Slice thinly or grate into slaws for a crisp, refreshing crunch.
  2. Pickled:
    In Japanese and Korean cuisines, daikon is commonly pickled—such as takuan or danmuji—for a tangy, flavorful side dish.
  3. Cooked in Soups and Stir-Fries:
    Daikon softens beautifully when cooked, absorbing flavors of broth, soy sauce, or miso.
  4. Roasted or Steamed:
    Cooking daikon brings out its natural sweetness, making it a delicious side dish for meats or rice bowls.
  5. Using the Greens:
    Don’t throw away the tops! Sauté the greens with garlic and sesame oil for a nutritious, slightly peppery dish.

Using Daikon Radishes for Soil Health

Even if you don’t plan to eat your daikon harvest, planting them for soil improvement is one of the smartest gardening strategies you can use. When left in the ground over winter, the roots decay naturally, leaving behind deep channels that enhance aeration and microbial activity.

This method, known as bio-tillage, helps prepare the soil for next season’s crops—especially deep-rooted vegetables like carrots, potatoes, and tomatoes.

Additionally, daikon’s nutrient-rich decomposition adds valuable organic matter to the soil, improving fertility for future plantings.


Environmental Benefits of Growing Daikon

Growing daikon radishes also contributes to sustainable gardening practices:

  • Reduces need for chemical fertilizers by recycling nutrients naturally.
  • Prevents soil erosion with its dense canopy and strong root structure.
  • Supports biodiversity by creating habitats for beneficial soil organisms.
  • Minimizes tillage, reducing fuel and labor requirements in large gardens or farms.

In short, daikon radishes help you grow healthier plants while supporting the environment.


Saving Daikon Seeds

If you’d like to save seeds for next season, allow a few plants to bolt and produce seed pods. When the pods turn brown and dry, harvest them and extract the seeds. Store in a cool, dry place for up to three years.

This sustainable approach not only saves money but also helps you adapt seeds that thrive in your local growing conditions.


Final Thoughts

Daikon radishes truly live up to their reputation as a multi-purpose root vegetable. Whether you grow them to improve your soil, feed your family, or simply enjoy their quick and satisfying growth, they are an outstanding addition to any garden.

From their deep-rooted soil benefits to their delicious culinary versatility, daikon radishes offer something for everyone. Plant them once, and you’ll see why so many gardeners swear by this humble yet powerful crop.