
Carrots are one of the most rewarding vegetables to grow at home. Their crisp texture, sweet flavor, and vibrant color make them a favorite addition to salads, soups, and juices. But what if you don’t have a large garden space? No worries! You can grow healthy, full-sized carrots in plastic polythene bags right on your balcony, terrace, or even beside a sunny window.
This complete 1200-word guide, inspired by the video “How To Grow Carrot In Plastic Polythene Bag || Learn Container Gardening,” will walk you through every detail—from choosing the right soil to harvesting those beautiful orange roots.
Why Grow Carrots in Polythene Bags?
Growing carrots in plastic polythene bags is not only space-efficient but also surprisingly simple. This method lets you control the soil condition, water drainage, and root depth—factors that are crucial for straight, smooth carrots.
Here are some key benefits:
- Space-saving: Ideal for apartments or small spaces.
- Portable: Move your bags to catch the best sunlight.
- Cost-effective: You can reuse old rice or fertilizer bags.
- Pest control: Fewer soil-borne diseases compared to open-ground gardens.
So, if you thought you needed a large plot for growing carrots, think again—polythene bags make it possible for anyone!
Step 1: Choosing the Right Variety of Carrot
Carrots come in many shapes and lengths. When growing in containers, choose short or medium-sized varieties that do well in limited depth. Some of the best varieties for bag gardening are:
- Nantes: Cylindrical, sweet, and grows well in loose soil.
- Chantenay: Short and stout, perfect for shallow containers.
- Mini or Baby Carrots: Mature quickly and ideal for small bags.
These varieties typically mature in 70 to 90 days and adapt easily to confined growing spaces.

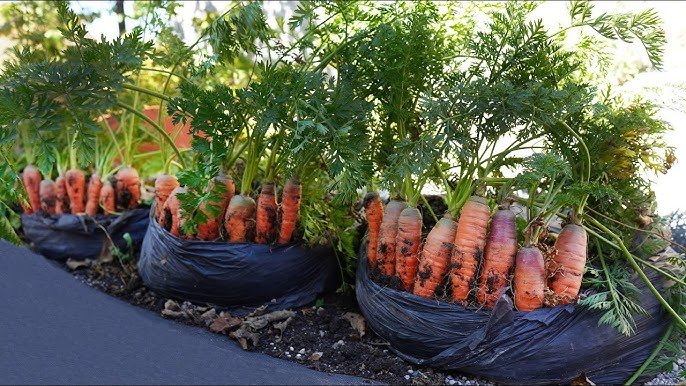
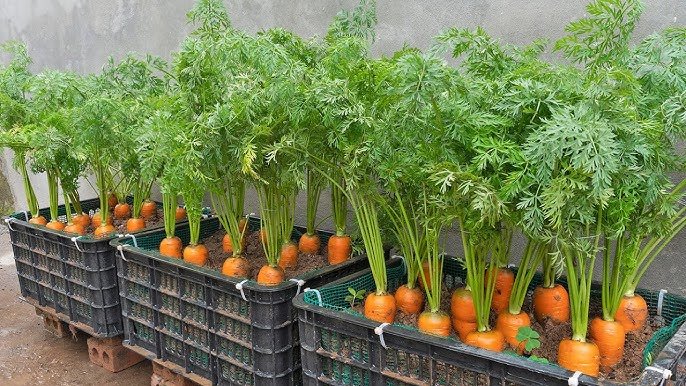
Step 2: Selecting and Preparing the Polythene Bag
You can use thick, durable plastic bags such as:
- Old rice sacks
- Fertilizer or compost bags
- Heavy-duty garbage bags
Bag size recommendation:
Choose a bag at least 18–24 inches deep and 12–14 inches wide. This depth allows carrot roots to develop fully without curling.
Preparation:
- Make 8–10 small holes at the bottom for drainage.
- Place a few small stones or gravel pieces at the base to prevent clogging.
- Roll down the top of the bag to half its height so it’s easier to fill and handle.
Step 3: Preparing the Perfect Soil Mix
Carrots need loose, well-draining, and fertile soil for straight growth. Hard or compact soil can cause twisted or forked roots.
Here’s a perfect soil mix formula for carrots in bags:
- 40% garden soil
- 40% compost or cow manure
- 20% river sand or coco peat
Mix well until the texture is crumbly and light. Avoid adding too much nitrogen fertilizer as it can result in excessive leafy growth but smaller roots.
Pro Tip: Sift your soil through a mesh before filling the bag. Removing stones and clumps ensures your carrots grow straight and uniform.

Step 4: Sowing Carrot Seeds
Carrot seeds are tiny, so sowing them properly makes a big difference.
Here’s how to do it:
- Moisten the soil slightly before planting.
- Sprinkle seeds evenly on the surface.
- Cover them with a thin layer (about 0.5 cm) of fine soil or compost.
- Mist water gently using a spray bottle—avoid strong watering that may wash seeds away.
To improve germination, cover the bag with a thin plastic sheet or wet newspaper for the first few days to retain moisture.
Carrot seeds usually take 10–15 days to germinate, depending on temperature. Once seedlings appear, remove the cover and place the bag in a sunny location.
Step 5: Watering and Sunlight Requirements
Carrots love consistent moisture but dislike soggy soil.
- Watering: Water lightly every day or every alternate day. The soil should remain moist but not waterlogged.
- Sunlight: Place your bag where it receives at least 5–6 hours of direct sunlight daily.
- Temperature: Ideal range is between 16°C and 25°C (60°F–77°F).
During extremely hot days, move the bag to partial shade to prevent stress and cracking.
Step 6: Thinning Seedlings for Healthy Growth
Once the carrot seedlings are about 2 inches tall, they’ll be crowded. Thinning ensures that each plant gets enough room for root development.

How to thin:
- Gently remove weaker seedlings by pinching them off at soil level.
- Keep one healthy seedling every 2 inches apart.
- Water lightly after thinning to help remaining plants settle.
Don’t discard the thinned seedlings—they make nutritious microgreens for salads!
Step 7: Caring for Growing Carrots
Carrots are low-maintenance, but a few care steps can boost your harvest:
a) Fertilizing:
- After 3–4 weeks, apply a light dose of organic liquid fertilizer or compost tea.
- Avoid high-nitrogen fertilizers that promote leaf growth over root development.
b) Mulching:
Add a thin layer of dried leaves or straw on top of the soil. Mulching helps retain moisture and keeps the roots cool.
c) Pest Management:
Carrots grown in bags rarely face pests, but you can deter aphids and mites by spraying neem oil solution once every two weeks.
d) Bag Maintenance:
If the bag’s soil level settles, top it up with compost. Also, unroll the bag gradually as plants grow taller.

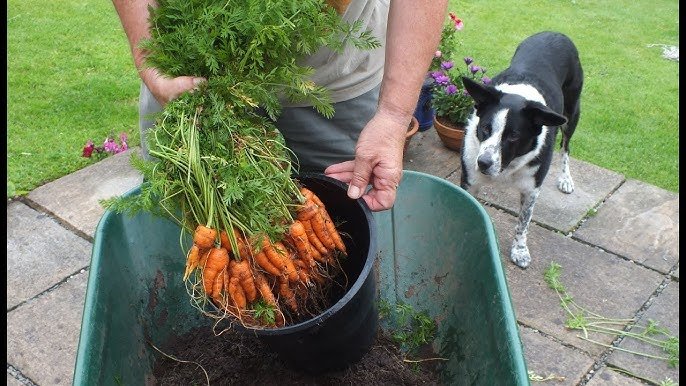
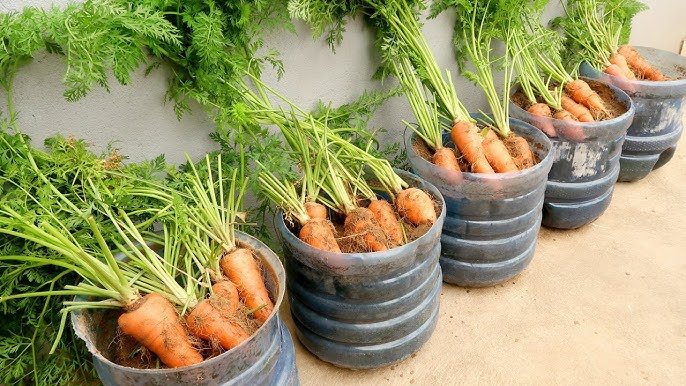
Step 8: Harvesting Carrots
Carrots are ready to harvest 70–90 days after sowing, depending on the variety.
Signs of readiness:
- The carrot tops start showing slightly above the soil.
- Leaves begin to turn light green or yellowish.
To harvest:
- Loosen the soil around the plant gently.
- Pull the carrot straight up by holding the base of the leaves.
- Wash off the soil and enjoy the fresh, crisp flavor!
Pro Tip: For sweeter carrots, water them lightly two days before harvesting.
Step 9: Post-Harvest Tips and Storage
Freshly harvested carrots can stay fresh for 1–2 weeks if stored properly.
- Trim the leaves to prevent moisture loss.
- Wash gently, dry, and store in a perforated plastic bag in the refrigerator.
- You can also pickle or juice them for longer use.
Additional Tips for Success
- Sequential Sowing: Sow new seeds every 3 weeks for a continuous supply of carrots.
- Mix Cropping: Grow carrots alongside onions or lettuce in separate bags—they help deter pests naturally.
- Use Organic Compost: Regular top-dressing with compost enhances soil health for future planting.
- Recycle Bags: After harvest, clean and reuse the same bag for growing other root crops like radish or beetroot.
Common Mistakes to Avoid
- Overwatering: Causes root rot or splits. Keep soil moist, not soggy.
- Hard Soil: Leads to deformed carrots—always ensure loose soil.
- Crowded Plants: Results in thin or stunted roots—don’t skip thinning.
- Low Sunlight: Produces weak, pale carrots—ensure at least 5 hours of sun.
By avoiding these simple mistakes, you’ll enjoy a healthier, more abundant harvest.
Conclusion: Grow Your Own Fresh Carrots Anywhere!
Growing carrots in plastic polythene bags is one of the easiest and most rewarding ways to practice container gardening. You don’t need a big backyard—just a sunny corner, some compost, and a little care. Within a few weeks, you’ll see lush green tops waving from your bag, and soon after, delicious, homegrown carrots ready for your kitchen.

Whether you live in a city apartment or have a small terrace, this method lets you enjoy fresh, organic carrots year-round while making use of recycled materials.
So grab an old polythene bag, prepare your soil, and get ready to experience the joy of harvesting your very own crunchy carrots—straight from your container garden!
Leave A Comment