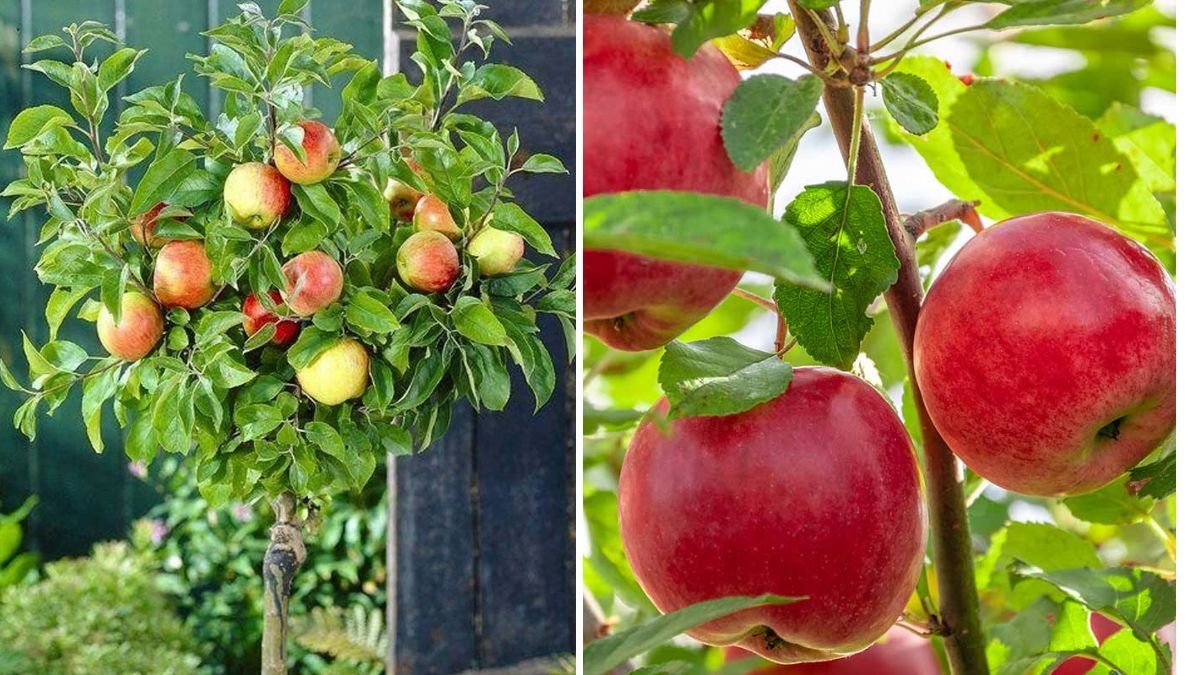
Planting a fruit tree is one of the most rewarding gardening experiences — it’s an investment that gives back year after year. Among all apple varieties, the Braeburn apple stands out as a perfect balance of sweet and tart flavor, crisp texture, and exceptional storage ability. Whether you’re a seasoned gardener or a first-time fruit grower, planting your own Braeburn apple tree brings beauty, fragrance, and delicious harvests to your home garden.
Inspired by the video “Planting My Braeburn Apple Tree,” this detailed guide walks you through everything you need to know about planting, nurturing, and growing Braeburn apples — from choosing the right spot to ensuring long-term success.
Let’s dig in and see how you can turn one small sapling into a thriving, fruitful tree that rewards you for decades to come.
Why Choose the Braeburn Apple Tree?

The Braeburn apple is a world-class variety originally discovered in New Zealand during the 1950s. Believed to be a natural cross between the Lady Hamilton and Granny Smith varieties, Braeburn quickly gained global popularity for its rich, tangy flavor and beautiful appearance.
Here’s why gardeners love Braeburn apple trees:

- Balanced Flavor: Sweet and slightly tart — great for eating fresh, juicing, or baking.
- Compact Growth: Ideal for home orchards or even medium-sized gardens.
- High Productivity: Yields plenty of medium to large apples each season.
- Excellent Storage: Keeps fresh for months when stored properly.
- Beautiful Blossoms: Its spring blooms attract bees and enhance pollination in nearby fruit trees.
If you want an apple that tastes great straight off the tree and stores well through winter, Braeburn is an excellent choice.
Step 1: Selecting the Perfect Spot for Your Braeburn Apple Tree

Location is key when it comes to planting apple trees. Braeburn apples thrive in sunny, well-drained areas with good air circulation.
Here’s what to look for:
- Sunlight:
Choose a spot that receives at least 6–8 hours of full sunlight daily. More sun equals better fruit sweetness and quality. - Soil:
Braeburn apples prefer loamy, well-drained soil with a slightly acidic pH between 6.0 and 6.8. Avoid heavy clay or waterlogged areas. - Spacing:
- Dwarf trees: Space about 8–10 feet apart.
- Semi-dwarf trees: Space about 12–15 feet apart.
- Standard trees: Space about 18–20 feet apart.
Good spacing ensures airflow, which helps prevent fungal diseases and promotes healthy growth.
- Pollination Partners:
Braeburn apples are partially self-fertile, but they’ll produce larger and more consistent crops if planted near another apple variety for cross-pollination. Ideal pollination partners include Fuji, Gala, or Granny Smith.
Step 2: Preparing the Soil for Planting

Healthy soil equals a healthy tree. Preparing the ground properly gives your Braeburn tree the best possible start.

Here’s how to do it:
- Test the Soil:
Check pH and nutrient levels using a soil test kit. Adjust acidity with lime (to raise pH) or elemental sulfur (to lower pH). - Add Organic Matter:
Mix in compost, aged manure, or leaf mold to enrich the soil with nutrients and improve structure. - Loosen the Soil:
Dig a hole about twice as wide and the same depth as the root ball. Loosen the soil at the bottom to allow roots to spread easily.
Step 3: How to Plant Your Braeburn Apple Tree

Now comes the exciting part — planting!
Materials Needed:
- Your Braeburn apple sapling (bare-root or potted)
- Shovel or spade
- Compost or organic matter
- Watering can
- Mulch (wood chips, straw, or shredded bark)
Planting Steps:
- Soak the Roots (if bare-root):
If your tree is bare-root, soak the roots in water for about 1 hour before planting to rehydrate them. - Position the Tree:
Place the tree in the hole so that the graft union (the swollen area above the roots) sits 2 inches above the soil surface. - Backfill Gently:
Fill the hole halfway with soil, tamp lightly to remove air pockets, and water well. Then, finish filling the hole and water again thoroughly. - Stake the Tree (if necessary):
Young trees may need support during the first few years. Use a soft tie to secure the trunk to a wooden stake without damaging the bark. - Add Mulch:
Apply a 2–3 inch layer of mulch around the base to retain moisture, regulate temperature, and suppress weeds. Keep mulch a few inches away from the trunk.
Step 4: Watering and Feeding Your Braeburn Tree

Proper watering and feeding are essential for early establishment and long-term productivity.
Watering Schedule:
- Newly planted trees: Water deeply once or twice per week for the first growing season.
- Established trees: Water weekly during dry periods, ensuring the soil remains evenly moist but not soggy.
Fertilizing:
In early spring, apply a balanced 10-10-10 fertilizer or organic compost. Avoid fertilizing late in the season, as it can trigger tender new growth susceptible to frost.
Step 5: Pruning and Training for Healthy Growth
Pruning helps shape your tree, increase airflow, and improve fruit quality.

When to Prune:
Late winter or early spring, before new buds appear.
How to Prune:
- Remove dead, damaged, or crossing branches.
- Keep the center open to allow light and air into the canopy.
- Shape into a modified central leader or open vase form for easy harvesting.
- Trim vigorous vertical shoots to promote lateral fruiting branches.
Proper pruning during the first few years lays the foundation for a strong, productive tree for decades to come.
Step 6: Protecting Your Tree from Pests and Diseases
Like all apple trees, Braeburn can attract certain pests and diseases. Regular monitoring and natural controls can prevent most problems.
Common Pests:
- Aphids: Tiny insects that feed on young leaves. Use neem oil or insecticidal soap.
- Codling Moth: Causes wormy apples. Set pheromone traps in early spring.
- Apple Maggots: Small fruit borers. Use sticky traps and remove fallen fruit promptly.
Common Diseases:
- Apple Scab: Fungal spots on leaves and fruit. Improve airflow and spray with organic sulfur if needed.
- Powdery Mildew: White coating on leaves. Prune infected shoots and maintain sunlight exposure.
- Fire Blight: Bacterial wilt affecting blossoms and branches. Cut infected areas well below symptoms and disinfect pruning tools.
Keeping your orchard clean — removing fallen fruit and pruned debris — is key to reducing disease pressure.
Step 7: Pollination and Flowering
In spring, your Braeburn tree will burst into stunning clusters of white-pink blossoms, filling the air with a delicate fragrance.

To ensure good fruit set:
- Encourage pollinators like bees by planting nearby flowers such as clover, borage, or lavender.
- Avoid spraying insecticides during bloom.
- If natural pollinators are scarce, gently hand-pollinate flowers with a small brush.
With proper pollination, small green fruitlets will begin forming by early summer.
Step 8: Fruit Development and Harvest Time
Braeburn apples ripen in mid to late fall (October–November), depending on your climate. The fruit’s color shifts from green to golden-yellow with red-orange blush as it matures.
Signs of Ripeness:
- The apple’s skin turns vibrant and glossy.
- Fruits detach easily when twisted gently.
- The flavor becomes sweet-tart and aromatic.
Harvest Tips:
- Pick apples carefully to avoid bruising.
- Store them in a cool, dark place (30–35°F) with high humidity.
- Properly stored, Braeburn apples can last 3–4 months while maintaining flavor and crunch.
Step 9: Winter Care for Your Braeburn Apple Tree
When the leaves fall and the growing season ends, your tree enters dormancy. A little winter prep ensures it’s ready to thrive again next spring.
- Apply a fresh layer of mulch to insulate the roots.
- Protect the trunk with tree wraps or guards against frost cracks and rodents.
- Avoid pruning too late in fall; it can stimulate unwanted growth.
- Water occasionally during dry winters if the ground isn’t frozen.
Conclusion: A Rewarding Journey from Sapling to Harvest
Planting your Braeburn apple tree is the beginning of a long and fulfilling relationship with nature. With its striking blossoms, steady growth, and flavorful fruit, this tree adds beauty and abundance to any garden.
From careful planting and pruning to the first bite of your own crisp, sweet-tart apple, every step is deeply satisfying. The Braeburn tree rewards patience and care with decades of harvests — a legacy you can share with family, friends, and future generations.
So, grab your shovel, prepare your soil, and plant that Braeburn tree. In just a few years, you’ll be enjoying the delicious fruits of your labor — literally!
Leave A Comment