Few herbs are as versatile, aromatic, and easy to grow as chives and garlic chives. These hardy perennials belong to the onion family and can elevate your kitchen garden with both beauty and flavor. Their mild, onion-like or garlicky taste adds a delicious punch to soups, salads, omelets, and more. Plus, they’re among the easiest herbs to grow—from a sunny windowsill pot to your backyard garden bed.
In this detailed guide, we’ll walk through everything you need to know about growing chives and garlic chives—from sowing seeds and solving common problems to harvesting and using them in your kitchen. Whether you’re a beginner gardener or a seasoned grower, this “seed to kitchen” tutorial will help you cultivate thriving, flavorful plants year after year.
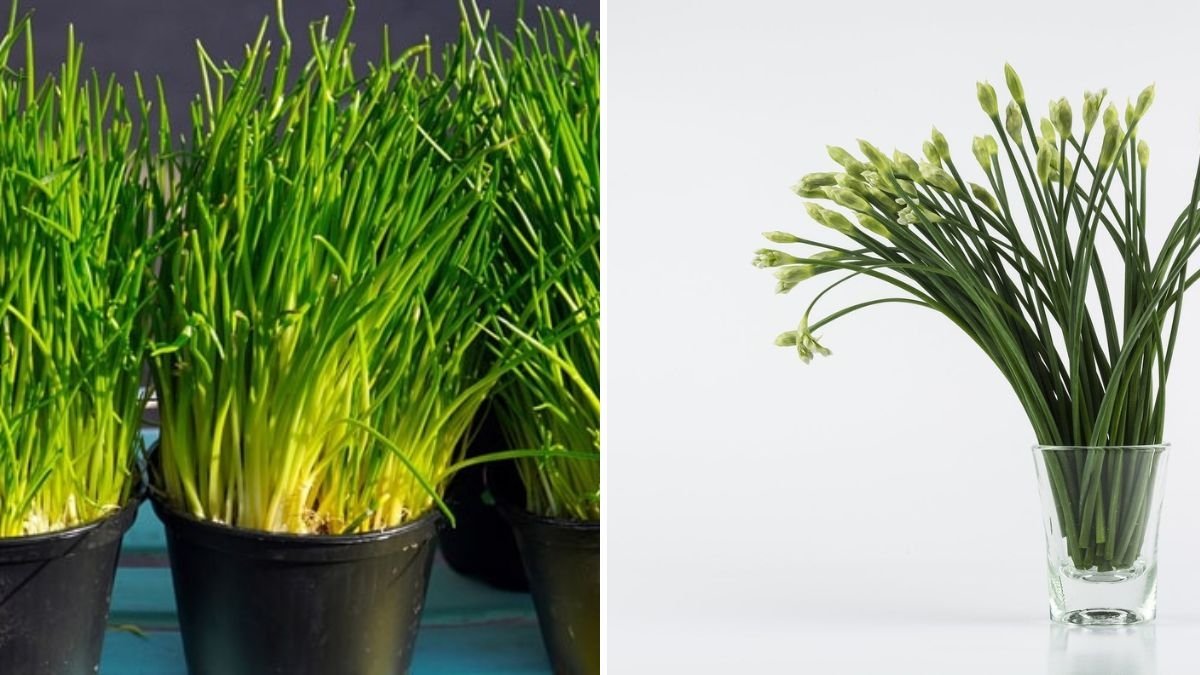
1. Understanding Chives vs. Garlic Chives
Before you start planting, it’s essential to know the difference between common chives and garlic chives—two close relatives that differ slightly in flavor, appearance, and growth habits.
Common Chives (Allium schoenoprasum)
- Slender, hollow, round leaves with a mild onion flavor.
- Produces purple-pink globe-shaped flowers in late spring.
- Often used raw in salads, soups, and garnishes.
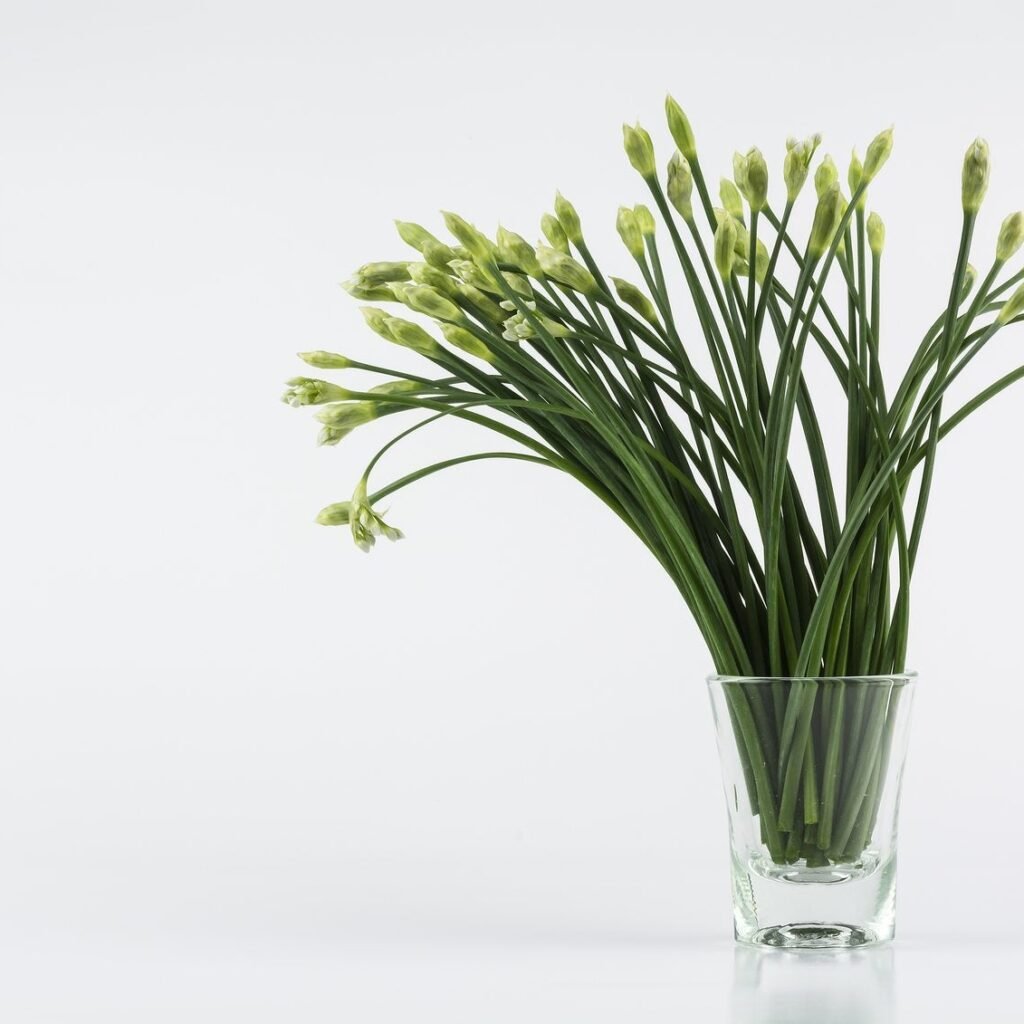
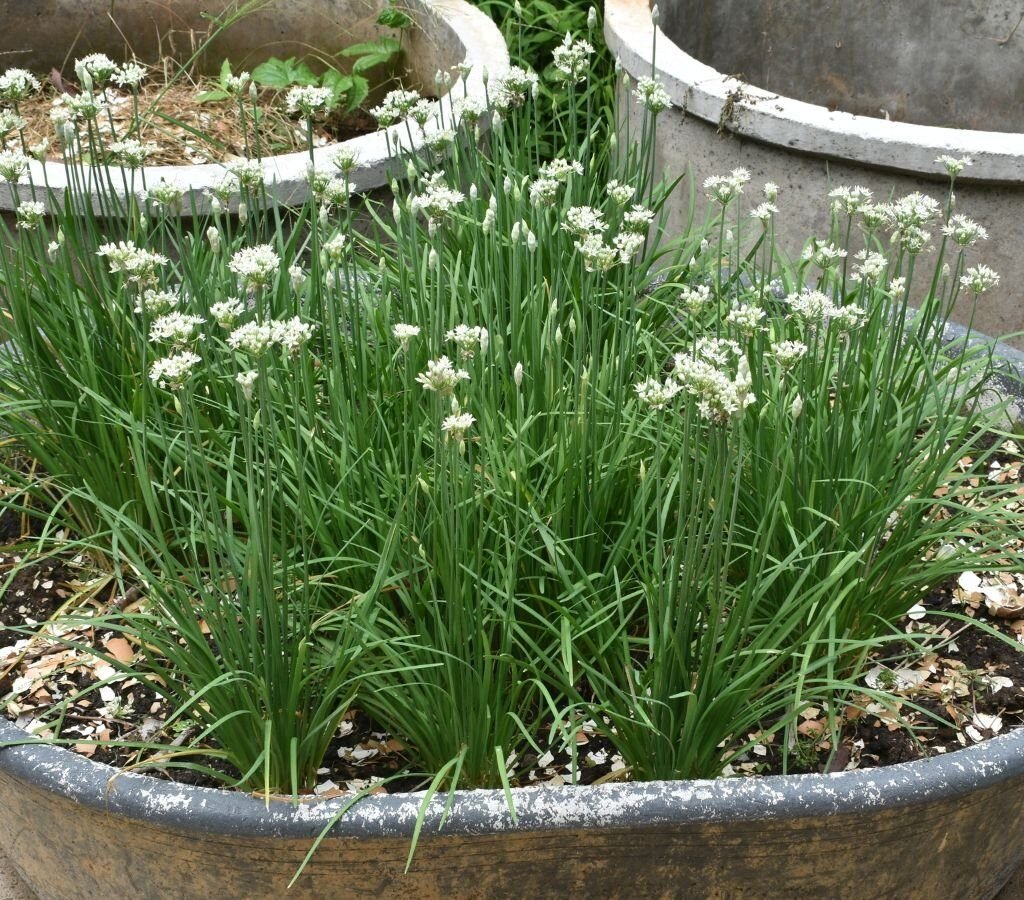
Garlic Chives (Allium tuberosum)
- Flat, wider leaves with a mild garlic taste.
- Produces white star-shaped flowers in mid to late summer.
- Excellent for stir-fries, dumplings, and savory dishes.
Both varieties are perennial herbs, meaning they’ll return each year with minimal maintenance. Garlic chives tend to spread more aggressively, so they’re ideal for containers or garden borders.
2. Ideal Growing Conditions
Chives are incredibly adaptable, but providing the right environment ensures a healthier, more productive plant.
- Sunlight: Full sun (at least 6 hours daily) is ideal, though they tolerate partial shade.
- Soil: Rich, well-draining soil enriched with compost or organic matter.
- pH Level: Slightly acidic to neutral (6.0–7.0).
- Water: Keep the soil consistently moist but never waterlogged.
- Temperature: Thrive in cool to moderate temperatures (15–25°C or 59–77°F).
You can grow chives in-ground, in raised beds, or containers—making them perfect for small-space or urban gardeners.
3. Propagation: Growing Chives from Seed or Division
There are two main ways to start your chive plants—from seed or by division.

Growing from Seed
- Sow indoors 6–8 weeks before the last frost date or directly outdoors once frost danger has passed.
- Fill seed trays or pots with a light, well-draining potting mix.
- Sprinkle seeds evenly and lightly cover them with a thin layer of soil (about ¼ inch).
- Mist with water to keep the surface moist.
- Seeds usually germinate in 7–14 days under warm, bright conditions.
Once seedlings reach 3–4 inches tall, thin or transplant them to their permanent home.
Propagation by Division
If you already have an established chive plant, division is the fastest way to expand your garden.
- In early spring or fall, dig up the plant gently.
- Separate the clump into smaller sections (each with roots attached).
- Replant divisions about 6–8 inches apart, watering well afterward.

This method revitalizes older plants and promotes fresh growth.
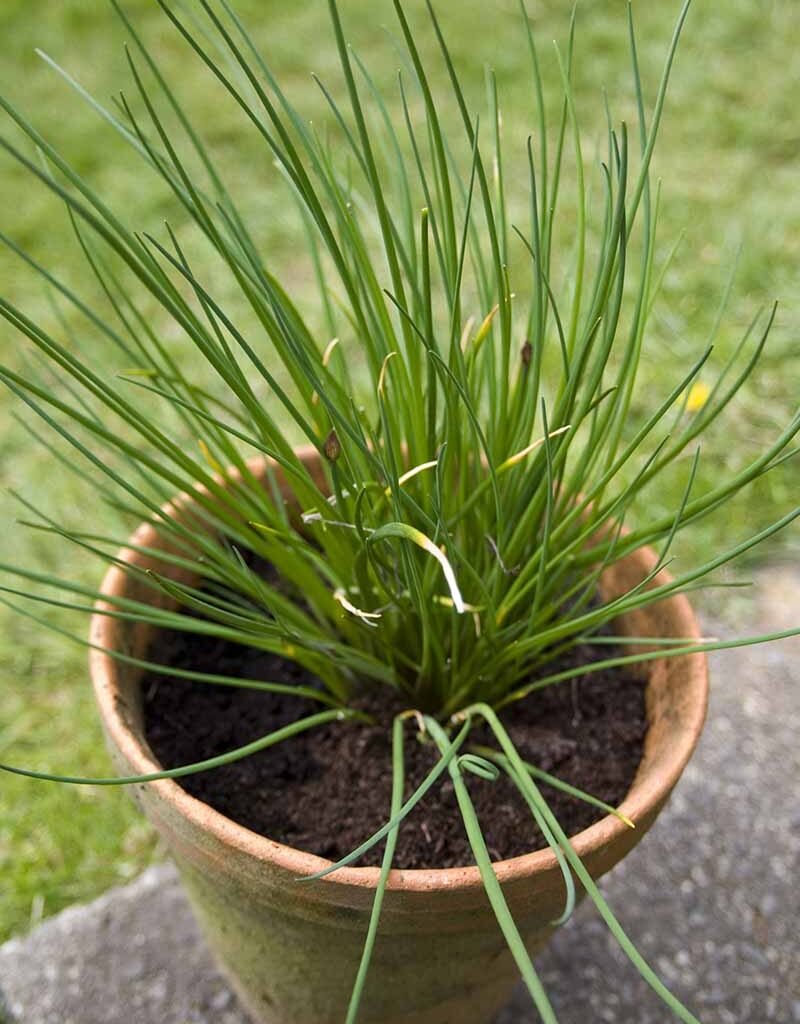
4. Planting Chives in the Garden or Containers
Whether you’re growing in beds or pots, proper spacing and setup are key.
In-Ground or Raised Beds:
- Space plants 8–10 inches apart.
- Plant in a sunny, well-drained area with compost-rich soil.
- Water after planting and keep the soil evenly moist.
In Containers:
- Use a 6–8 inch deep pot with drainage holes.
- Fill with a high-quality potting mix.
- Place in a sunny location such as a balcony, patio, or windowsill.
Container-grown chives tend to stay compact, making them easier to harvest and maintain.

5. Watering and Fertilizing
Chives prefer consistent moisture—not soggy, but never bone-dry.
- Water 2–3 times per week, depending on weather.
- Reduce watering in cooler months to prevent root rot.
For feeding:
- Apply a balanced organic fertilizer (such as 10-10-10) once a month during active growth.
- Alternatively, add a top dressing of compost or liquid seaweed fertilizer every few weeks.
Too much fertilizer, however, can lead to soft, weak leaves—so feed lightly and consistently.
6. Common Problems and Solutions
Chives are relatively pest-free, but a few issues can arise.
| Problem | Cause | Solution |
|---|---|---|
| Yellow leaves | Overwatering or nutrient deficiency | Improve drainage and feed with compost tea |
| Powdery mildew | Poor airflow, excessive moisture | Space plants properly; water at base; use neem oil spray |
| Aphids or thrips | Sap-sucking insects | Spray with neem oil or insecticidal soap |
| Root rot | Waterlogged soil | Reduce watering; repot in well-drained soil |
Regular trimming and airflow help prevent most diseases naturally.
7. Pruning and Maintenance
Frequent harvesting doubles as pruning! Cutting chives regularly encourages lush, new growth and prevents the leaves from becoming tough.
- Trim every 2–3 weeks once plants are established.
- Cut leaves about 2 inches above the soil.
- Remove faded flower stalks to prevent self-seeding (especially for garlic chives).
For overwintering, simply allow the leaves to die back naturally—chives will regrow vigorously in spring.

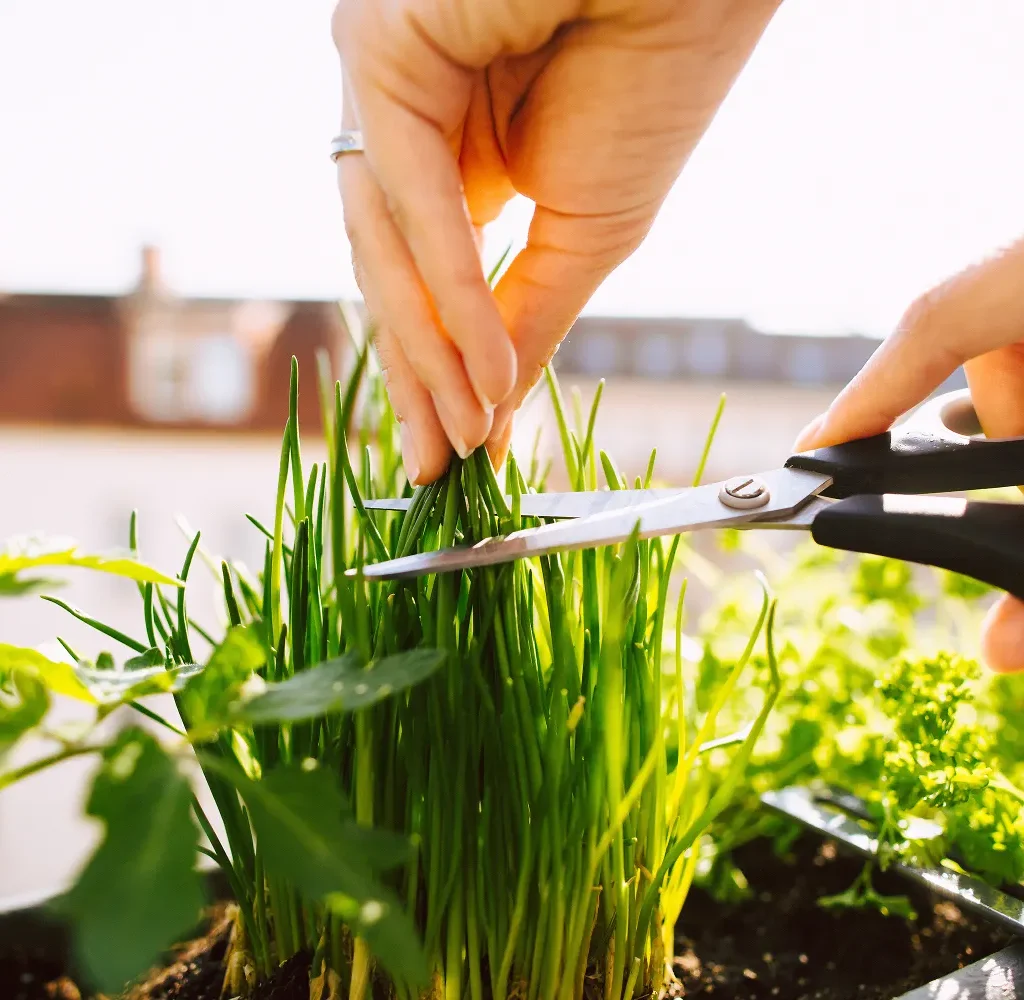
8. Harvesting Chives and Garlic Chives
You can start harvesting when plants are about 6–8 inches tall, usually 60–75 days after sowing.
How to Harvest:
- Use scissors or garden shears to snip leaves evenly across the clump.
- Always leave 2 inches of growth so plants can recover quickly.
- For garlic chives, you can also harvest flower buds before they open for stir-fries or garnishes.
With regular cutting, chives can provide fresh leaves throughout the growing season. Avoid harvesting too aggressively late in fall to allow plants to store energy for winter.
9. Using Chives in the Kitchen
Chives are incredibly versatile herbs that bring a subtle, fresh onion or garlic flavor to many dishes. Here are some delicious ways to use them:
- Fresh garnish: Sprinkle chopped chives over baked potatoes, soups, or scrambled eggs.
- Herb butter: Mix with butter, salt, and lemon juice for a savory spread.
- Salads and dips: Blend into salad dressings, yogurt dips, or creamy sauces.
- Stir-fries and dumplings: Use garlic chives for a gentle garlicky aroma in Asian dishes.
- Herbal vinegar or oil: Infuse chives in vinegar or olive oil for flavored condiments.
Remember—chives lose flavor when cooked too long. Add them toward the end of cooking to preserve their delicate taste and aroma.
10. Saving Seeds and Propagating for Next Season
If you want to save chive seeds:
- Allow some flowers to mature fully on the plant.
- Once the blooms dry, the seed heads will turn brown.
- Shake the heads over a container to collect black seeds.
- Store in a cool, dry place for next year’s planting.
Alternatively, divide mature clumps every 2–3 years to rejuvenate plants and prevent overcrowding.

11. Growing Tips for Healthier Chives
To get the most out of your plants, keep these expert tips in mind:
- Rotate crops: Avoid planting chives in the same spot year after year to prevent soil-borne issues.
- Companion planting: Grow chives near carrots, tomatoes, or roses to deter pests naturally.
- Deadhead flowers: Remove faded blooms to keep leaves tender and prevent self-seeding.
- Mulching: Apply a thin mulch layer to retain soil moisture and suppress weeds.
- Divide regularly: Every few years, divide clumps to maintain strong, flavorful growth.
12. Overwintering and Long-Term Care
Chives are hardy perennials that tolerate frost and even light snow. In colder regions:
- Cut back dead foliage after the first frost.
- Mulch with straw or dry leaves to insulate roots.
- Potted chives can be moved indoors to a sunny window during winter.
In early spring, remove mulch, water thoroughly, and watch fresh green shoots emerge.
13. Benefits of Growing Chives
Beyond their culinary uses, chives bring many benefits to your home garden:
- Pollinator-friendly: Their flowers attract bees and beneficial insects.
- Natural pest deterrent: The sulfur compounds in chives repel aphids, beetles, and other pests.
- Low maintenance: Once established, chives thrive with little care.
- Perennial harvest: They regrow each year, offering a long-term, sustainable herb source.
Plus, they look stunning in garden borders, herb spirals, or even decorative pots on your kitchen windowsill.
Conclusion
Growing chives and garlic chives is a rewarding experience for every home gardener. From their delicate flavor to their ornamental appeal, these hardy herbs are both beautiful and useful. With the right soil, regular watering, and timely pruning, you’ll enjoy an endless supply of fresh, flavorful greens that enhance everything from simple omelets to gourmet dishes.
Whether you start from seed or divide an old clump, chives are forgiving, fast-growing, and virtually pest-free. Once established, they’ll keep rewarding you year after year with lush green leaves and charming blossoms.

So grab a packet of seeds or a starter clump, find a sunny corner in your garden—or even a small pot on your kitchen windowsill—and start your chive-growing journey from seed to kitchen today!
Leave A Comment