If you’ve ever wanted to start gardening but didn’t know where to begin, growing bean sprouts in plastic bottles is one of the easiest, fastest, and most rewarding projects you can try. You don’t need a garden, expensive equipment, or even soil — just a few beans, plastic bottles, and water. In less than a week, you can harvest fresh, crunchy, and delicious bean sprouts that are perfect for salads, stir-fries, and soups.
In this detailed beginner’s guide, you’ll learn how to grow bean sprouts step by step using recycled plastic bottles, how to care for them, and how to enjoy this nutritious, homegrown food right from your kitchen counter.
Why Grow Bean Sprouts at Home?
Bean sprouts are young, tender shoots that grow from mung beans, soybeans, or other legumes. They are packed with vitamins A, B, C, and E, protein, and enzymes that boost immunity and digestion. What’s more, they grow super fast — you can go from seed to harvest in just 4–6 days.
Here are a few reasons why growing bean sprouts in plastic bottles is perfect for beginners:
- No soil needed: Just water and a bottle.
- Low maintenance: Requires only daily rinsing.
- No sunlight needed: Sprouts grow best in a shaded, cool area.
- Quick harvest: Ready to eat in less than a week.
- Eco-friendly: Recycles plastic bottles into useful growing containers.
- Healthy and delicious: Adds crunch, flavor, and nutrition to your meals.
This is truly the simplest way to start your gardening journey — no mess, no fuss, and nearly foolproof.
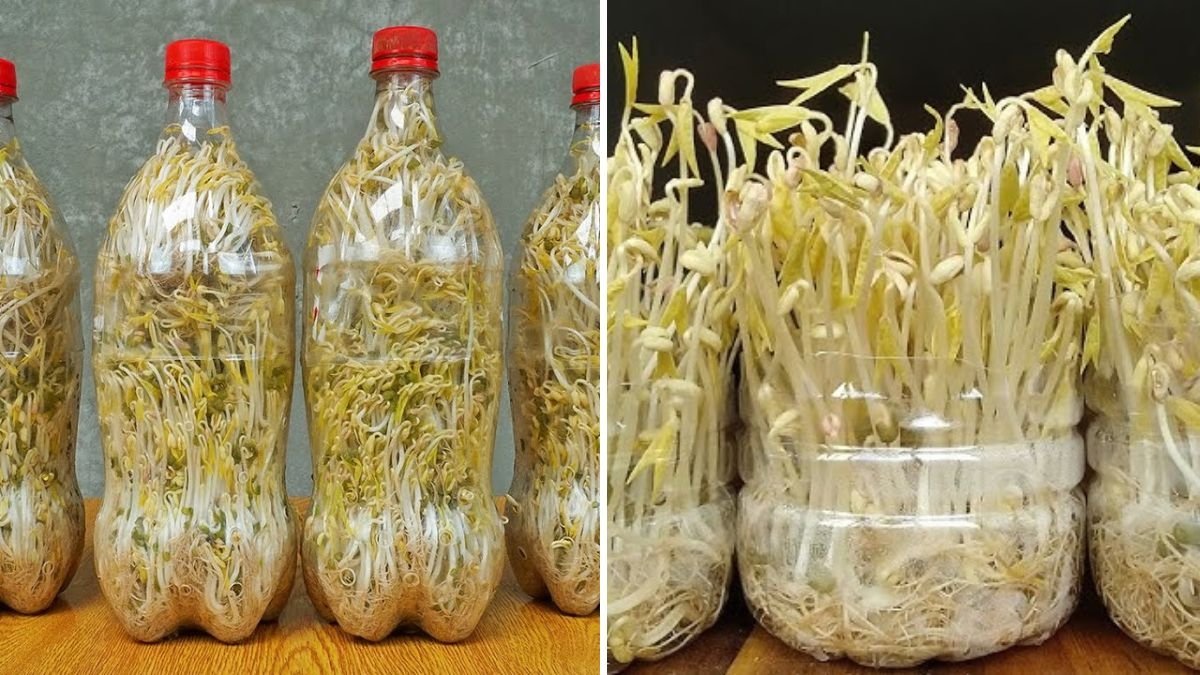
Step 1: Choose the Right Plastic Bottle
Start with a clean, transparent plastic bottle — preferably a 1.5 or 2-liter water or soda bottle. The size depends on how many sprouts you want to grow at once.

How to Prepare:
- Cut the Bottle:
Cut off the top third of the bottle to create an open container. You can keep the top part and invert it later as a cover if needed. - Make Drainage Holes:
Using a hot nail or knife, poke small holes around the base and lower sides of the bottle. These holes will allow water to drain during rinsing. - Clean and Dry:
Wash thoroughly with soap and rinse to remove any residue or smell.
Now your simple sprouting container is ready!
Step 2: Selecting and Soaking Your Beans
The best beans for sprouting are mung beans — they sprout quickly, are high in nutrition, and have a mild, sweet taste. However, you can also use soybeans, lentils, or alfalfa seeds.
How to Prepare the Beans:
- Measure:
Use about ¼ to ½ cup of mung beans for a 2-liter bottle. Remember, they will expand to 5–6 times their size when sprouting. - Rinse:
Wash the beans thoroughly under running water to remove dust or impurities. - Soak:
Place the beans in a bowl and cover them with room-temperature water. Let them soak for 8–12 hours or overnight.- This activates the beans and softens their outer shell, preparing them to sprout.
After soaking, the beans will double in size — they’re now ready for sprouting.
Step 3: Setting Up the Bottle Sprouter
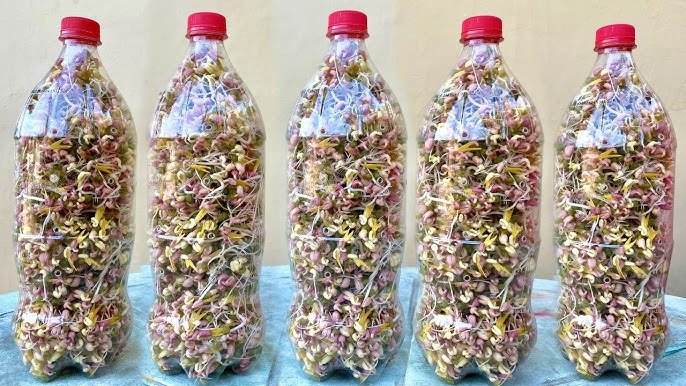
- Add Beans:
Drain the soaked beans and place them inside your prepared plastic bottle. - Cover the Opening:
Use a piece of cloth or mesh (like an old net or muslin fabric) and secure it with a rubber band around the bottle opening.- This allows airflow and easy rinsing while keeping insects or dust out.
- Place in a Dark, Cool Area:
Sprouts grow best in indirect light or darkness. Too much sunlight will make them turn bitter or dry out.- A kitchen shelf, cupboard, or shaded balcony corner is perfect.
Your setup is now ready — simple, clean, and space-saving!
Step 4: Rinsing and Draining Daily
This is the most important part of growing healthy, crisp sprouts.
Daily Routine:
- Morning:
Fill the bottle with cool water through the cloth-covered opening.
Swirl gently to wash the beans, then drain out the water through the holes or cloth. - Evening:
Repeat the rinse and drain process once more.
Make sure no standing water remains — excess moisture can cause mold or spoilage. Keep the bottle tilted upside down or sideways in a bowl to ensure good drainage and airflow.

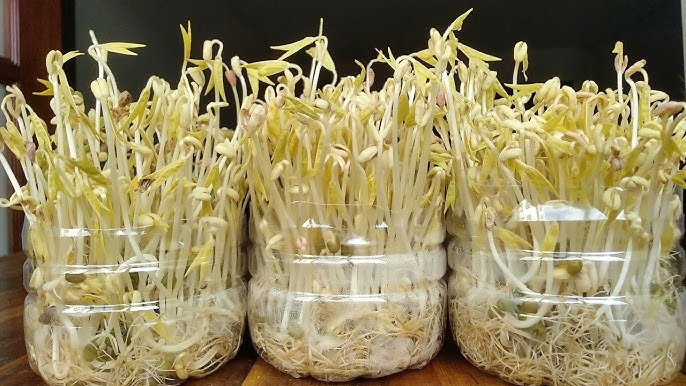
By the second or third day, you’ll notice small white roots emerging. By day four or five, your sprouts will be long, crunchy, and ready for harvest!
Step 5: Encouraging Growth and Freshness
During the sprouting process, it’s important to maintain the right conditions:
- Temperature: Keep between 20–28°C (68–82°F) — ideal for fast sprouting.
- Humidity: Ensure proper airflow to prevent mold.
- Light: Keep away from direct sunlight.
- Water Quality: Always use clean, filtered water for rinsing.
If your sprouts start smelling bad or turning slimy, they may have excess moisture. Simply rinse them more thoroughly and reduce soaking time.
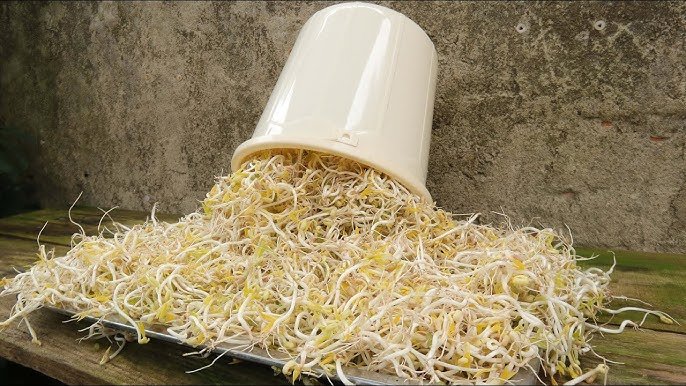
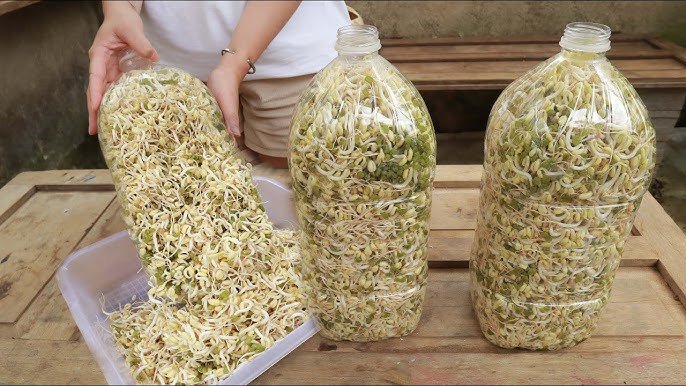
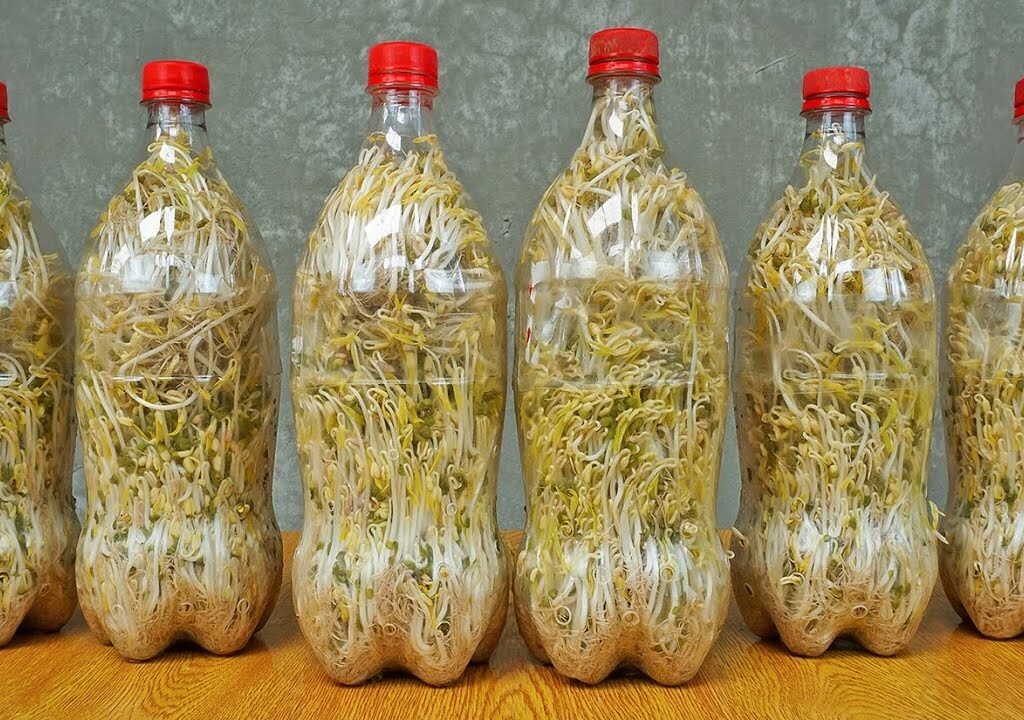
Step 6: Harvesting Your Bean Sprouts
After 4–6 days, your sprouts should be about 2–3 inches long, firm, and pale white or yellowish in color — perfect for eating!
Harvesting Steps:
- Remove the cloth or mesh and gently pour the sprouts into a clean bowl.
- Rinse them in cool water to remove seed coats and any debris.
- Drain completely and let them air dry for a few minutes.
That’s it — your fresh, homegrown bean sprouts are ready to enjoy!
You can store them in an airtight container in the refrigerator for up to 3 days. For the best flavor and nutrition, consume them immediately after harvest.

Step 7: Enjoying Your Homegrown Bean Sprouts
Bean sprouts are extremely versatile — you can eat them raw, lightly cooked, or mixed into your favorite dishes. Here are a few delicious ideas:
- Salads: Add to mixed greens for a fresh, crunchy texture.
- Soups: Top off your ramen, pho, or vegetable soups with sprouts.
- Stir-Fries: Toss them into fried rice, noodles, or veggie stir-fries for added crunch.
- Sandwiches & Wraps: Use as a healthy, hydrating filling.
- Omelets or Pancakes: Mix into egg dishes or savory pancakes for a nutritious boost.
They’re light, delicious, and add a satisfying crispness to every bite.
Nutritional and Health Benefits
Growing your own bean sprouts not only saves money but also gives you access to super fresh, living food full of nutrients and enzymes.
Health Benefits Include:
- Rich in protein and fiber – supports muscle growth and digestion.
- Loaded with vitamins A, B, C, and E – strengthens immunity and boosts skin health.
- High in antioxidants – helps fight inflammation and free radicals.
- Low in calories – ideal for weight management.
- Easy to digest – sprouting reduces anti-nutrients like phytic acid, making minerals more absorbable.
These small shoots pack a powerful punch of nutrition, perfect for anyone looking to eat healthy on a budget.
Why This Plastic Bottle Method Works So Well
Using plastic bottles to grow sprouts is efficient and beginner-friendly because it mimics ideal sprouting conditions — moist, dark, and well-drained.
Here’s why this method succeeds:

- Controlled environment: The bottle holds just the right amount of humidity.
- Simple drainage: The holes prevent waterlogging and mold.
- Space-saving design: Perfect for urban or indoor gardening.
- Recycling benefit: Reduces plastic waste and promotes sustainability.
It’s a great example of how small, eco-friendly steps can lead to healthier lifestyles.
Eco-Friendly Gardening for Beginners
Even if you’ve never grown anything before, sprouting beans in bottles is a great way to start sustainable gardening. You don’t need land, pots, or tools — just creativity and consistency.
This method teaches the basics of plant life cycles, water management, and food sustainability. Once you’ve mastered sprouts, you can easily move on to growing herbs, microgreens, or small vegetables in containers.
It’s the perfect gateway into home gardening — affordable, fast, and educational!
Tips and Tricks for Success
- Always rinse twice daily to keep sprouts clean and mold-free.
- Keep bottles in a dark, cool spot — light makes them bitter.
- Don’t overcrowd the bottle — beans need space to expand.
- If sprouts smell off, discard immediately and start fresh.
- Use organic, untreated seeds — they germinate better and are safe to eat.
- You can reuse bottles — just wash and sterilize before each new batch.
Final Thoughts
Starting your gardening journey doesn’t have to be expensive or complicated. Growing bean sprouts in plastic bottles is one of the simplest, healthiest, and most satisfying ways to produce your own food — right from your kitchen.
In less than a week, you can go from dry beans to crisp, nutritious sprouts bursting with life and flavor. It’s cheap, delicious, and perfect for beginners who want to experience the magic of growing food at home.

So next time you’re about to throw away a plastic bottle — save it, rinse it, and start growing your first batch of bean sprouts!
Your journey to greener living and healthier eating can start with this one small, eco-friendly step.
Leave A Comment