How to Grow Leeks from Seed in Containers: The Complete Easy Planting Guide

How to Grow Leeks from Seed in Containers: The Complete Easy Planting Guide

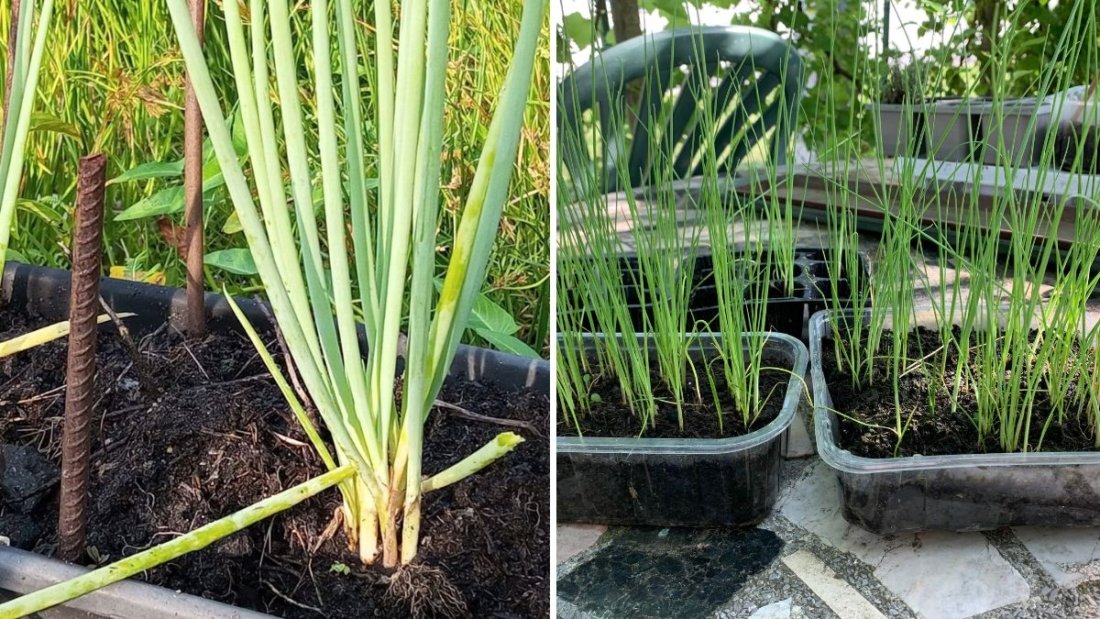
Leeks are a flavorful, elegant member of the onion family, beloved for their mild, sweet taste and their ability to elevate soups, stews, and other dishes. While many gardeners assume leeks require a large vegetable patch, the truth is—they grow beautifully in containers too! If you have limited space or just want to try a fun container gardening project, learning how to grow leeks from seed in containers is a rewarding experience that produces delicious results.

In this complete guide, you’ll learn everything you need to know about growing leeks from seed—from selecting the right variety and preparing your containers to watering, fertilizing, and harvesting your homegrown leeks with ease.


Why Grow Leeks at Home?
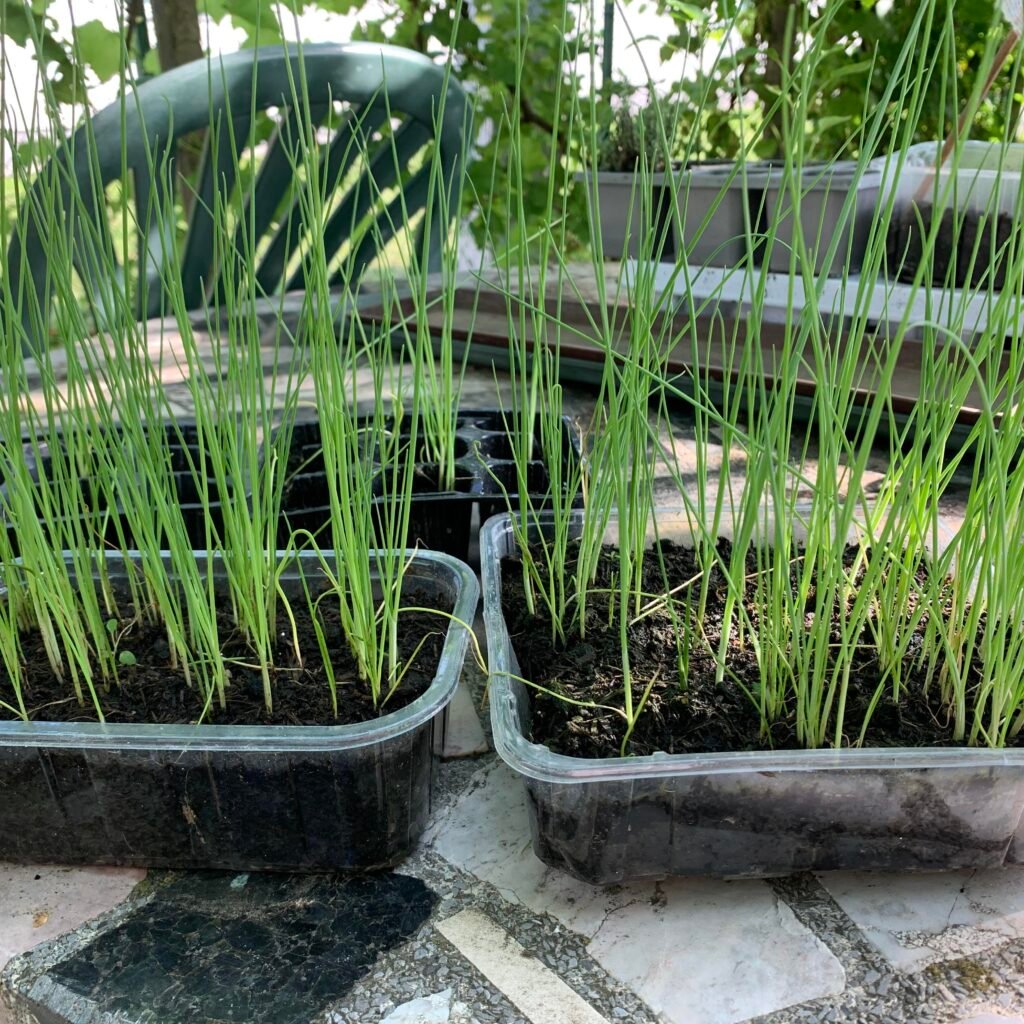
Leeks are an underrated vegetable that deserve more love in home gardens. Closely related to onions and garlic, they have a unique, delicate flavor that’s sweeter and milder—making them perfect for soups, stir-fries, casseroles, and more.

Here’s why you should consider growing leeks:

  • Compact and container-friendly: Perfect for small gardens, patios, or balconies.
  • Long harvesting window: Once mature, leeks can stay in the soil for weeks without losing quality.
  • Cold-hardy: Leeks thrive in cooler weather and can even withstand mild frost.
  • Nutrient-rich: They’re loaded with vitamin K, folate, manganese, and antioxidants.

Whether you’re a beginner gardener or a seasoned grower, leeks are an easy and rewarding crop to add to your collection.


Step 1: Choose the Right Leek Variety
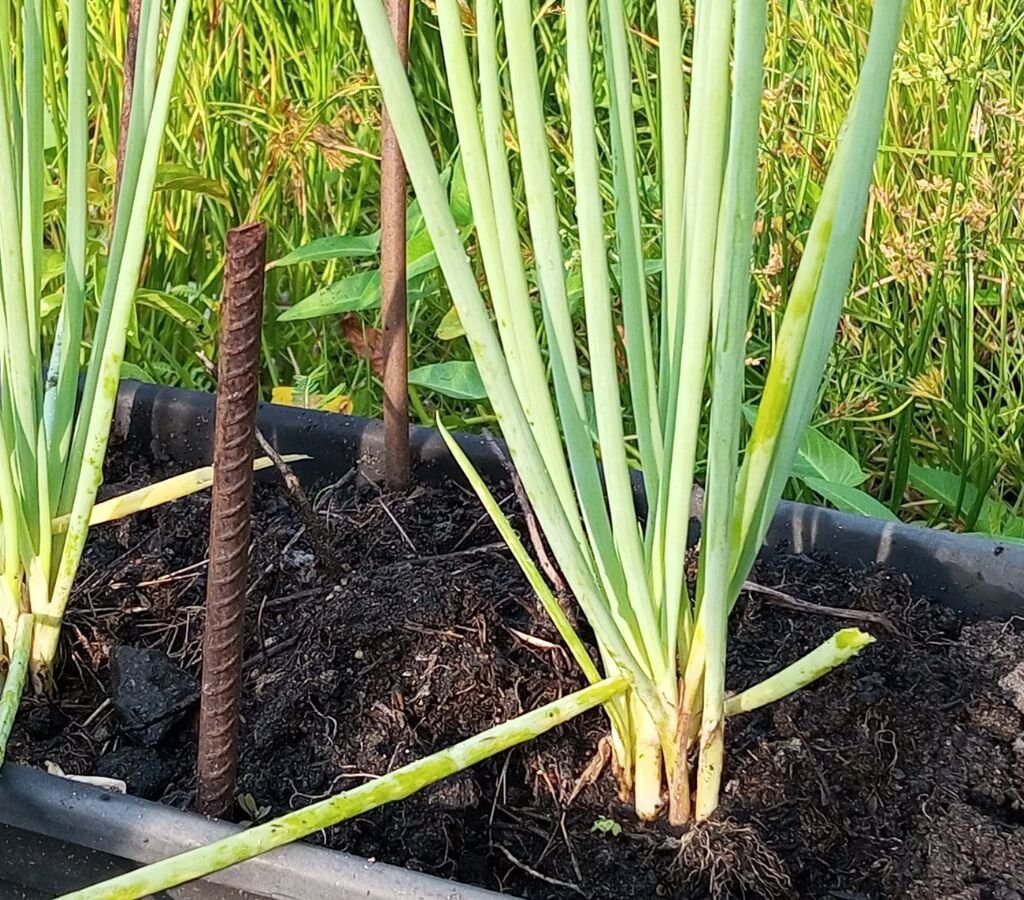
Before sowing, pick a variety that suits your climate and container setup. There are two main types of leeks—summer leeks (fast-maturing and tender) and winter leeks (hardier and slower-growing).

Here are some popular varieties to consider:

  • ‘King Richard’ – A fast-growing summer leek that matures in about 75 days; ideal for containers.
  • ‘Lancelot’ – Uniform, straight leeks that resist disease and grow well in smaller spaces.
  • ‘Blue Solaise’ – A hardy winter leek with bluish-green leaves, perfect for cooler climates.
  • ‘Tadorna’ – A reliable all-season variety that produces flavorful, uniform stems.

If you’re growing leeks in containers, choose early-maturing or compact types for best results.


Step 2: Prepare Containers and Soil

Leeks develop long, straight shanks (the edible stem), so they need enough depth for roots to spread and stems to elongate.

Container Requirements:

  • Depth: At least 10–12 inches deep (deeper is better).
  • Width: 10–12 inches per leek plant or grow multiple plants in a long rectangular planter.
  • Drainage: Ensure the container has drainage holes to prevent waterlogging.

Soil Preparation:

Leeks prefer rich, loose, and well-draining soil. Compact or heavy clay soil can restrict growth.

  • Use a mix of:
    • 60% high-quality potting soil
    • 30% well-rotted compost
    • 10% perlite or coarse sand for drainage
  • Mix in a handful of organic fertilizer or a slow-release vegetable blend before sowing.

A soil pH between 6.0 and 7.0 is ideal for leeks.


Step 3: Sowing Leek Seeds
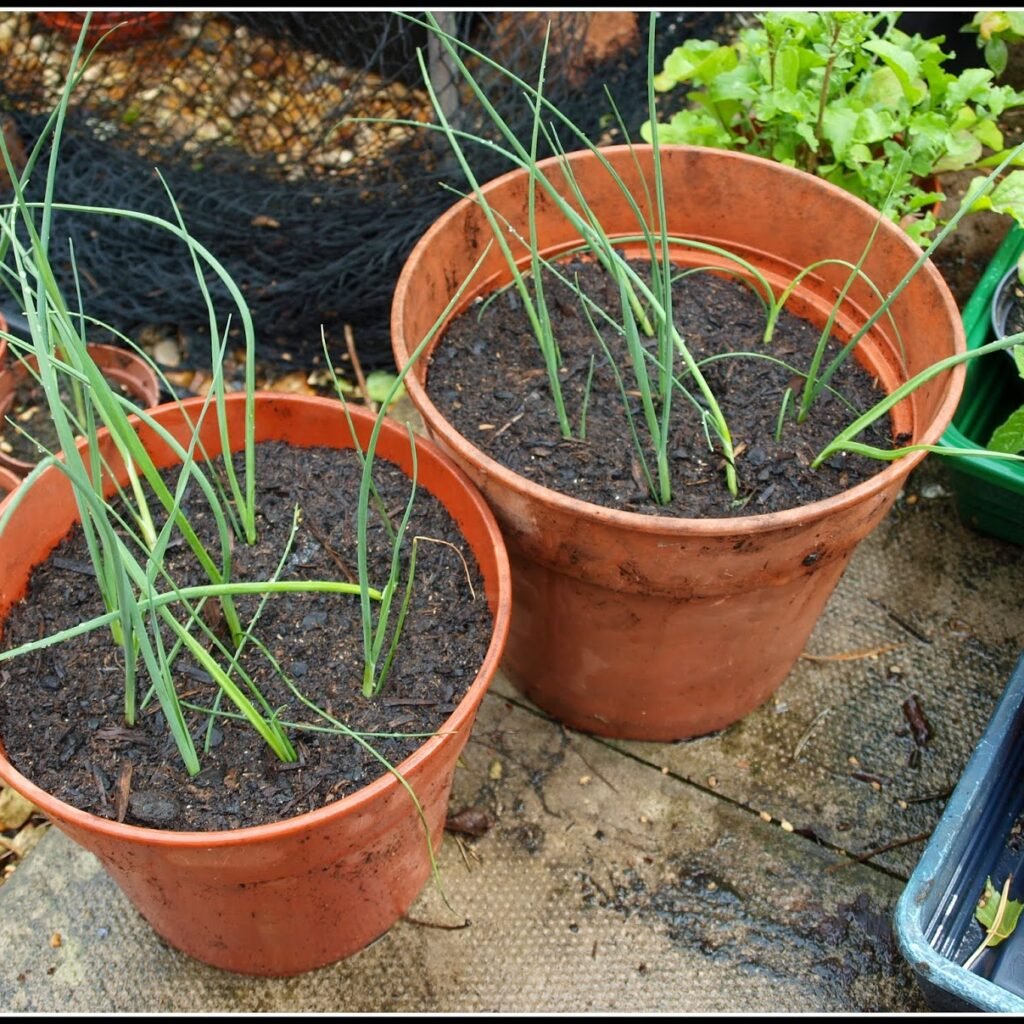
Leeks can be started indoors or directly sown into containers. Starting seeds indoors allows you to get a head start before the growing season begins.

Starting Seeds Indoors:

  1. Fill seed trays or small pots with seed-starting mix.
  2. Sow seeds about ¼ inch deep, spacing them about 1 inch apart.
  3. Mist the soil gently and cover the tray with plastic wrap or a humidity dome to retain moisture.
  4. Place trays in a warm, bright spot (ideally 65–75°F / 18–24°C).
  5. Germination takes about 10–14 days.
  6. Once seedlings reach 6–8 inches tall, they’re ready for transplanting into containers.

Direct Sowing in Containers:

  • Sow seeds directly in your prepared container once temperatures stay above 50°F (10°C).
  • Scatter seeds thinly and cover lightly with soil.
  • Keep soil moist but not soggy.
  • Thin seedlings to about 4–6 inches apart once they reach 3–4 inches tall.

Step 4: Transplanting Leek Seedlings
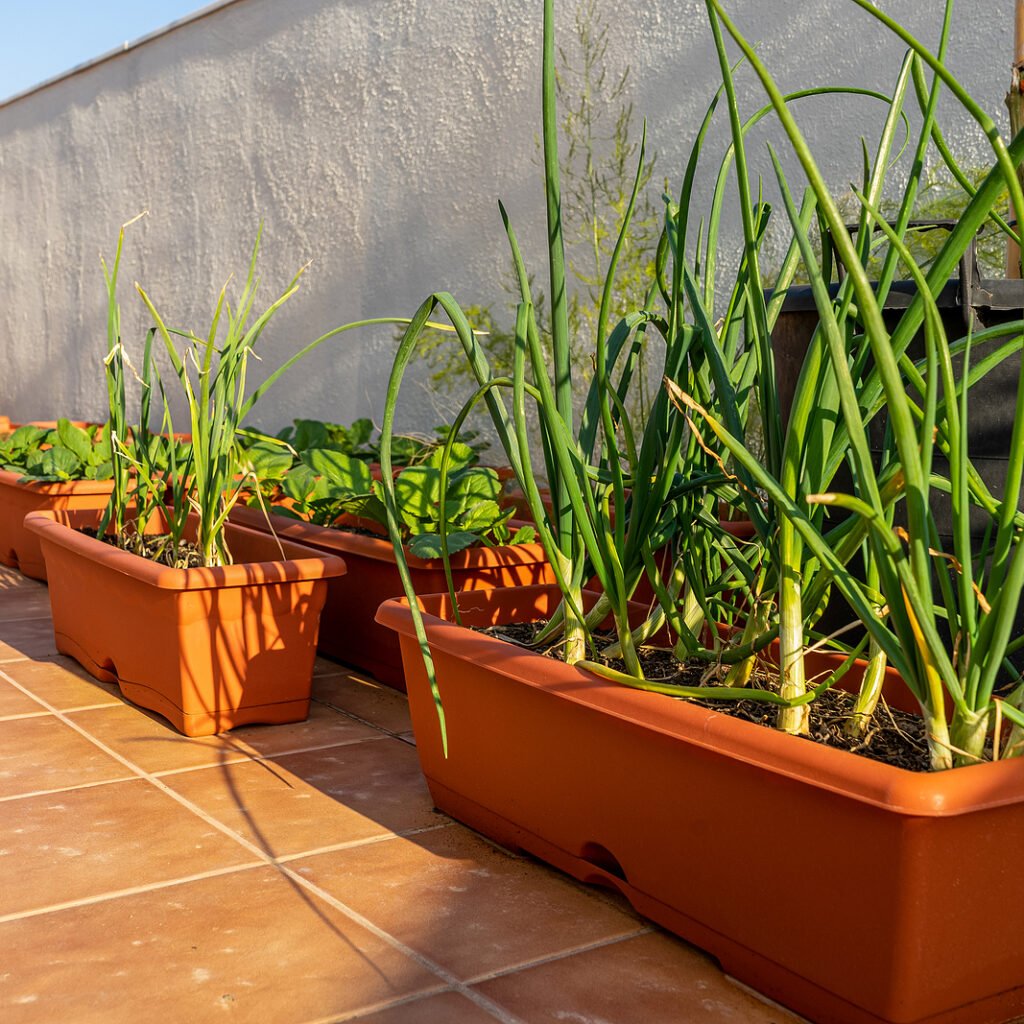
If you started leeks indoors, they’ll need to be transplanted into their final container once they’re strong enough.

Here’s how to do it:

  1. Fill your container with soil, leaving room at the top for planting holes.
  2. Use a stick or dibber to make holes about 6 inches deep.
  3. Trim leek roots to about 1 inch long and cut the top leaves back by one-third (this helps them establish better).
  4. Place each seedling into a hole and gently fill it with soil or water.
    • Don’t press soil tightly—leeks like loose soil around their stems to encourage long, white shanks.
  5. Space plants 4–6 inches apart in rows or clusters.

Step 5: Watering and Feeding
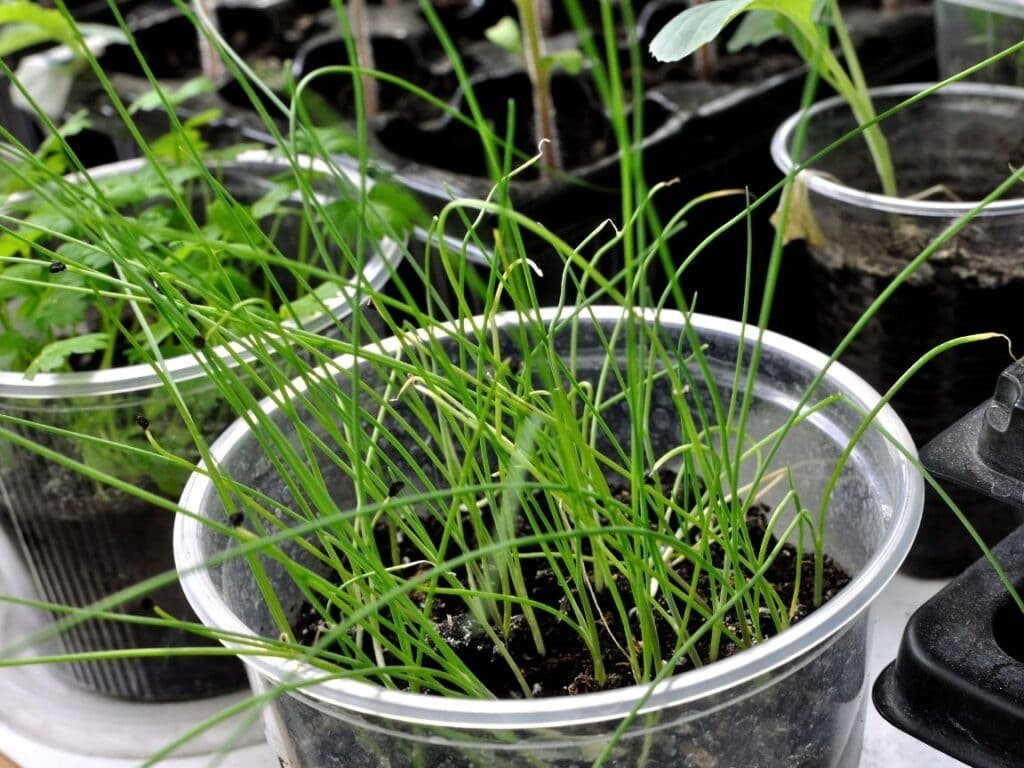
Leeks prefer consistent moisture, so regular watering is crucial.

  • Keep the soil evenly moist but not waterlogged.
  • Water deeply once or twice a week, depending on weather conditions.
  • Avoid letting the soil dry out completely, especially during hot spells.

For feeding:

  • Every 2–3 weeks, apply a balanced liquid fertilizer or compost tea.
  • Alternatively, top-dress with compost every month to replenish nutrients.

Container-grown leeks need more frequent feeding since nutrients leach out faster than in-ground gardens.


Step 6: Blanching the Leeks (Optional for White Stems)

Blanching leeks means covering part of the stem to exclude sunlight, resulting in long, tender, white shanks—the most desirable part of the plant.

In containers, this is easy to do:

  • As leeks grow, gradually mound up soil or compost around the stems every few weeks.
  • Alternatively, use toilet paper rolls or PVC tubes around each leek to block sunlight from the base.

Be careful not to bury the growing leaves, just the lower stem portion.


Step 7: Care and Maintenance

Light:

Leeks need at least 6 hours of sunlight daily. In very hot regions, light afternoon shade can prevent stress.

Temperature:

They thrive in cool weather (ideal range 55–75°F / 13–24°C). In warmer climates, grow leeks during fall and winter months.

Pests and Diseases:

Watch out for:

  • Onion flies – Use fine mesh netting or companion plant with carrots.
  • Thrips – Spray with neem oil or insecticidal soap.
  • Rust or mildew – Ensure good air circulation and avoid overhead watering.

Regularly remove yellowing leaves and keep the area weed-free.


Step 8: Harvesting Leeks

Leeks take about 100–120 days from sowing to maturity, depending on the variety. You can also harvest young, tender leeks earlier as “baby leeks.”

When to Harvest:

  • Stems should be about 1–2 inches thick for mature leeks.
  • Use a trowel or gently twist and pull them from the soil.
  • Avoid damaging neighboring plants.

Harvesting Tip:

If you planted leeks at different times, you can enjoy a continuous harvest throughout the season.

Storage:

  • Fresh leeks can be stored in the refrigerator for up to two weeks.
  • For longer storage, trim, blanch, and freeze them for soups or stir-fries later.

Step 9: Companion Planting for Leeks

Leeks grow well alongside several garden vegetables and herbs that help deter pests or enhance growth.

Good companions:

  • Carrots (mutually repel pests)
  • Celery
  • Beets
  • Cabbage family (like kale and broccoli)

Avoid planting with:

  • Onions and garlic (they compete for nutrients and attract similar pests).

Step 10: Common Problems and Quick Fixes

ProblemPossible CauseSolution
Thin or weak stemsCrowding or lack of nutrientsThin plants properly; fertilize regularly
Yellowing leavesOverwatering or poor drainageImprove drainage and reduce watering frequency
Stunted growthPoor soil fertilityAdd compost or a balanced organic fertilizer
Rust spotsHumid conditionsProvide good airflow and avoid wetting leaves

Bonus: Growing Leeks Year-Round

In mild climates, leeks can be grown nearly year-round.

  • Spring/Summer sowing: Ideal for early harvests.
  • Fall sowing: Produces hardy winter leeks that can tolerate frost.
  • In colder regions, use row covers or mini greenhouses to extend the growing season.

For continuous supply, sow seeds every 3–4 weeks.


Final Thoughts

Learning how to grow leeks from seed in containers is a simple yet rewarding way to enjoy this gourmet vegetable at home. With just a bit of patience and consistent care, you can produce tall, crisp, and flavorful leeks that enhance your home-cooked meals and add elegance to your garden.

Whether you’re gardening on a balcony, patio, or backyard, container-grown leeks prove that you don’t need much space to grow something extraordinary. From seed to harvest, this easy planting guide will help you achieve beautiful, delicious leeks that are fresher than anything you’ll find in stores.

So grab your seeds, fill your containers, and start your leek-growing adventure today—your homemade soups and stews will thank you!
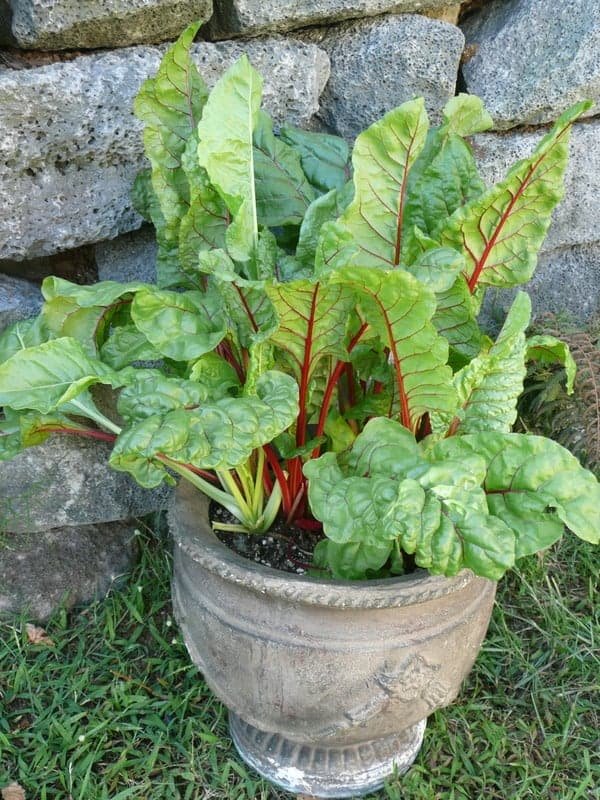
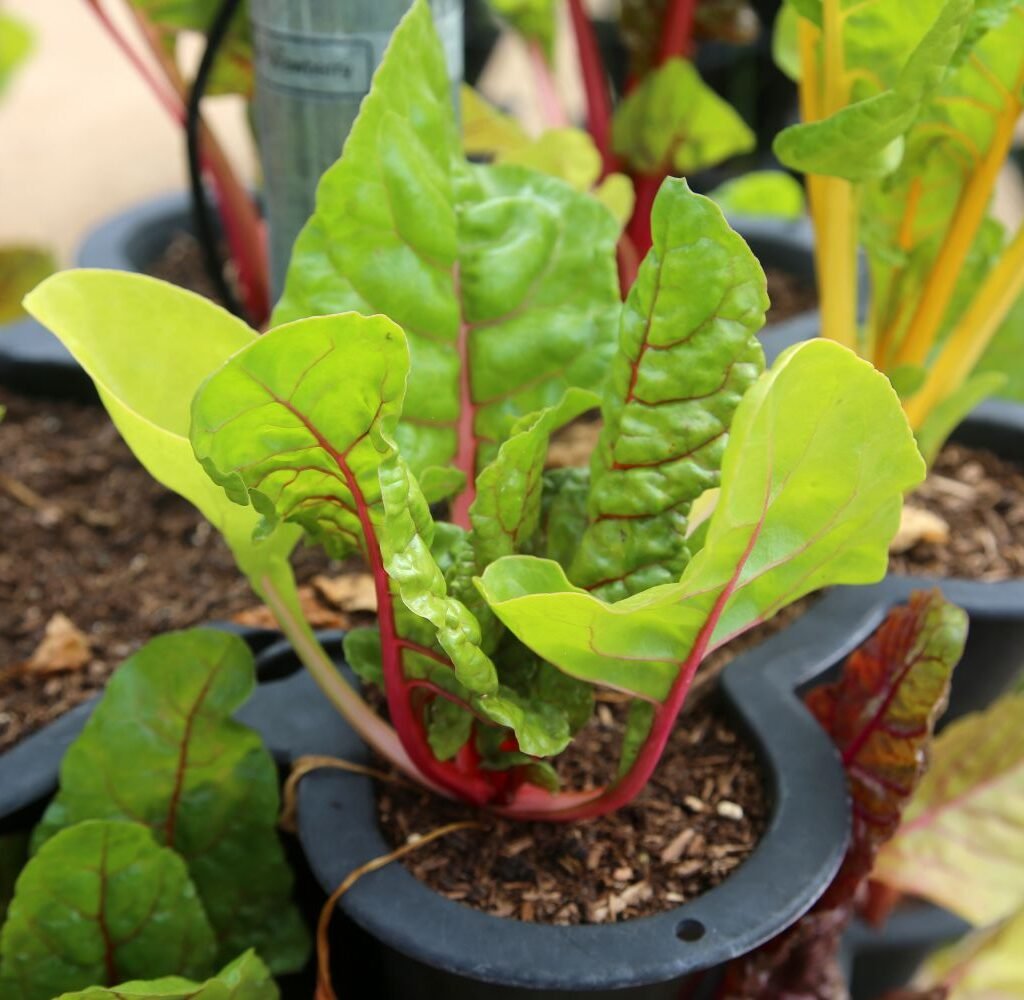
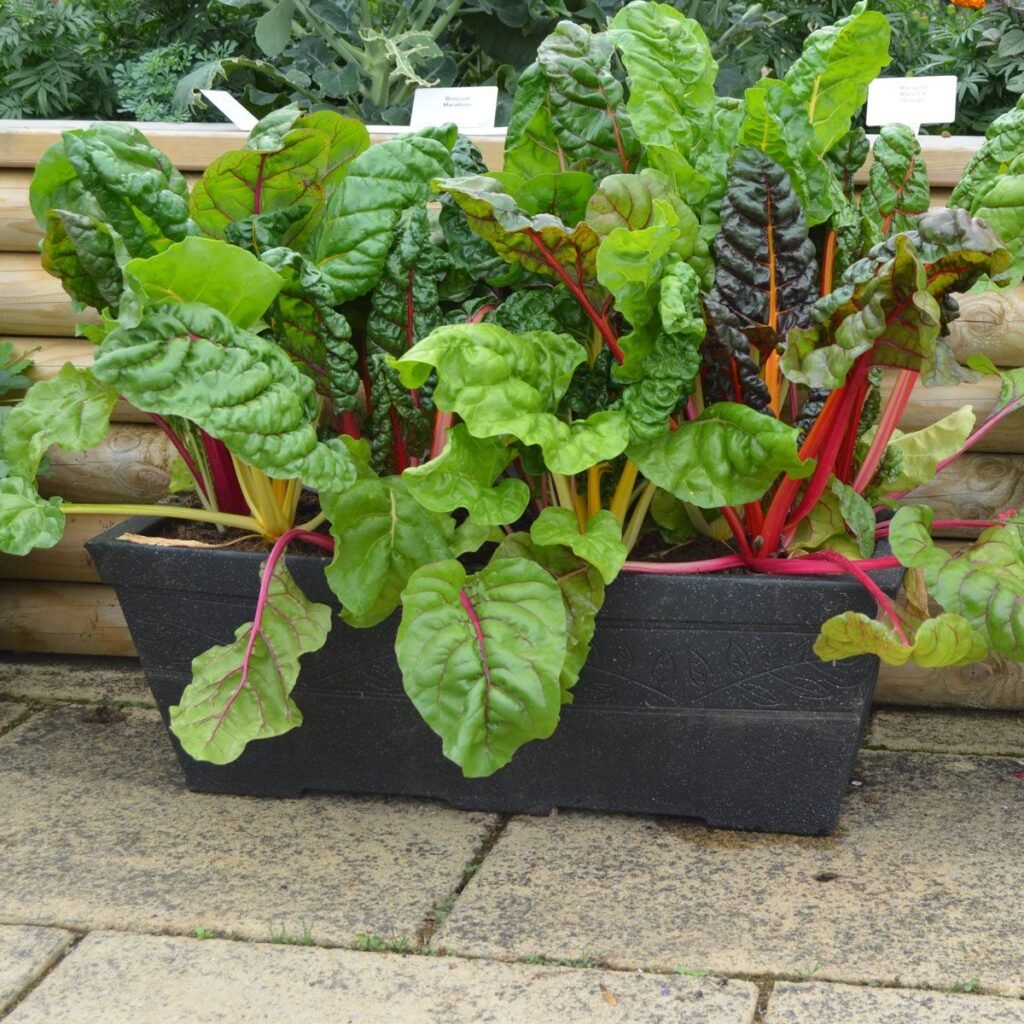
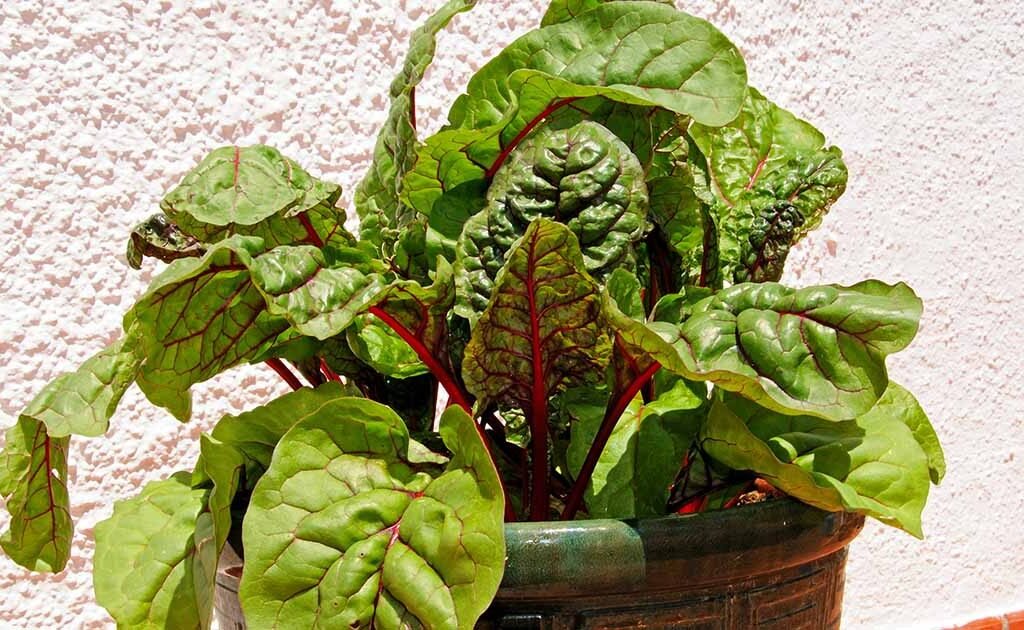
How to Grow Swiss Chard from Seed in Containers and Garden Beds: The Complete Easy Planting Guide

How to Grow Swiss Chard from Seed in Containers and Garden Beds: The Complete Easy Planting Guide

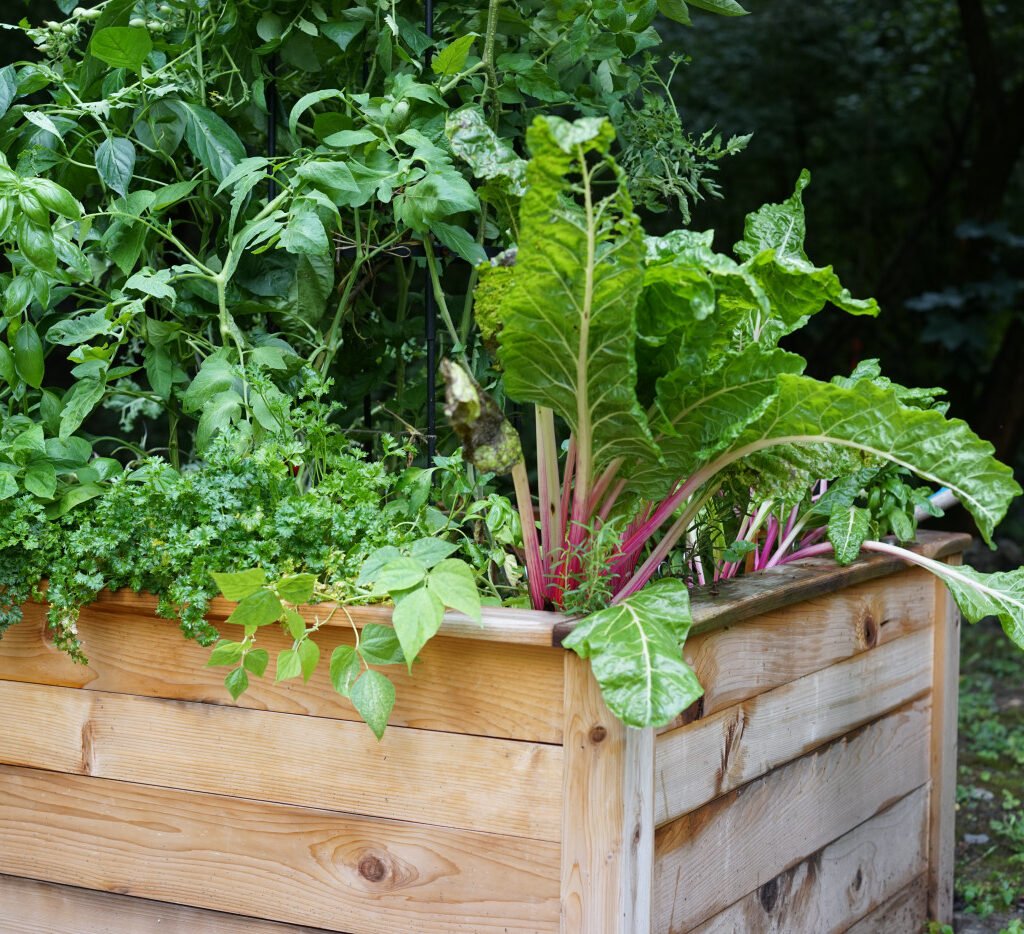
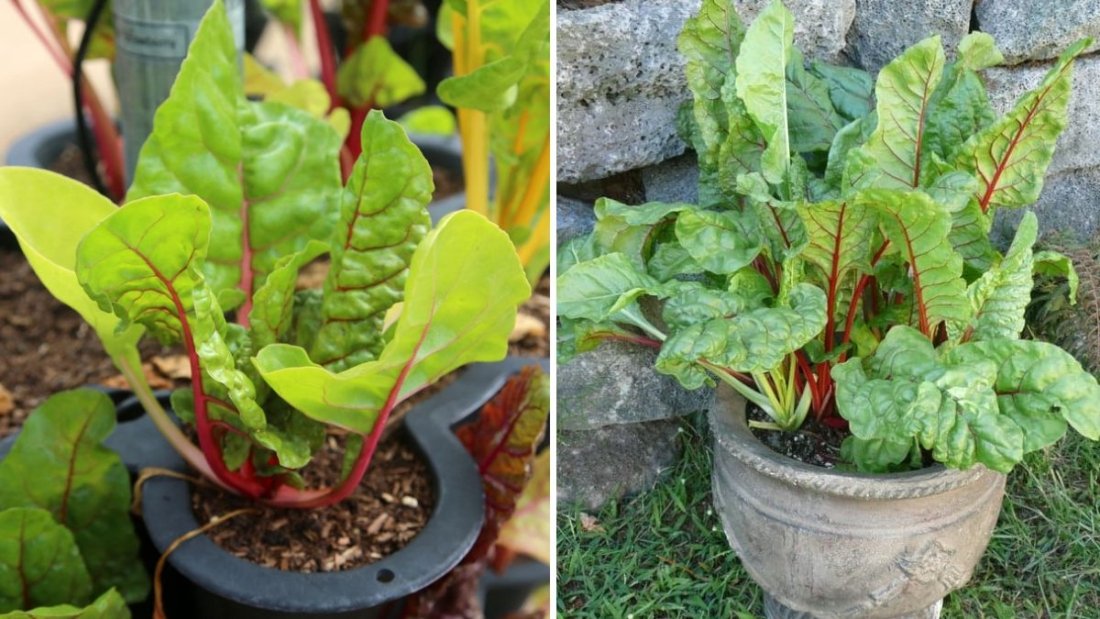
Swiss chard, also known as silverbeet or leaf beet, is a versatile leafy green that’s both beautiful and nutritious. With its glossy, colorful stalks and vibrant leaves, this plant is a showstopper in any garden — and the best part? It’s incredibly easy to grow! Whether you have a sprawling garden bed or just a few containers on your balcony, you can successfully grow Swiss chard from seed and enjoy months of fresh, healthy greens.

In this easy planting guide, you’ll learn everything you need to know about growing Swiss chard from seed — from preparing your soil and choosing containers to harvesting your first crisp, delicious leaves.


Why Grow Swiss Chard?

Swiss chard is one of the most rewarding leafy greens to grow for both beginners and experienced gardeners. It’s a hardy crop that thrives in a range of climates and soil types, and it’s remarkably low-maintenance. Unlike spinach, which tends to bolt in warm weather, Swiss chard can grow year-round in mild climates.

Here are a few reasons why you should grow Swiss chard:

  • Fast-growing and long-lasting: Harvest within 6–8 weeks of sowing, and it continues producing for months.
  • Highly nutritious: Packed with vitamins A, C, and K, as well as magnesium and iron.
  • Visually appealing: The colorful stems (in varieties like Bright Lights or Rainbow Chard) add charm to any garden.
  • Heat-tolerant and cold-hardy: It can handle both spring and fall conditions, making it a versatile crop.

Step 1: Choose the Right Variety

There are several Swiss chard varieties, and your choice depends on personal preference and garden space. Here are some popular ones:

  • ‘Bright Lights’ – A mix of vibrant stems in red, yellow, orange, and pink; great for ornamental and edible use.
  • ‘Fordhook Giant’ – A traditional green chard with thick white stems; known for its productivity.
  • ‘Rhubarb Chard’ – Deep red stems and veins; slightly more flavorful with a striking appearance.

If you’re growing in containers, choose a compact variety like ‘Bright Lights’ that adapts well to limited space.


Step 2: Prepare Your Containers or Garden Beds

Swiss chard can thrive in both containers and traditional garden beds. The key is to provide rich, well-draining soil and sufficient space for root development.

For Containers:

  • Use pots or containers that are at least 10–12 inches deep and 10 inches wide per plant.
  • Make sure the containers have good drainage holes to prevent waterlogging.
  • Fill with a high-quality potting mix enriched with compost or organic matter.

For Garden Beds:

  • Choose a sunny location that receives at least 6 hours of sunlight daily.
  • Loosen the soil to about 8–10 inches deep, removing stones and debris.
  • Mix in well-rotted compost or aged manure to improve soil fertility and texture.

Swiss chard prefers a slightly acidic to neutral soil with a pH of 6.0–7.0.


Step 3: Sow the Seeds

Swiss chard seeds are clusters that may produce multiple seedlings, so thinning is essential later on.

Sowing Indoors (Optional):

  • Start seeds 3–4 weeks before the last frost date.
  • Sow seeds about ½ inch deep in seed trays filled with seed-starting mix.
  • Keep the soil moist and place trays in a warm location (around 70°F / 21°C).
  • Once seedlings have 2–3 true leaves, transplant them outdoors.

Sowing Directly Outdoors:

  • Wait until the soil temperature is above 50°F (10°C).
  • Sow seeds directly into containers or garden beds about ½ inch deep and 2 inches apart.
  • Cover lightly with soil and water gently.
  • Once seedlings emerge (in about 7–10 days), thin them to 6–12 inches apart, depending on the variety.

Step 4: Watering and Feeding

Swiss chard thrives in evenly moist soil.

  • Water regularly, especially during dry spells, but avoid overwatering. The goal is to keep the soil consistently moist but not soggy.
  • Mulching around the plants helps retain moisture and suppress weeds.
  • Feed your chard every 3–4 weeks with a balanced liquid fertilizer or compost tea to encourage lush growth.

For container plants, nutrients can wash out more quickly, so fertilize slightly more often (every 2–3 weeks).


Step 5: Caring for Your Swiss Chard

Swiss chard is quite resilient, but a little care will keep it thriving all season long.

1. Light:

Full sun is ideal, but Swiss chard can tolerate partial shade, especially in hot climates.

2. Temperature:

It grows best between 50°F and 75°F (10–24°C) but can handle light frosts. In very hot regions, provide some afternoon shade to prevent wilting.

3. Pests and Diseases:

Keep an eye out for common garden pests like aphids, leaf miners, and slugs.

  • Remove damaged leaves promptly.
  • Spray with neem oil or an organic insecticidal soap if infestations occur.
  • Avoid overhead watering to reduce fungal problems.

4. Mulching:

Add a 2-inch layer of organic mulch (like straw or shredded leaves) around your plants to maintain soil moisture and temperature.


Step 6: Harvesting Swiss Chard

One of the best things about Swiss chard is its “cut-and-come-again” nature — meaning you can harvest outer leaves while the plant keeps growing.

How to Harvest:

  • Begin harvesting about 6–8 weeks after sowing when leaves are 6–8 inches long.
  • Use sharp scissors or garden shears to cut the outer leaves at the base, leaving the inner leaves to mature.
  • Regular harvesting encourages continuous growth.

You can also harvest the entire plant by cutting it about 1 inch above the soil — it will regrow quickly for another round.

Tip:

For the most tender and flavorful leaves, pick them in the morning when they’re crisp and full of moisture.


Step 7: Using and Storing Swiss Chard

Swiss chard is incredibly versatile in the kitchen.

  • Use young leaves raw in salads or smoothies.
  • Sauté mature leaves with garlic and olive oil for a quick side dish.
  • Add them to soups, omelets, stir-fries, or pasta dishes.

To store, wash the leaves thoroughly, pat them dry, and keep them in a plastic bag in the refrigerator. They’ll stay fresh for about 3–5 days. For longer storage, blanch and freeze them.


Bonus: Companion Planting for Swiss Chard

Swiss chard gets along well with many garden vegetables. Companion planting helps deter pests and improve soil health.

  • Good companions: Carrots, onions, beans, cabbage, and radishes.
  • Avoid planting near: Corn and potatoes, as they compete for nutrients.

Step 8: Growing Swiss Chard Year-Round

In temperate climates, Swiss chard can be grown almost all year with a bit of planning.

  • In spring, sow seeds early for an early-summer harvest.
  • In fall, plant again for a cool-weather crop.
  • In warmer regions, grow it through winter using light frost protection or a simple row cover.

With staggered planting every 2–3 weeks, you can ensure a continuous harvest throughout the year.


Common Problems and Easy Fixes

ProblemLikely CauseQuick Solution
Yellowing leavesOverwatering or poor drainageImprove soil drainage; water only when topsoil is dry
Small or slow-growing leavesLack of nutrientsAdd compost or a balanced fertilizer
Holes in leavesPests (slugs, leaf miners)Use neem oil or remove affected leaves
Bolting (flowering early)Hot weather or stressProvide shade and consistent watering

Final Thoughts

Growing Swiss chard from seed in containers or garden beds is one of the easiest and most rewarding gardening projects you can try. With just a little care, you’ll enjoy months of fresh, nutritious greens that keep your kitchen stocked and your garden vibrant.

Whether you’re short on space or have a full backyard garden, Swiss chard adapts beautifully — proving that you don’t need to be an expert gardener to grow something truly amazing.

So grab some seeds, prepare your soil, and start planting today — your homegrown Swiss chard harvest is just a few weeks away!


How to Grow Mustard Greens From Seed: A Complete Guide to Growing Fresh, Flavorful Greens at Home

How to Grow Mustard Greens From Seed: A Complete Guide to Growing Fresh, Flavorful Greens at Home

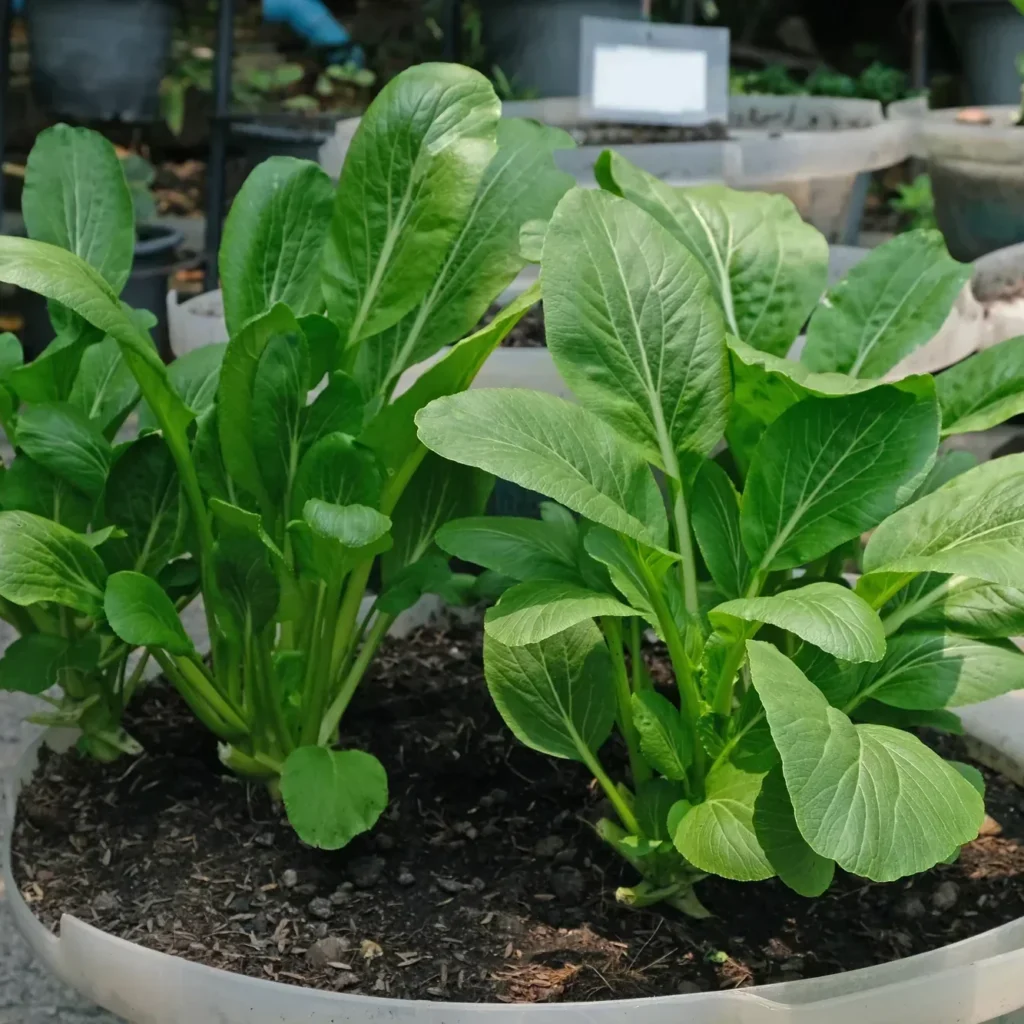
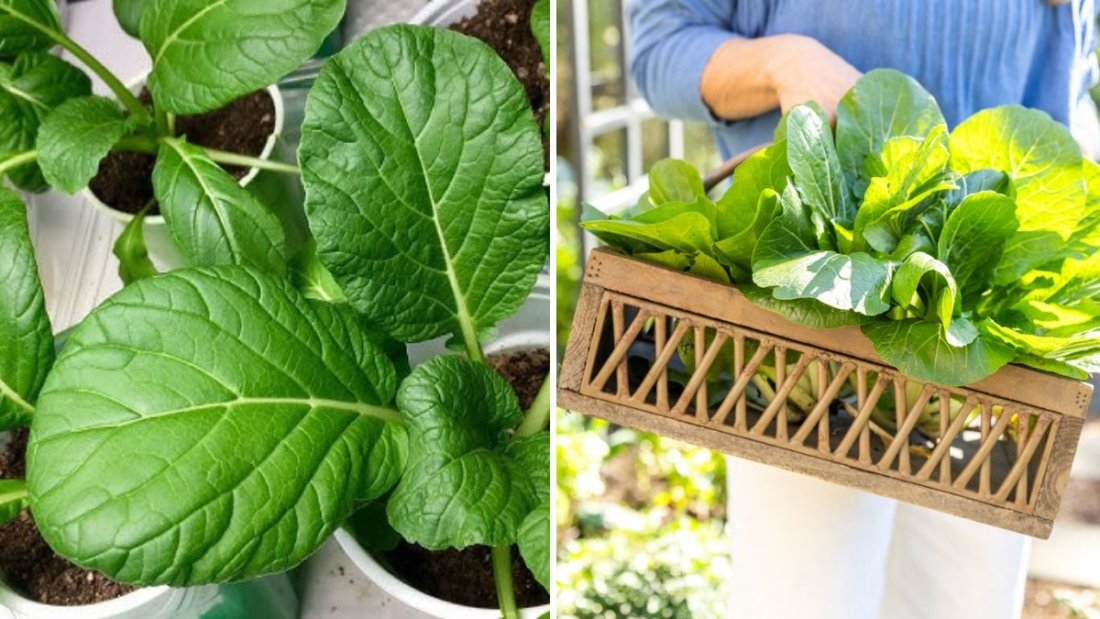
Mustard greens are among the easiest and most rewarding leafy vegetables you can grow at home. Known for their peppery flavor, quick growth, and impressive nutritional value, these greens thrive in both garden beds and containers. Whether you’re an experienced gardener or a beginner just starting out, growing mustard greens from seed offers a fast and satisfying harvest. In this guide, we’ll take you through every step — from selecting seeds and preparing soil to planting, caring, and harvesting your mustard greens for an endless supply of fresh leaves.


Why Grow Mustard Greens?

Mustard greens (Brassica juncea) are a powerhouse of nutrition, packed with vitamins A, C, and K, along with calcium and antioxidants. These leafy greens are also incredibly versatile — you can enjoy them in salads, stir-fries, soups, or as steamed greens.

One of the best things about mustard greens is how easy they are to grow. They germinate quickly, tolerate mild frost, and can be harvested multiple times throughout their growing season. With proper care, a single planting can provide you with weeks of delicious, tender greens.


Step 1: Choosing the Right Variety

Mustard greens come in many shapes, sizes, and flavors — from mild and tender to bold and spicy. Some popular varieties include:

  • Green Wave: A fast-growing, curly-leaved variety known for its strong flavor and heat tolerance.
  • Southern Giant Curled: Classic variety with large, frilly leaves and a bold taste.
  • Red Giant: Adds color and a milder, slightly sweet flavor to your dishes.
  • Florida Broadleaf: Smooth leaves, mild flavor, and great for cooler weather.

Choose a variety that suits your taste and growing conditions. If you’re new to mustard greens, start with Green Wave or Southern Giant Curled for reliable performance.


Step 2: Preparing the Soil

Mustard greens grow best in well-draining, fertile soil that’s rich in organic matter. The ideal soil pH is between 6.0 and 7.5.

Before planting:

  1. Loosen the soil to a depth of about 10–12 inches.
  2. Incorporate compost or well-rotted manure to boost fertility.
  3. Avoid compacted or waterlogged soil — mustard greens prefer consistent moisture but not standing water.

If you’re growing in containers, choose a pot at least 12 inches deep and fill it with a high-quality vegetable potting mix enriched with compost.


Step 3: Planting Mustard Greens from Seed

Mustard greens grow best in cool weather, making them perfect for spring or fall planting.

  • Timing:
    • Spring: Sow seeds 3–4 weeks before the last expected frost date.
    • Fall: Sow seeds 6–8 weeks before the first expected frost.
  • Planting depth: Sow seeds ¼ to ½ inch deep.
  • Spacing:
    • For baby greens: Space seeds about 2 inches apart.
    • For mature leaves: Space plants 6–8 inches apart.

Cover seeds lightly with soil and water gently. Seeds usually germinate within 4–7 days when the temperature is between 50°F and 75°F (10°C–24°C).


Step 4: Watering and Light Requirements

Mustard greens thrive with consistent moisture. Keep the soil evenly moist but not soggy. Uneven watering can lead to bitter-tasting leaves or early bolting (flowering).

  • Water deeply once or twice a week, depending on weather conditions.
  • Mulch around the plants with straw or leaves to help retain soil moisture and control weeds.
  • Mustard greens love full sun, but they’ll also tolerate partial shade — especially helpful in warmer climates to prevent bolting.

Step 5: Fertilizing for Healthy Growth

Mustard greens are moderate feeders. Adding compost at planting time usually provides enough nutrients for good growth, but you can boost their performance with a balanced fertilizer.

  • Apply a nitrogen-rich organic fertilizer (like fish emulsion or compost tea) every 3–4 weeks to encourage lush, leafy growth.
  • Avoid over-fertilizing, as this can cause excessive leaf growth and reduce flavor intensity.

Step 6: Managing Pests and Diseases

Like other leafy greens, mustard plants can attract a few common pests. Keep an eye out for:

  • Aphids: These tiny insects can cluster on leaves; rinse them off with a strong water spray or use neem oil.
  • Flea beetles: Small black beetles that create tiny holes in leaves. Floating row covers can protect young plants.
  • Cabbage worms: Green caterpillars that chew through leaves. Handpick them or use organic insecticidal soap.

Practicing crop rotation and avoiding overhead watering helps prevent diseases like downy mildew and leaf spot.


Step 7: Thinning and Maintenance

Once seedlings reach about 3 inches tall, thin them to allow proper air circulation and room for growth. The thinned seedlings can be used as microgreens — tender and packed with flavor.

Keep your garden bed weed-free, as weeds compete for nutrients and moisture. Lightly cultivate the soil around the plants to avoid damaging the shallow roots.


Step 8: Harvesting Mustard Greens

Mustard greens grow quickly — you can start harvesting as soon as 3 to 4 weeks after planting for baby greens and 6 to 8 weeks for mature leaves.

  • For baby greens: Cut outer leaves when they’re about 3–5 inches long.
  • For full-sized greens: Harvest larger leaves first, allowing inner ones to continue growing.
  • Always harvest in the cool morning hours to ensure crisp, tender leaves.

Regular harvesting encourages new growth, extending your harvest season.


Step 9: How to Have a Continuous Supply

To enjoy mustard greens for months, use succession planting. Sow new seeds every 2 to 3 weeks during the growing season. This ensures you always have fresh greens ready to pick.

In warm regions, mustard greens can bolt quickly when temperatures rise. To prolong the season:

  • Provide partial shade using garden fabric.
  • Keep the soil consistently moist.
  • Choose bolt-resistant varieties like Red Giant.

Step 10: Storing and Using Mustard Greens

Freshly harvested mustard greens can be stored in the refrigerator for up to a week. Wash them thoroughly and pat dry before storing them in a perforated plastic bag.

You can also blanch and freeze the leaves for long-term storage:

  1. Blanch in boiling water for 2 minutes.
  2. Cool immediately in ice water.
  3. Drain and pack into freezer-safe bags.

These greens are perfect in soups, stews, stir-fries, or simply sautéed with garlic and olive oil. Their slightly spicy kick adds a burst of flavor to any dish.


Bonus: Collecting Seeds for Next Season

If you’d like to save your own seeds, let a few mustard plants bolt and produce seed pods. Once the pods turn brown and dry, collect them and remove the seeds. Store seeds in a cool, dry place for up to three years.

This not only saves money but also helps you maintain a cycle of homegrown greens year after year.


Final Thoughts

Growing mustard greens from seed is an easy and rewarding way to fill your garden — and your kitchen — with fresh, nutritious greens. With minimal effort, you can enjoy multiple harvests throughout the year, especially in cooler months. Whether you prefer them raw in salads, lightly steamed, or stir-fried, mustard greens are a versatile addition to any home garden.

By following these simple steps — from choosing the right variety to harvesting regularly — you’ll soon have a vibrant patch of mustard greens ready to enjoy. So grab your seeds, prepare your soil, and start growing your own flavorful greens today!

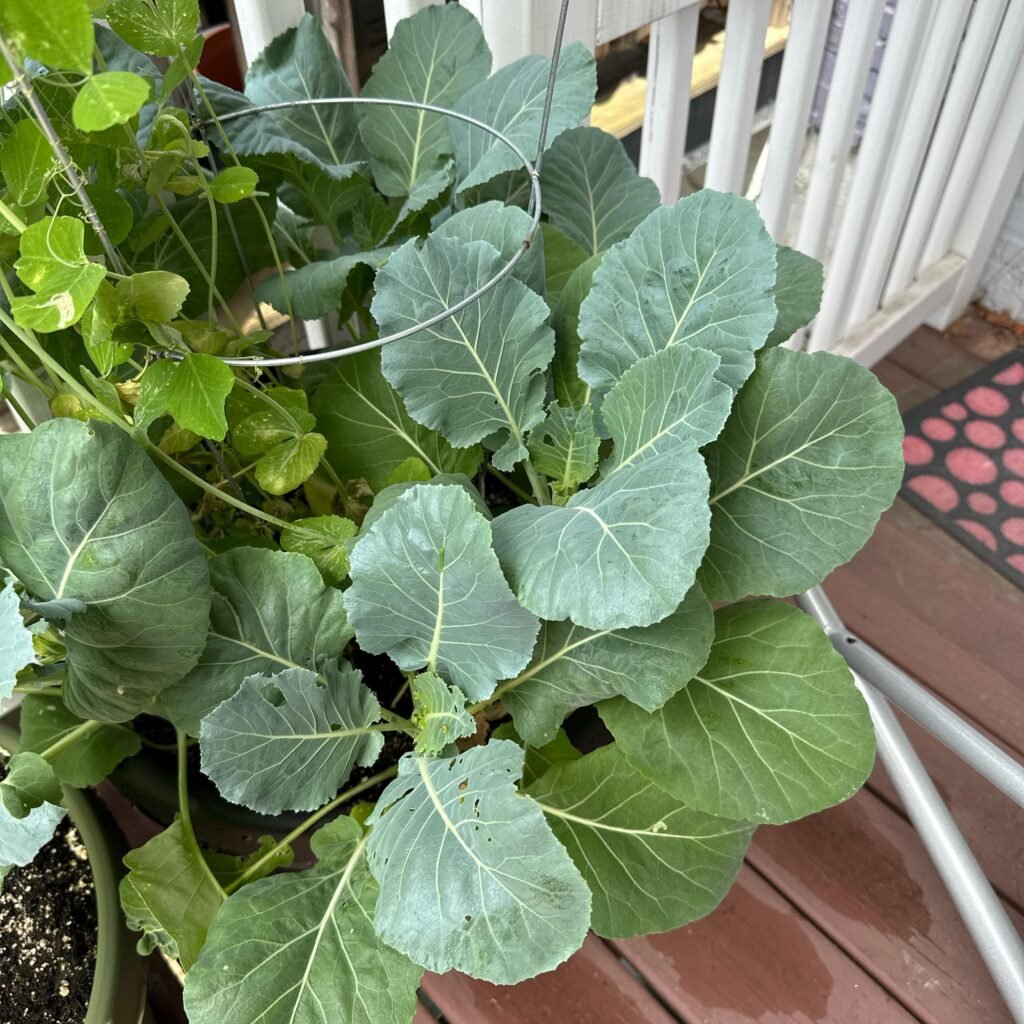
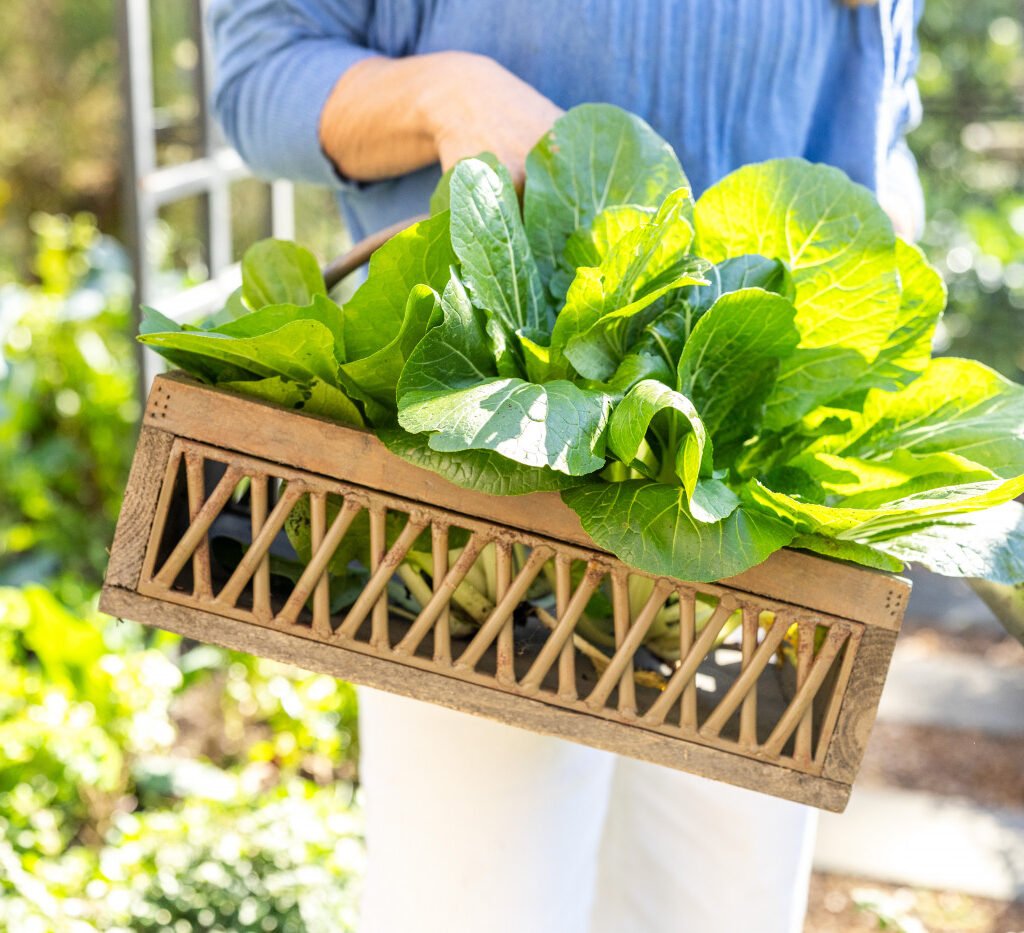
How to Have an Endless Harvest with Collard Greens: The Complete Guide to Growing, Caring, and Harvesting

How to Have an Endless Harvest with Collard Greens: The Complete Guide to Growing, Caring, and Harvesting

Imagine walking into your garden any time of the year and picking fresh, healthy, vibrant greens — that’s exactly what you get with collard greens. Known for their resilience, rich nutrition, and continuous productivity, collard greens are among the easiest leafy vegetables to grow for a nearly endless harvest.

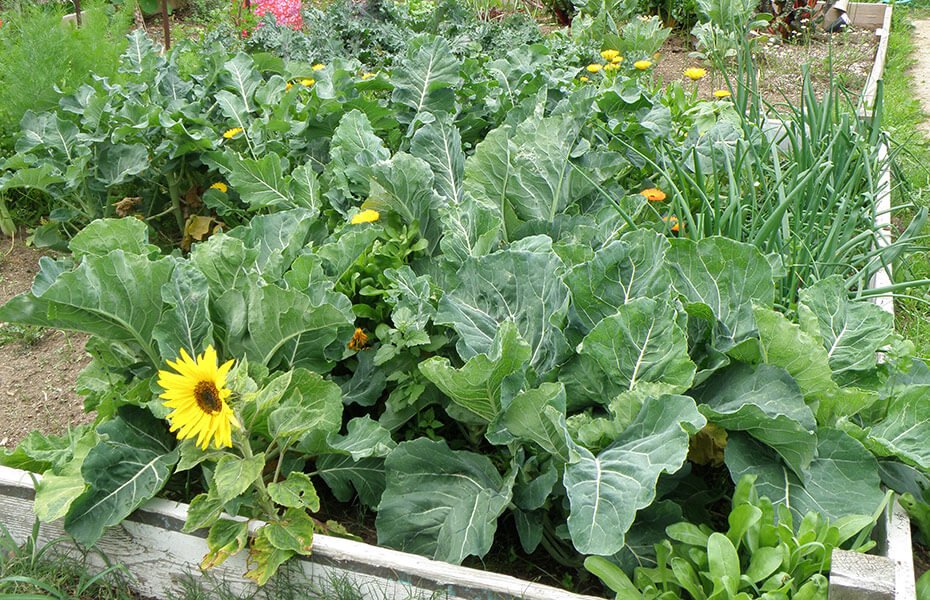
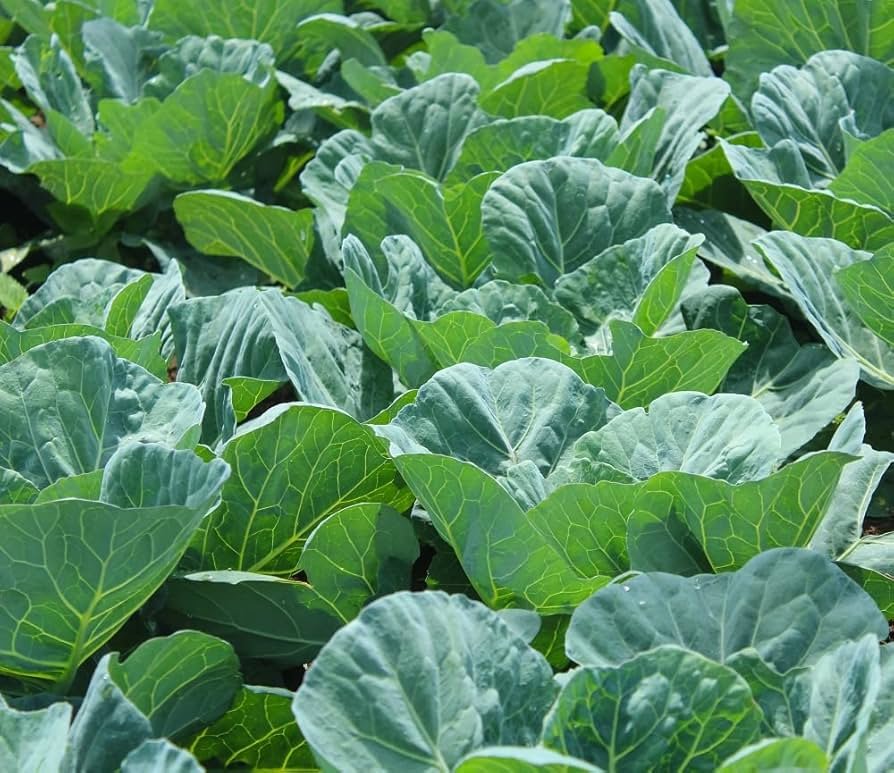
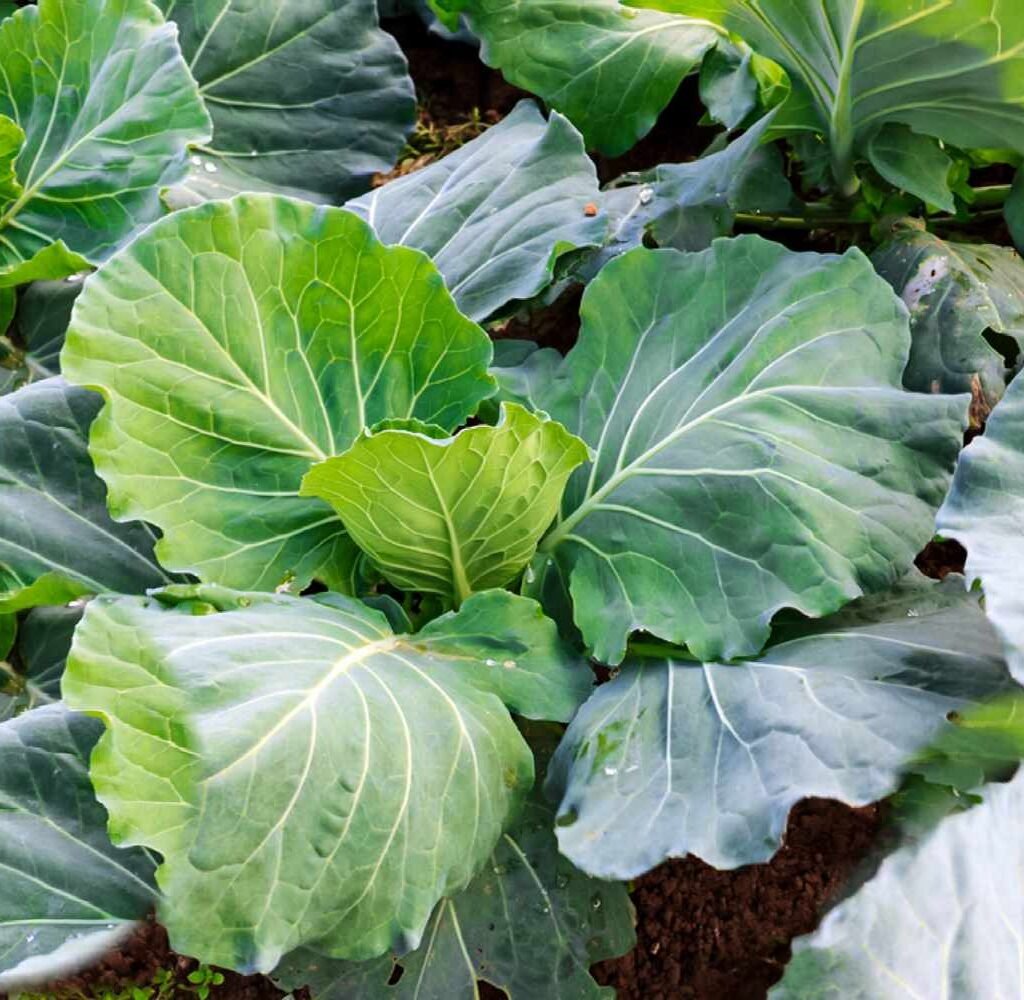
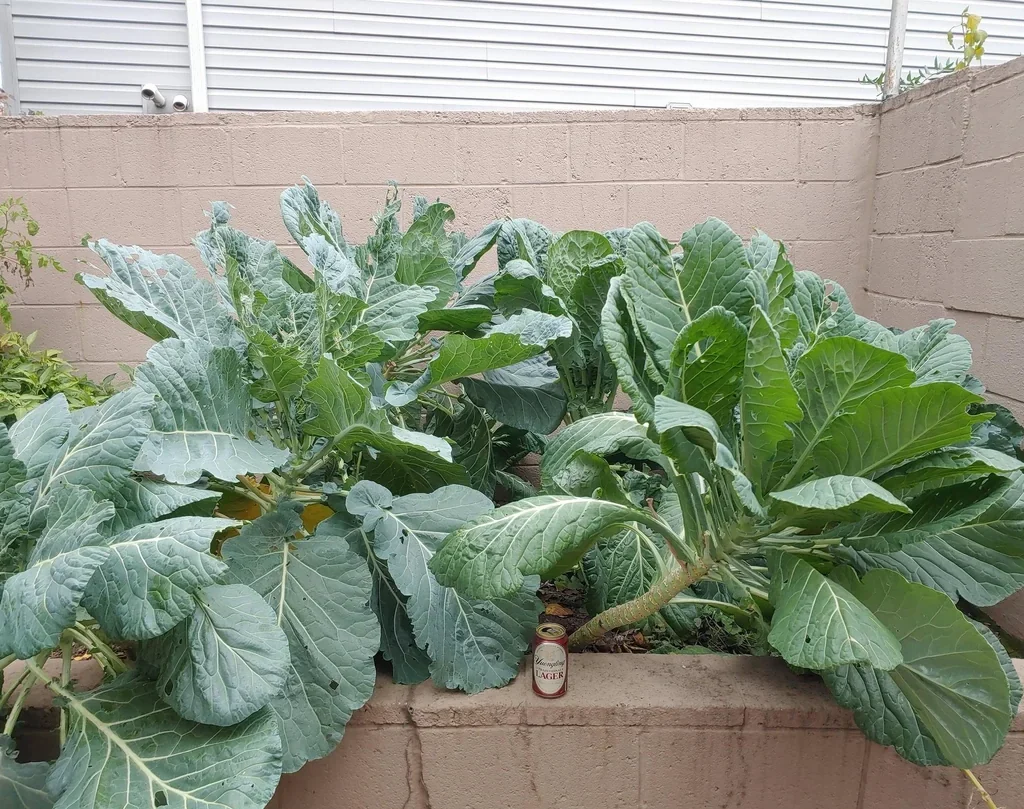
In this complete guide, inspired by the video “How To Have An Endless Harvest With Collard Greens”, we’ll explore how to grow collard greens step-by-step — from planting and caring for them to harvesting properly so they keep producing for months. Whether you’re growing in a backyard garden, raised bed, or even containers, you’ll learn how to make your collards thrive year-round with minimal effort.


Why Collard Greens Are Perfect for an Endless Harvest

Collard greens (Brassica oleracea var. viridis) belong to the same family as cabbage, kale, and broccoli. What makes them stand out is their cut-and-come-again nature. This means you can harvest leaves continuously without killing the plant.

Here’s why collard greens are ideal for endless harvesting:

  1. Perennial-Like Growth:
    In mild climates, collard greens can live and produce for multiple years, acting almost like a perennial crop.
  2. Fast and Continuous Production:
    Once mature, collards quickly replace harvested leaves with new growth, ensuring a steady supply.
  3. Low Maintenance:
    These hardy greens tolerate heat, mild frost, and even neglect better than many other leafy vegetables.
  4. Nutrient-Dense:
    Packed with vitamins A, C, and K, calcium, and antioxidants, collard greens are one of the healthiest greens you can eat.
  5. Pest Resistant and Adaptable:
    They resist many common garden pests and thrive in diverse conditions — from garden beds to pots.

With the right growing and harvesting methods, you can enjoy fresh collard greens all year long.


Choosing the Right Variety

Before you plant, it’s helpful to pick the right variety suited for your climate and preferences. Some popular and high-yielding options include:

  • Georgia Southern: A classic variety known for large, tender leaves and heat tolerance.
  • Morris Heading: Compact plants with slightly wrinkled, flavorful leaves.
  • Vates: Cold-hardy and excellent for overwintering in cooler climates.
  • Champion: Great disease resistance and dense leaf growth.
  • Tiger Hybrid: Fast-growing and resistant to bolting in warm weather.

Each of these varieties offers long harvesting potential, but if you’re aiming for year-round greens, Georgia Southern and Vates are top choices.


Preparing the Soil

Collard greens grow best in rich, well-draining soil full of organic matter. To prepare your garden bed or containers:

  1. Choose the Location:
    Select a spot that receives 6–8 hours of sunlight daily. Collards tolerate partial shade but grow best in full sun.
  2. Soil Type:
    • Ideal pH: 6.0–7.5
    • Mix compost, aged manure, or organic fertilizer into the soil before planting.
  3. Drainage:
    Avoid waterlogged areas. Good drainage is key to preventing root rot and diseases.
  4. Raised Beds or Containers:
    • Raised beds improve drainage and soil quality.
    • For containers, use pots at least 12 inches deep with nutrient-rich potting mix.

Planting Collard Greens

Collard greens can be grown from seeds or transplants.

1. Direct Seeding:

  • Sow seeds about ½ inch deep directly into the soil.
  • Space seeds 12–18 inches apart, with 2–3 feet between rows.
  • Thin seedlings once they’re a few inches tall, keeping the strongest ones.

2. Transplants:

  • Start seeds indoors 4–6 weeks before your last frost date.
  • Transplant seedlings when they have 4–5 true leaves and outdoor temperatures are consistently above 50°F (10°C).

3. Succession Planting:

To ensure an endless supply, plant new seeds every 3–4 weeks. This staggered approach means you’ll always have young, productive plants ready for harvest.


Watering and Feeding

Collard greens grow quickly and need consistent care to keep producing.

  • Watering:
    Keep the soil evenly moist. Water deeply 2–3 times per week, especially during hot weather. Avoid soaking the leaves to prevent fungal problems.
  • Mulching:
    Apply organic mulch (straw, dry leaves, or grass clippings) to retain moisture, regulate soil temperature, and suppress weeds.
  • Fertilizing:
    Feed plants every 3–4 weeks with compost tea or a balanced organic fertilizer (such as 10-10-10). During heavy leaf production, supplement with a nitrogen-rich fertilizer to promote lush growth.

Caring for Healthy, Long-Lived Collard Plants

To keep your collards productive for months (or even years), follow these care practices:

  1. Regular Pruning:
    Remove older, yellowing leaves from the bottom of the plant. This encourages new growth from the center and prevents disease.
  2. Pest Management:
    Common pests include aphids, cabbage worms, and flea beetles. Use neem oil or insecticidal soap as a natural deterrent. Also, companion planting with marigolds or garlic helps repel insects.
  3. Weed Control:
    Keep the area around your plants weed-free to reduce competition for nutrients and water.
  4. Temperature Protection:
    Collard greens are cold-tolerant, but in severe frost, cover them with garden fabric or a cloche.

The Secret to an Endless Harvest: Cut-and-Come-Again Method

The key to harvesting collard greens continuously lies in how you pick the leaves.

Step-by-Step Harvesting Method:

  1. Start from the Bottom:
    Begin harvesting the outermost, mature leaves first — usually 8–10 inches long. Leave the smaller, inner leaves untouched.
  2. Leave the Center Intact:
    The top center (also called the growing crown) should never be cut. It’s where new leaves emerge.
  3. Harvest Gradually:
    Pick 2–3 leaves from each plant every few days. This steady approach stimulates new growth.
  4. Consistent Picking:
    The more you harvest, the more energy the plant puts into growing new leaves. Consistent harvesting prevents the plant from “resting” or going to seed.
  5. Avoid Cutting the Stem:
    Always cut the leaf at its base with clean scissors or a knife instead of tearing it by hand.

Using this method, your collard plants can continue producing for 6 months or more, and in mild climates, even year-round!


Managing Bolting (Flowering)

Sometimes, collard greens may start to flower or “bolt,” especially in hot weather. Once they bolt, the leaves can become bitter.

To prevent this:

  • Keep plants well-watered and mulched to maintain cooler soil temperatures.
  • Choose heat-tolerant varieties like Champion or Georgia Southern.
  • Provide light afternoon shade in summer using garden fabric or tall companion plants.

If a plant bolts, harvest the remaining leaves and replant fresh seeds for a new cycle.


Growing Collard Greens in Containers

Don’t have garden space? No problem — collard greens grow beautifully in containers.

  • Container Size: At least 12–16 inches deep and 12 inches wide per plant.
  • Soil: Use a rich potting mix with compost and perlite for drainage.
  • Sunlight: Place in full sun or partial shade.
  • Watering: Containers dry faster, so water regularly and deeply.
  • Fertilizing: Feed with compost or organic fertilizer every 2 weeks for steady growth.

Container gardening allows you to move plants easily and extend the growing season by bringing them indoors during cold weather.


Overwintering Collard Greens

In warmer climates, collard greens can survive winter and continue producing new leaves in spring.

To overwinter successfully:

  • Mulch heavily around the base with straw or leaves for insulation.
  • Remove damaged or diseased leaves before cold weather sets in.
  • Cover plants with frost blankets or plastic tunnels during freezing nights.

With a little protection, your collards will bounce back stronger after winter, ready to keep growing and providing fresh greens.


Health Benefits of Collard Greens

Collard greens aren’t just productive — they’re incredibly nutritious. Regularly eating them can offer:

  • Heart Health: High in fiber and antioxidants that reduce cholesterol levels.
  • Bone Strength: Rich in calcium and vitamin K.
  • Detox Support: Contain chlorophyll and sulfur compounds that support liver function.
  • Weight Management: Low in calories yet filling, perfect for healthy diets.

Adding fresh collards to soups, stir-fries, smoothies, or sautés helps you enjoy their health benefits every day.


Conclusion

Learning how to have an endless harvest with collard greens is a gardener’s dream come true. With the right care, smart harvesting techniques, and regular feeding, your plants can keep producing nutritious, tender leaves month after month.

By using the cut-and-come-again method, keeping your soil rich and moist, and protecting your plants from extreme temperatures, you can enjoy a continuous supply of collard greens nearly all year round.

Whether you’re growing in a backyard garden or a few pots on your balcony, collard greens are one of the most rewarding leafy greens to cultivate. Start your collard garden today — and experience the joy of truly endless, homegrown harvests!

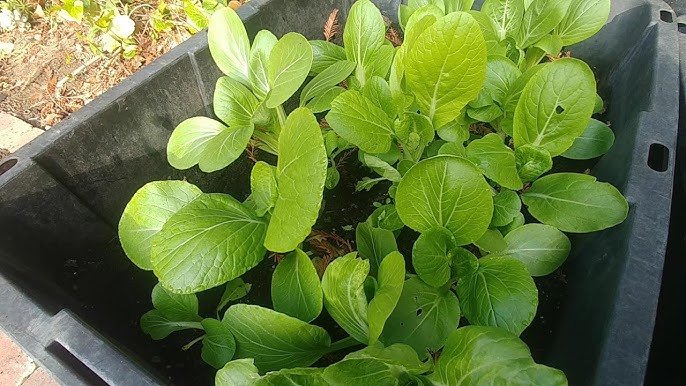
How to Plant Bok Choy in Containers at Home: A Complete Step-by-Step Guide

How to Plant Bok Choy in Containers at Home: A Complete Step-by-Step Guide

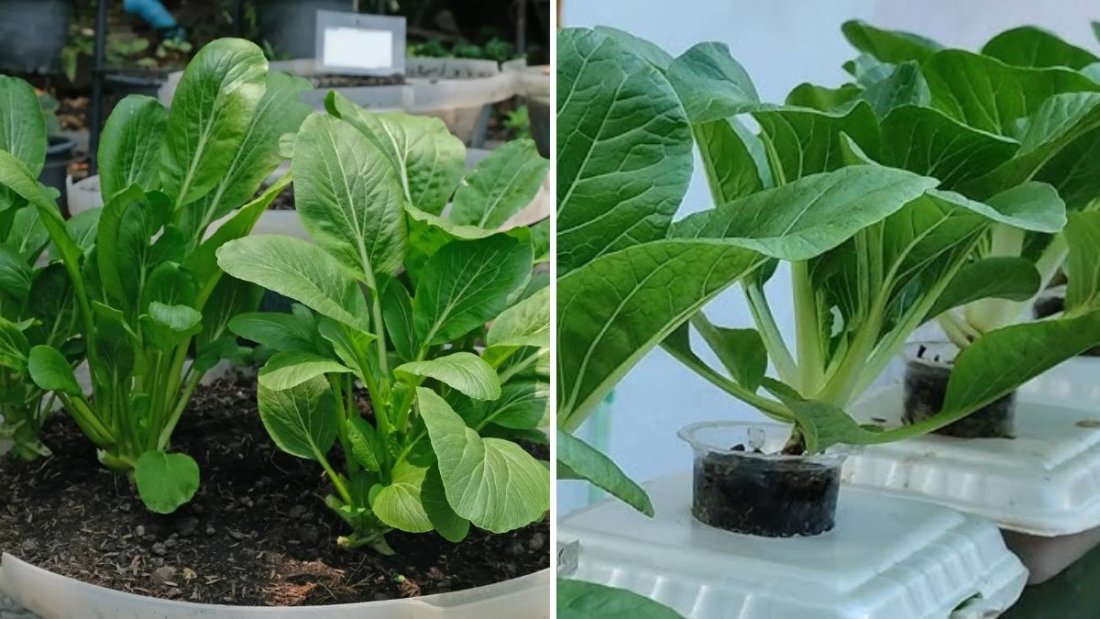
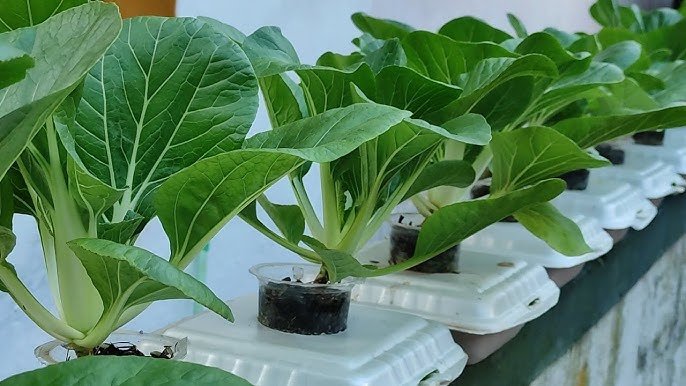
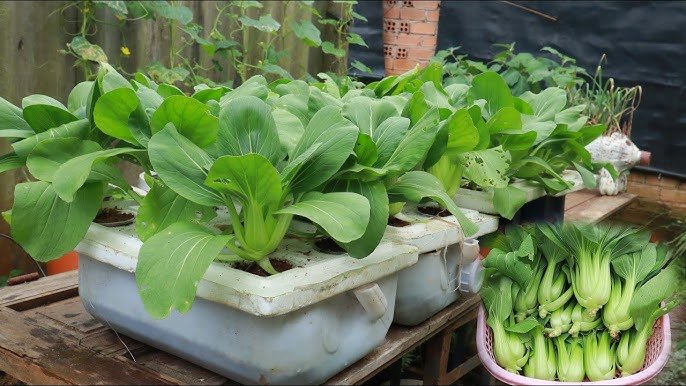
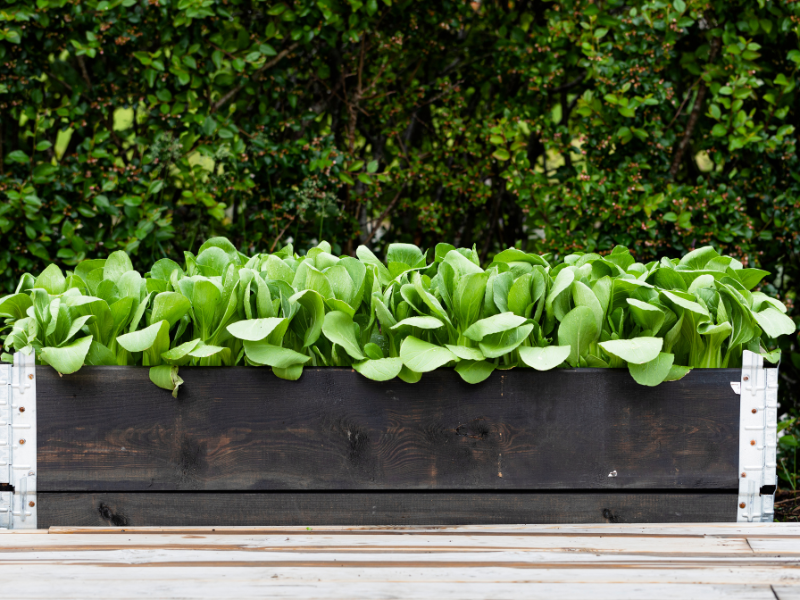
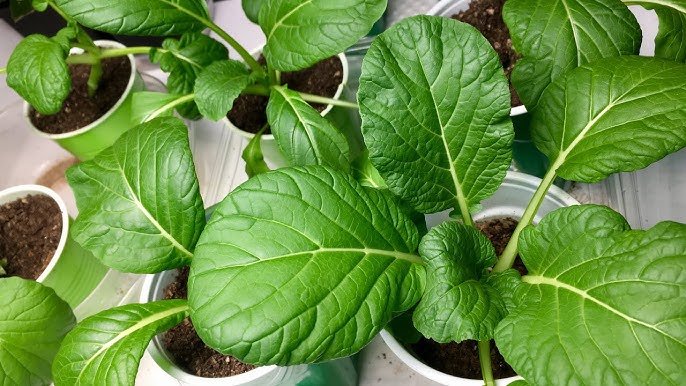
Growing bok choy (also known as pak choi or Chinese cabbage) at home is one of the most rewarding experiences for any home gardener. This leafy green is not only delicious and packed with nutrients, but it’s also incredibly easy to grow — even if you don’t have much space. Whether you live in an apartment or a house with limited outdoor area, container gardening makes it possible to enjoy fresh, homegrown bok choy right from your balcony, patio, or kitchen corner.

In this detailed guide, you’ll learn how to plant bok choy in containers at home, including everything from choosing the right pot and soil to harvesting crisp, healthy greens. Let’s dive in!


Why Grow Bok Choy in Containers?

Bok choy is a cool-season crop that thrives in mild temperatures and grows quickly—typically ready to harvest within 30 to 45 days. Growing it in containers offers several benefits:

  1. Space-saving: Perfect for small balconies or patios.
  2. Easy to control: You can manage soil quality, water, and sunlight better.
  3. Fewer pests: Container plants are less prone to soil-borne diseases and common garden pests.
  4. Convenient harvest: You can easily snip fresh leaves anytime for cooking.

Step 1: Choose the Right Container

The first step is selecting the right container size for your bok choy plants. Bok choy doesn’t have deep roots, but it needs enough room to spread and grow healthy leaves.

  • Container Size:
    Choose a pot that is at least 8–10 inches deep and 10–12 inches wide. For full-sized bok choy, one plant per 10-inch pot works best. For baby bok choy, you can plant 2–3 plants in the same container.
  • Drainage:
    Make sure the pot has drainage holes at the bottom to prevent waterlogging. You can also place small pebbles or gravel at the base to improve drainage.
  • Material:
    Terracotta, plastic, or grow bags all work well. If you live in a hot area, use plastic or glazed pots, as they retain moisture better than clay.

Step 2: Use Nutrient-Rich Soil

Bok choy grows best in loose, well-draining, and fertile soil that’s rich in organic matter.

  • Soil Mix Recommendation:
    Combine the following:
    • 40% garden soil or topsoil
    • 40% organic compost or well-rotted manure
    • 20% coco peat or perlite for better aeration

The soil should be slightly acidic to neutral, with a pH between 6.0 and 7.0. Bok choy loves moisture, so keep the soil consistently damp but not soggy.


Step 3: Select a Suitable Location

Bok choy thrives in cool temperatures between 15°C and 25°C (59°F–77°F). It prefers partial sunlight—around 4–6 hours of sun daily.

  • If you’re growing bok choy indoors, place the container near a south-facing window where it can get gentle sunlight.
  • If the temperature rises above 30°C (86°F), move the pot to a shaded area or cover it with a light shade cloth to prevent bolting (premature flowering).

Step 4: Planting Bok Choy Seeds

You can start bok choy either from seeds or seedlings, but starting from seed is easy and rewarding.

To plant from seed:

  1. Fill your container with the prepared soil mix, leaving about an inch of space at the top.
  2. Sprinkle the seeds evenly over the surface and cover them with a thin layer (¼ inch) of soil.
  3. Mist gently with water to keep the soil moist.
  4. Place the container in a warm, well-lit area.

Germination:
Bok choy seeds germinate within 5–7 days. Once seedlings appear, thin them out so each plant has 4–6 inches of space to grow.

If you prefer transplanting seedlings, wait until they have at least 3–4 true leaves before moving them to the container.


Step 5: Watering and Moisture

Bok choy needs consistent moisture to grow tender, juicy leaves. The soil should never dry out completely.

  • Watering schedule: Water every 1–2 days or whenever the top inch of soil feels dry.
  • Avoid overhead watering to prevent fungal diseases—use a watering can with a narrow spout to target the soil around the base.
  • In hot climates, adding a mulch layer (like straw or dried leaves) helps retain soil moisture.

Step 6: Fertilizing Bok Choy

Since bok choy grows fast, it benefits from regular feeding.

  • At planting time: Mix in organic compost or slow-release fertilizer.
  • During growth: Every 2 weeks, feed with a liquid fertilizer made from compost tea, fish emulsion, or seaweed extract.

A nitrogen-rich fertilizer helps encourage lush green growth, but don’t overdo it—too much nitrogen can cause the plant to bolt early.


Step 7: Managing Pests and Diseases

Even in containers, bok choy can attract pests such as aphids, flea beetles, and cabbage worms.

Here are natural ways to keep them away:

  • Neem oil spray: Mix 1 tablespoon neem oil with 1 liter of water and spray weekly.
  • Garlic or chili spray: A homemade deterrent that repels insects.
  • Handpicking: Remove caterpillars or visible pests manually.
  • Companion planting: Grow bok choy with mint, garlic, or marigold to repel harmful insects naturally.

To avoid fungal problems, ensure good airflow and avoid overwatering.


Step 8: Caring for Growing Plants

Once your bok choy starts growing, continue to care for it with consistency:

  • Thin seedlings: Keep only the healthiest ones to prevent overcrowding.
  • Loosen soil: Gently aerate the top layer once a week for better root growth.
  • Monitor for bolting: If plants start forming flower stalks, harvest immediately as the leaves may turn bitter.

Step 9: Harvesting Bok Choy

One of the best parts of growing bok choy is how quickly you can enjoy the fruits of your labor!

Baby Bok Choy:

  • Ready to harvest in 25–30 days when plants are about 4–5 inches tall.
  • Cut the whole plant at the base or pick outer leaves individually.

Full-sized Bok Choy:

  • Ready in 40–50 days when plants reach about 12 inches tall.
  • Use a sharp knife to cut just above the soil line.
  • Leave the base intact to encourage regrowth for a second harvest.

After harvesting, wash the leaves and store them in a cool place or refrigerator. Fresh bok choy stays crisp for about 5–7 days.


Step 10: Common Problems and Solutions

  1. Bolting (flowering too early):
    • Caused by hot temperatures or long daylight hours.
    • Solution: Grow in partial shade and maintain cool, moist soil.
  2. Yellow leaves:
    • May indicate nutrient deficiency or overwatering.
    • Solution: Adjust watering and feed with a balanced organic fertilizer.
  3. Pale, slow-growing plants:
    • Caused by poor soil fertility.
    • Solution: Enrich soil with compost or apply a nitrogen boost.

Bonus Tip: Regrow Bok Choy from Kitchen Scraps

You can regrow bok choy from the base of a store-bought stalk:

  1. Cut off the base (2 inches thick).
  2. Place it in a shallow bowl with water, exposing only the bottom.
  3. Keep it near sunlight and change the water every 2 days.
  4. Within a week, new leaves and roots will start growing!
  5. Once roots are visible, transplant the base into soil.

It’s a fun and sustainable way to keep your bok choy supply going.


Final Thoughts

Learning how to plant bok choy in containers at home is simple, budget-friendly, and incredibly satisfying. This leafy vegetable rewards you with a continuous supply of crisp, tender greens that elevate stir-fries, soups, and salads.

With the right soil mix, regular watering, and gentle care, you can harvest your own organic bok choy in just a few weeks — no garden required. Whether you’re a beginner or an experienced gardener, this container-growing method ensures success and year-round freshness.

So grab a pot, some seeds, and start growing your own homegrown bok choy today — your kitchen and your health will thank you!
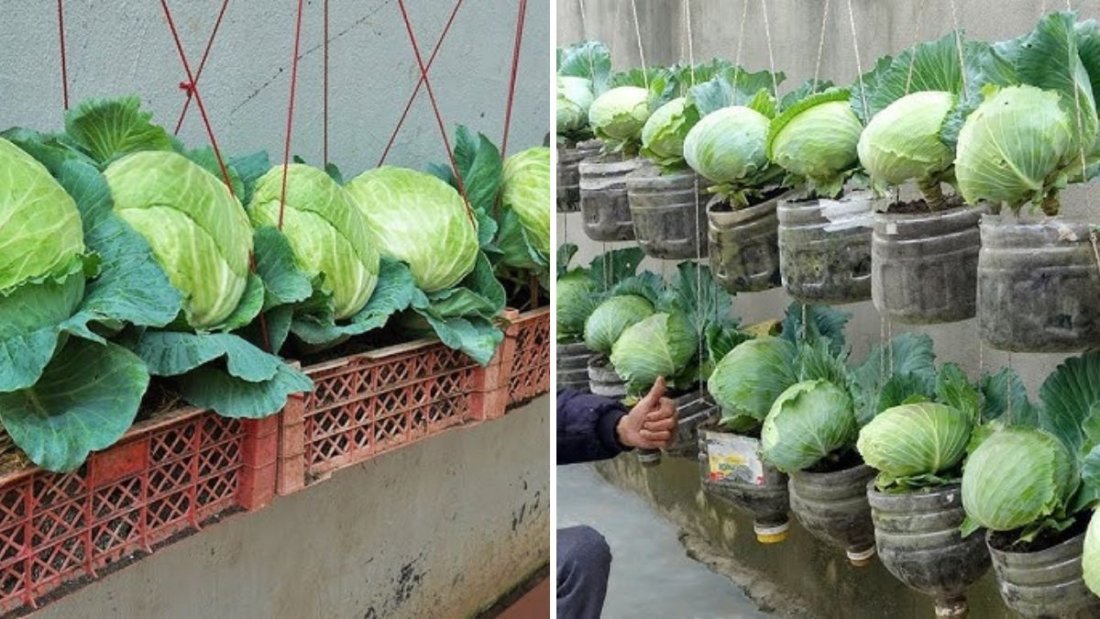
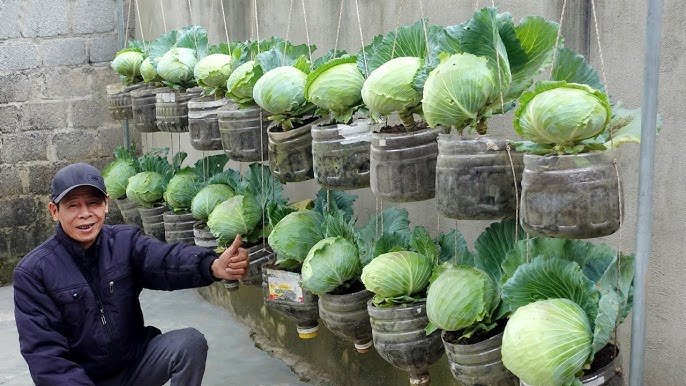
How to Grow Cabbage from Kitchen Scraps to Harvest: Complete 106-Day Time-Lapse Guide

How to Grow Cabbage from Kitchen Scraps to Harvest: Complete 106-Day Time-Lapse Guide

Growing cabbage from scraps is one of the most fascinating and rewarding gardening experiences. Imagine turning leftover cabbage leaves or stems from your kitchen into a thriving plant that produces a full head of fresh, organic cabbage within a few months. It’s not only sustainable but also an excellent way to recycle food waste and enjoy fresh produce at home.

This detailed guide, inspired by the time-lapse journey of “Cabbage Plant Growing From Scrap to Harvest in 106 Days,” will take you through every step—from re-growing cabbage scraps to caring, transplanting, and harvesting your own homegrown cabbage.


Why Grow Cabbage from Scraps

Growing cabbage from kitchen scraps is an eco-friendly and budget-friendly gardening technique. Here’s why you should give it a try:

  1. Zero Waste Gardening: You’re reusing leftovers that would otherwise end up as kitchen waste.
  2. Cost-Effective: No need to buy seeds; scraps do the job.
  3. Organic and Fresh: You control the growing process, ensuring chemical-free produce.
  4. Perfect for Beginners: Simple and easy to try even if you have limited space or experience.
  5. Educational and Fun: A great project for kids and families to observe plant growth.

Step 1: Choosing the Right Scrap for Regrowth

Not every cabbage scrap will regrow successfully. You need to select the right part of the cabbage to start the process.

What You’ll Need:

  • The cabbage base (core) that includes the stem and about 2 inches of attached leaves.
  • A shallow bowl or container.
  • Clean water.
  • Sunlight or a bright window.

How to Start:

  1. Cut the cabbage, leaving about 2 inches of the core intact.
  2. Place this core in a bowl with a little water—enough to cover the bottom part but not submerge it fully.
  3. Keep the bowl on a sunny windowsill or balcony where it gets 4–6 hours of light daily.
  4. Change the water every 1–2 days to prevent bacterial growth.

Within 5–7 days, you’ll notice new green leaves sprouting from the center and small white roots forming at the bottom.


Step 2: Preparing for Transplanting

Once roots are about 1–2 inches long and new leaves have grown, it’s time to transplant your cabbage scrap into soil.

Prepare the Soil:
Cabbage prefers rich, well-draining, and slightly acidic soil (pH 6.0–6.8). Mix:

  • 40% garden soil
  • 40% compost or cow dung manure
  • 20% sand or cocopeat for drainage

Container or Garden Bed:
If growing in pots, choose one that’s at least 12 inches deep and 12–14 inches wide. Make sure it has proper drainage holes.

Transplanting Steps:

  1. Dig a small hole in the soil deep enough to cover the cabbage base.
  2. Gently place the rooted scrap into the hole and cover with soil, leaving the growing leaves above ground.
  3. Water lightly to settle the soil.
  4. Keep the pot in a semi-shaded area for a few days until the plant adjusts.

Step 3: Providing the Right Growing Conditions

Cabbage is a cool-season crop and grows best in temperatures between 15°C and 25°C (59°F–77°F).

Sunlight: Provide at least 6 hours of sunlight daily for healthy growth. Too much heat can cause the plant to bolt or produce loose heads.

Watering:

  • Keep the soil consistently moist but not waterlogged.
  • Water deeply once every two days during the growing phase.
  • Mulch with dry leaves or straw to retain moisture and prevent weeds.

Humidity and Airflow:
Ensure good airflow around plants to prevent fungal diseases. Avoid overcrowding if you are growing multiple cabbage plants.


Step 4: Feeding the Plant Organically

Your cabbage plant needs nutrients at different stages of growth. Using organic fertilizers helps in building strong roots and forming firm, healthy heads.

Fertilizer Schedule:

  • During Early Growth (Weeks 1–4): Apply vermicompost or compost tea every 10 days.
  • During Head Formation (Weeks 5–10): Feed with banana peel fertilizer or liquid seaweed extract once every two weeks for potassium and micronutrients.
  • Final Growth Phase (Weeks 10–14): Use diluted cow dung slurry or fish emulsion to strengthen the plant before harvest.

Avoid over-fertilizing; too much nitrogen can result in leafy growth without proper head formation.


Step 5: Cabbage Growth Stages (Time-Lapse Breakdown)

The “106-Day Cabbage Growing Time-Lapse” perfectly demonstrates how cabbage progresses through different growth phases. Here’s a general timeline:

Day 1–10:

  • Scrap begins to regrow.
  • Roots and tiny green shoots appear.

Day 11–25:

  • Transplanted into soil.
  • Outer leaves start expanding rapidly.

Day 26–50:

  • Plant becomes bushy with strong leaves.
  • Central part starts thickening.

Day 51–80:

  • Head initiation begins.
  • Compact white-green structure starts forming at the center.

Day 81–106:

  • Head matures and becomes firm.
  • Outer leaves grow large and protective.
  • Plant is ready for harvest.

Step 6: Pest and Disease Management

Cabbage plants are prone to pests like aphids, cabbage worms, caterpillars, and whiteflies. Keep your plant safe using natural pest control methods.

Organic Pest Control Methods:

  1. Neem Oil Spray: Mix 5 ml neem oil with 1 liter of water and spray weekly.
  2. Garlic and Chili Spray: Acts as a natural insect repellent.
  3. Manual Removal: Inspect leaves daily and remove visible caterpillars.
  4. Companion Planting: Grow marigolds, mint, or basil nearby to deter pests.

For fungal issues like powdery mildew or black rot, spray a mix of 1 teaspoon baking soda in 1 liter of water every two weeks.


Step 7: Pruning and Maintenance

To keep your cabbage plant healthy:

  • Remove yellow or damaged leaves regularly.
  • Ensure soil remains moist but not soggy.
  • Support the plant with soil mounding at the base if it becomes tall and wobbly.

Weeding is also important to avoid nutrient competition.


Step 8: Harvesting the Cabbage

Your cabbage will be ready to harvest around 100–110 days after planting, as shown in the time-lapse.

Signs of Maturity:

  • The head is compact, firm, and solid to the touch.
  • The outer leaves are large and slightly curling outward.
  • The color is bright green (for green varieties) or purple (for red cabbage).

How to Harvest:

  • Use a sharp knife to cut the cabbage head at the base, leaving outer leaves and roots in place.
  • Handle gently to avoid bruising the head.
  • If you leave the base in the soil, smaller side shoots may grow again, offering a second mini harvest.

Step 9: Post-Harvest Care

After harvesting, remove any old or damaged leaves. Wash your cabbage thoroughly before storage.

Storage Tips:

  • Store whole heads in the refrigerator for up to 2 weeks.
  • Wrap in a paper towel and place in a perforated plastic bag to retain freshness.
  • Avoid washing before storage as excess moisture can lead to rot.

Step 10: Common Mistakes to Avoid

  1. Using Weak Scraps: Ensure your cabbage base is fresh and healthy before regrowing.
  2. Overwatering: Causes root rot and fungal diseases.
  3. Planting in Poor Soil: Leads to stunted growth.
  4. Insufficient Light: Results in weak, leggy plants.
  5. Late Harvesting: Overripe cabbage heads split or become bitter.

Step 11: Health Benefits of Homegrown Cabbage

Cabbage is more than just a leafy vegetable—it’s a nutritional powerhouse. Growing it organically at home enhances its health benefits.

  • Rich in Vitamin C: Strengthens immunity and skin health.
  • Supports Digestion: High in fiber, promoting gut health.
  • Heart-Friendly: Contains antioxidants that reduce cholesterol levels.
  • Anti-Inflammatory: Helps reduce inflammation in the body.
  • Aids in Weight Loss: Low in calories and packed with nutrients.

Eating freshly harvested cabbage ensures maximum nutrient retention.


Step 12: Sustainable Gardening Tip

After harvesting your cabbage, don’t throw away the outer leaves or roots. Use them in compost or replant to continue your zero-waste gardening cycle. You can even experiment by regrowing the remaining core again to see if it sprouts new life.


Final Thoughts

Growing cabbage from scraps to harvest is a truly satisfying process that shows the magic of nature and the power of sustainable gardening. In just about 106 days, a simple kitchen scrap can transform into a full-grown, nutritious cabbage head right in your home garden.

Whether you’re growing it in soil beds, containers, or small balcony gardens, the key is consistent care, proper watering, and natural feeding. With patience and observation, you’ll soon enjoy the crisp, homegrown taste of your very own cabbage—grown from nothing but a leftover kitchen scrap.

Start your own cabbage regrowth journey today and watch the incredible transformation unfold—just like the 106-day time-lapse, but right in front of your eyes.

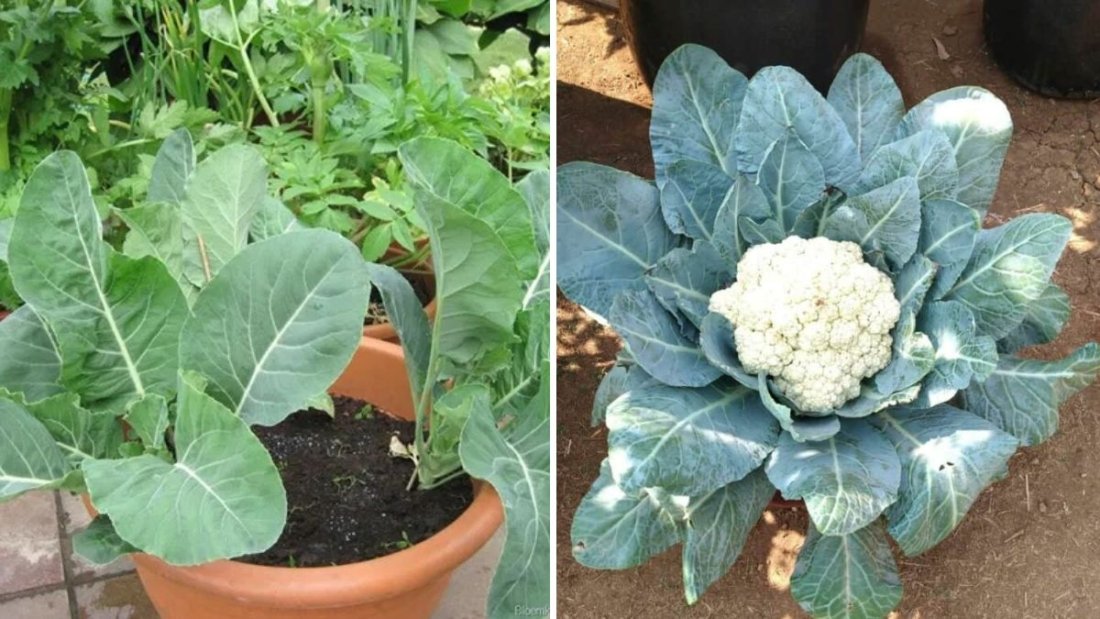
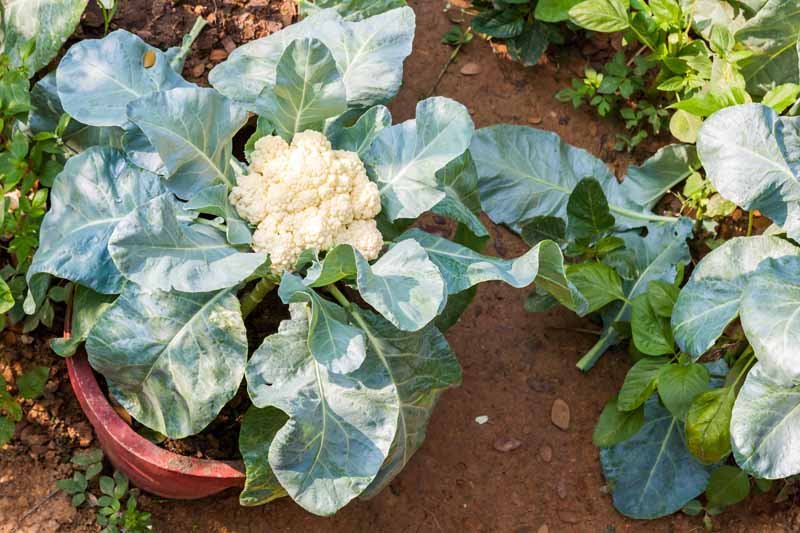
How to Grow Cauliflower at Home (With Full Updates): A Complete Step-by-Step Organic Guide

How to Grow Cauliflower at Home (With Full Updates): A Complete Step-by-Step Organic Guide

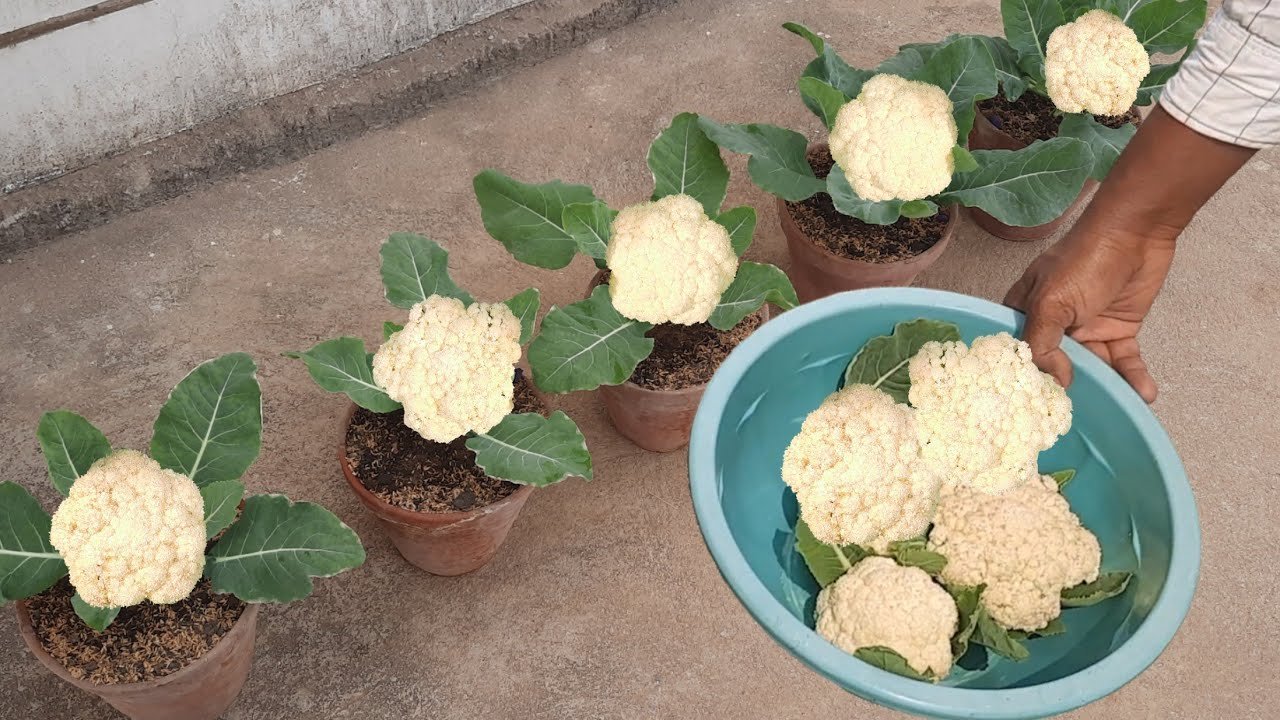
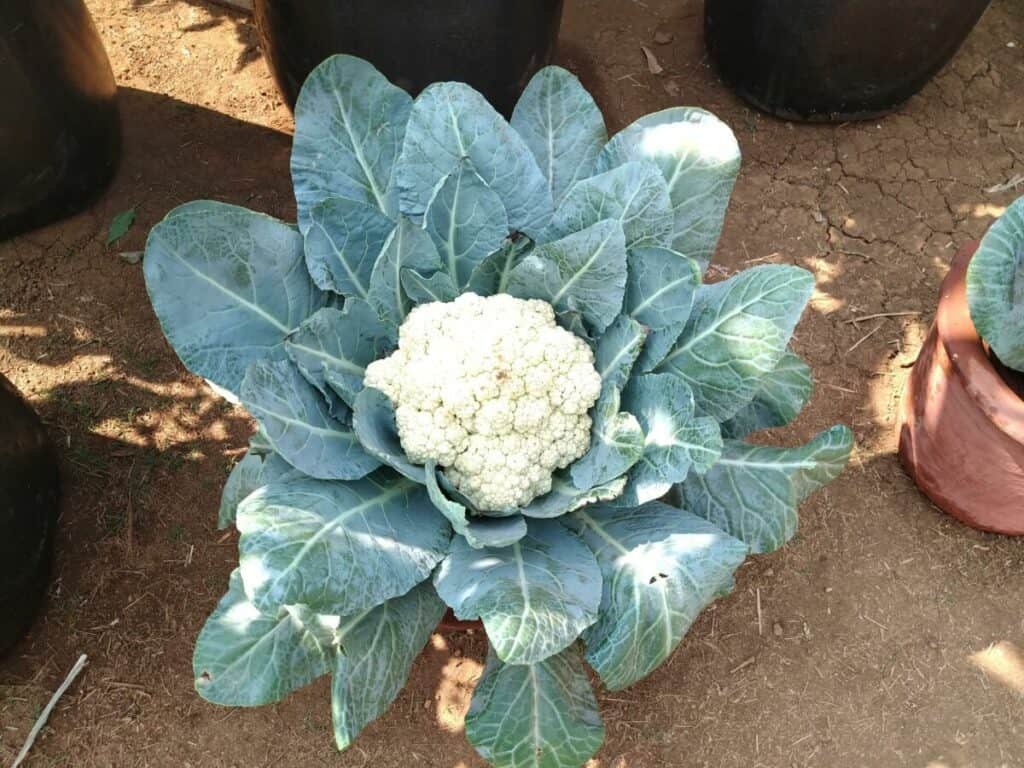
Growing cauliflower at home is an incredibly rewarding gardening experience. This nutrient-rich, cool-season vegetable might look challenging to grow, but with the right steps and consistent care, you can enjoy fresh, organic cauliflower straight from your kitchen garden. Whether you’re a beginner gardener or an experienced home grower, this complete guide with full updates will show you how to grow cauliflower successfully at home—from seed to harvest.


Why Grow Cauliflower at Home

Cauliflower is one of the most versatile and nutritious vegetables you can grow. It belongs to the same family as broccoli, kale, and cabbage but needs a bit more attention during growth. Here’s why growing cauliflower at home is worth your time:

  1. Fresh and Organic Produce: Homegrown cauliflower is free from harmful chemicals and synthetic fertilizers.
  2. Nutrient-Rich: Packed with vitamins C and K, folate, fiber, and antioxidants.
  3. Cost-Effective: A single plant can produce a large, dense head, saving you money.
  4. Perfect for Kitchen Gardens: You can grow cauliflower in pots, raised beds, or directly in the soil.

Step 1: Choosing the Right Variety

Choosing the right cauliflower variety is the first step to ensure success. Some varieties are early-maturing, while others take longer but produce larger heads.

Fast-growing varieties:

  • Snowball: Popular for kitchen gardens, produces compact white heads.
  • Early White: Matures quickly and tolerates a range of climates.
  • Pusa Deepali: Suitable for Indian climates, early-maturing and productive.
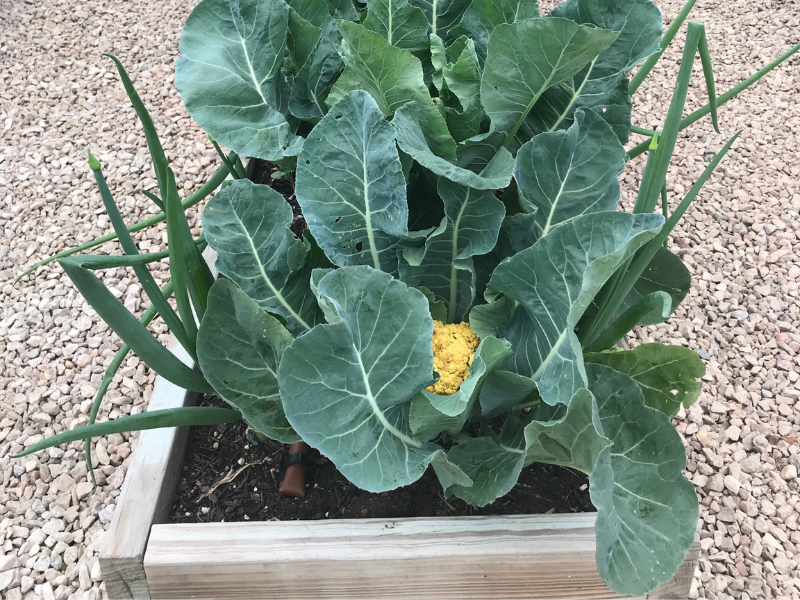
  • Cheddar Cauliflower: Unique orange-colored variety, rich in beta-carotene.

If you live in a warm region, go for heat-tolerant or tropical varieties to prevent premature flowering (bolting).


Step 2: Preparing the Soil

Cauliflower thrives in rich, fertile, and well-drained soil with a pH between 6.0 and 7.0. To prepare the perfect soil:

  1. Add Organic Compost: Mix 40% garden soil, 40% compost, and 20% sand or cocopeat for better drainage.
  2. Add Vermicompost or Cow Dung Manure: This provides nitrogen, which supports leaf and head development.
  3. Include Bone Meal or Rock Phosphate: Enhances root and flower growth.
  4. Maintain Moisture: Cauliflower requires moist but not waterlogged soil, so ensure proper drainage.

If you’re using containers, choose one that’s at least 12 inches deep and wide, with several drainage holes.


Step 3: Sowing the Seeds

Cauliflower can be grown from seeds or nursery seedlings, but starting from seeds gives better control and organic purity.

Seed Sowing Process:

  1. Sow seeds ½ inch deep in seed trays or small pots.
  2. Keep the soil consistently moist but not soggy.
  3. Seeds usually germinate in 5–10 days.
  4. Keep the seed trays in a bright, warm place with indirect sunlight.

Once the seedlings reach 4–5 inches tall and develop 3–4 true leaves, they are ready for transplanting into the main pot or garden bed.


Step 4: Transplanting the Seedlings

When transplanting, handle the seedlings gently to avoid damaging the delicate roots.

Steps for Transplanting:

  1. Transplant during the evening or on a cloudy day to prevent shock.
  2. Maintain 18–20 inches spacing between plants.
  3. Water thoroughly right after transplanting.
  4. Apply a light layer of mulch to retain moisture and regulate soil temperature.

Step 5: Sunlight and Watering

Cauliflower requires 6 to 8 hours of sunlight daily. However, in extremely hot regions, partial shade during peak afternoon hours can help prevent stress.

Watering Tips:

  • Keep the soil evenly moist at all times, especially during head formation.
  • Avoid overhead watering, which can cause fungal diseases.
  • Use a watering can or drip irrigation for even moisture.
  • Mulch around the base with dry leaves, straw, or coco husk to retain soil moisture.

Step 6: Feeding and Fertilizing Organically

To grow healthy, large cauliflower heads, you need to provide steady nutrition. Use organic fertilizers regularly for best results.

  1. Compost Tea or Vermiwash: Feed every 10–15 days for nutrient supply.
  2. Banana Peel Fertilizer: Rich in potassium, promotes healthy head formation.
  3. Cow Dung Slurry: Apply once every 20 days to boost nitrogen levels.
  4. Seaweed or Fish Emulsion: Strengthens plants and promotes steady growth.

Avoid over-fertilizing, as too much nitrogen can result in leafy plants with small heads.


Step 7: Temperature and Climate Requirements

Cauliflower is a cool-season crop and grows best in temperatures between 15°C and 25°C (59°F to 77°F).

In hot regions:

  • Use shade nets or grow under partial cover.
  • Mulch heavily to cool the soil.
  • Water early in the morning or evening.

In cold regions:

  • Protect plants from frost by covering them with plastic or jute sheets at night.
  • Grow early or late varieties suited for your climate zone.

Step 8: Pest and Disease Management

Cauliflower plants can attract pests like aphids, cabbage worms, caterpillars, and whiteflies. To keep them under control naturally:

  1. Neem Oil Spray: Mix 5 ml neem oil in 1 liter of water and spray every 7 days.
  2. Garlic and Chili Spray: Repels most common insects.
  3. Manual Removal: Inspect leaves daily and remove visible pests.
  4. Companion Planting: Grow marigolds, mint, or basil near cauliflower to repel insects naturally.

For fungal diseases like downy mildew, use baking soda spray (1 teaspoon baking soda in 1 liter of water) once every two weeks as a preventive measure.


Step 9: Blanching the Cauliflower Head

Blanching is an important step to keep the cauliflower head white and tender.

What Is Blanching?
When the cauliflower head begins to form (around 2 inches in diameter), gently bring the outer leaves over the head and tie them with soft twine or rubber bands. This shields the developing head from direct sunlight and prevents it from turning yellow.

Check the tied leaves regularly to ensure no pests are trapped inside.


Step 10: Harvesting Cauliflower

Cauliflower is ready to harvest 70–100 days after transplanting, depending on the variety and growing conditions.

How to Know It’s Ready:

  • The head (curd) should be compact, firm, and fully developed.
  • The color should be pure white, creamy white, or light green depending on the variety.
  • Harvest before the florets start to separate or turn yellow.

How to Harvest:

  • Use a sharp knife to cut the head off along with a few surrounding leaves for protection.
  • Handle gently to avoid bruising the head.

After harvesting, smaller side shoots may form, especially in some varieties—these can also be harvested later.


Step 11: Post-Harvest Care and Continuous Growth

Even after harvesting the main head, the plant can continue producing smaller florets. Keep watering moderately and feed with compost tea once a week.

Once the plant stops producing, remove it and add the remains to your compost bin to enrich your garden soil naturally.


Step 12: Common Mistakes to Avoid

  1. Irregular Watering: Causes poor head formation.
  2. Planting Too Late: Cauliflower doesn’t tolerate heat well; start early.
  3. Using Poor Soil: Lacking nutrients will result in small or deformed heads.
  4. Ignoring Pests: Early pest control is crucial for success.
  5. Not Blanching: Leads to yellow or loose heads.

Step 13: Health Benefits of Homegrown Cauliflower

Homegrown cauliflower isn’t just tastier; it’s also healthier. Here are some key benefits:

  • Rich in Antioxidants: Helps reduce inflammation.
  • Supports Heart Health: Promotes better circulation and reduces cholesterol.
  • Aids Digestion: High fiber content keeps your gut healthy.
  • Boosts Immunity: High vitamin C supports immune function.
  • Weight Management: Low in calories but high in nutrients.

Step 14: Bonus Tips for Faster Growth

  1. Soak seeds in warm water overnight before sowing for faster germination.
  2. Use raised beds for better drainage and faster root growth.
  3. Keep soil consistently moist but avoid waterlogging.
  4. Rotate cauliflower with other crops like beans or onions to improve soil health.
  5. Apply Epsom salt solution (one teaspoon per liter of water) monthly to strengthen the plants.

Final Thoughts

Growing cauliflower at home may seem challenging at first, but once you understand its needs—cool temperature, steady moisture, rich organic soil, and proper care—it becomes an enjoyable process. The satisfaction of harvesting your own organic cauliflower is unmatched, both in taste and health benefits.

By following these full updates and step-by-step instructions, you can successfully grow cauliflower in pots, containers, or your kitchen garden with great results. With patience, observation, and organic care, your garden will reward you with beautiful white cauliflower heads that are as fresh as they are flavorful.


How to Fast Grow Organic Broccoli in Your Kitchen Garden: A Complete Beginner’s Guide

How to Fast Grow Organic Broccoli in Your Kitchen Garden: A Complete Beginner’s Guide

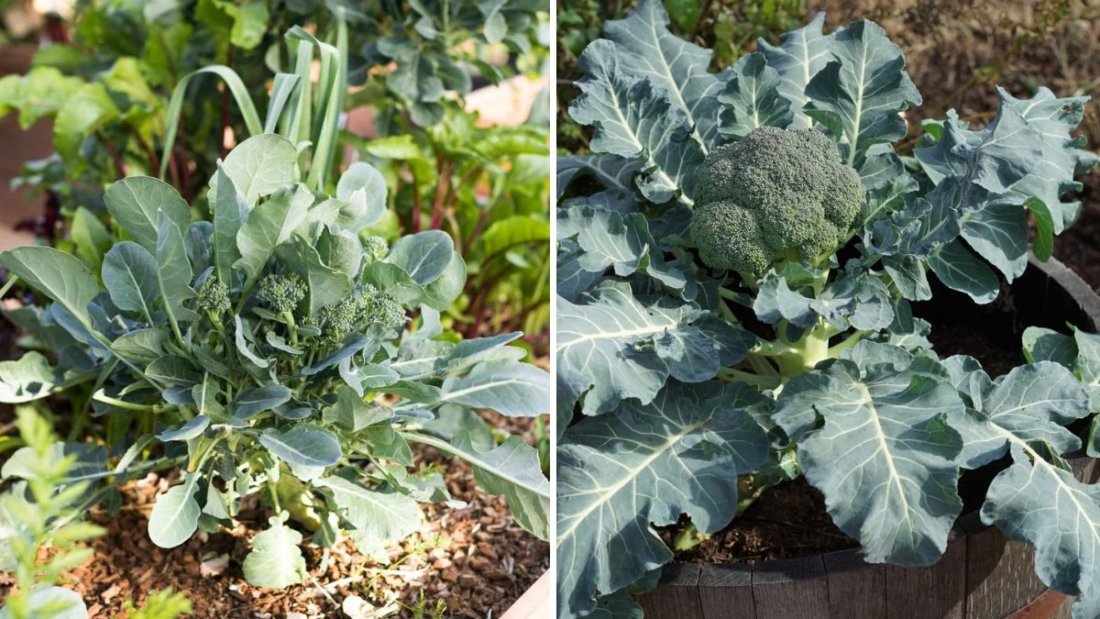
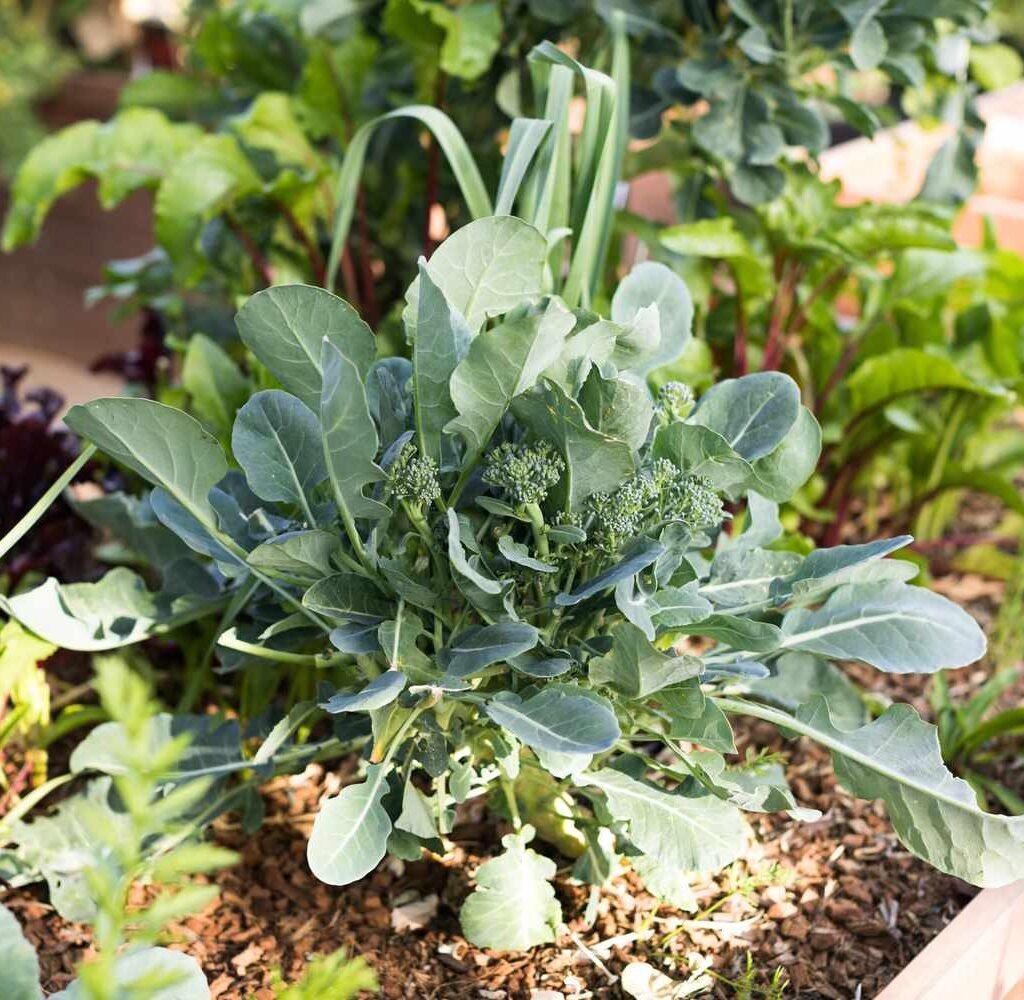
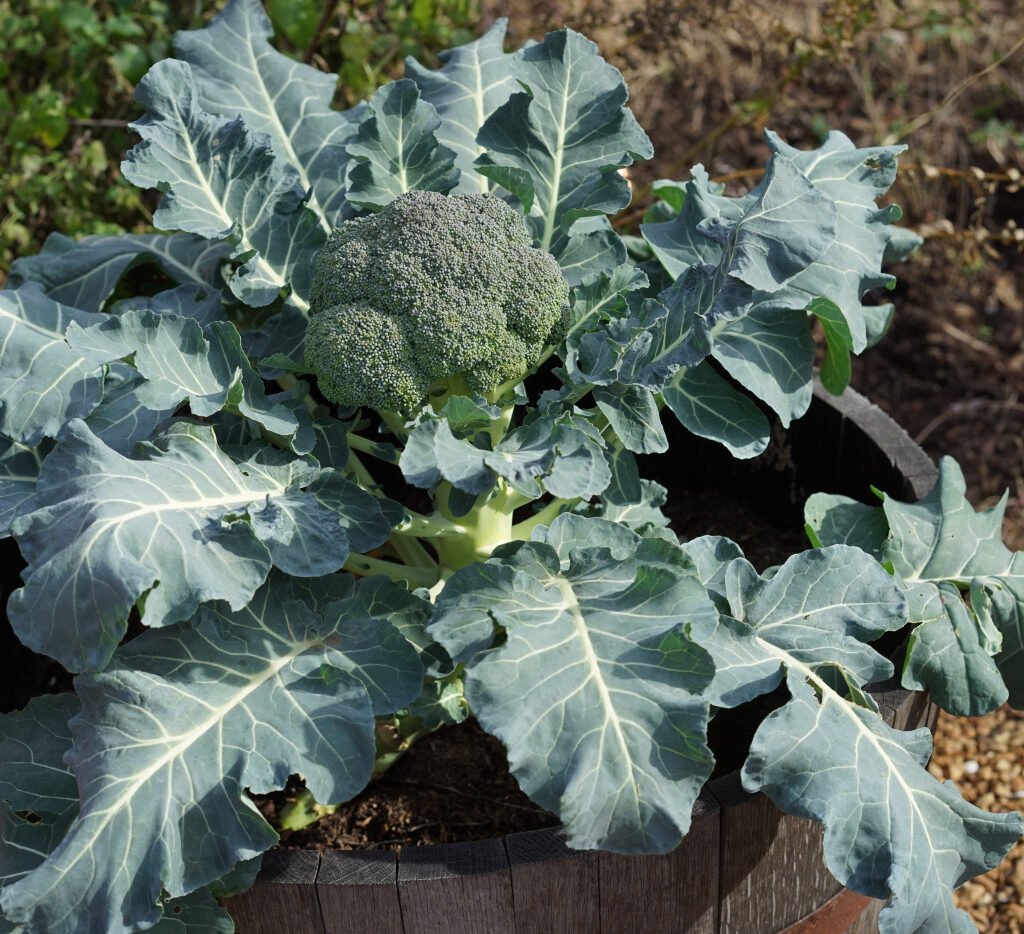
Growing organic broccoli in your kitchen garden is one of the most rewarding gardening experiences. Broccoli is not just a delicious and nutrient-rich vegetable, but it also grows beautifully when you give it the right care. With a few simple techniques, you can speed up the growing process and harvest healthy, organic broccoli right from your backyard or balcony garden.

In this detailed guide, we’ll explore how to fast grow organic broccoli in your kitchen garden, covering everything from seed selection and soil preparation to watering, pest control, and harvesting tips. Let’s get started!

Why Grow Broccoli in Your Kitchen Garden?

Before jumping into the growing steps, let’s look at why broccoli is worth growing at home:

  1. Highly Nutritious: Broccoli is rich in vitamins A, C, K, calcium, and antioxidants that boost immunity and overall health.
  2. Chemical-Free Produce: Growing it organically means no harmful pesticides or synthetic fertilizers—just clean, healthy food.
  3. Space-Efficient: Broccoli can thrive in containers or raised beds, making it perfect for small kitchen gardens.
  4. Cool-Season Crop: Broccoli grows best in mild weather, making it ideal for winter or early spring gardening in most regions.

Step 1: Choosing the Right Broccoli Variety

For fast and healthy growth, select a variety suited to your climate and garden space. Some quick-maturing varieties include:

  • Calabrese Broccoli: A classic, quick-growing variety with large green heads.
  • De Cicco: Early-maturing and great for small gardens.
  • Waltham 29: Hardy and ideal for slightly cooler climates.
  • Green Magic: Popular hybrid known for uniform growth and smooth heads.

Pro Tip: If you live in a warmer region, look for heat-tolerant varieties to avoid early bolting (flowering too soon).


Step 2: Preparing Nutrient-Rich Organic Soil

Broccoli loves fertile, well-drained soil with a pH between 6.0 and 7.0. To make your soil nutrient-rich and organic:

  1. Mix in Compost: Add plenty of decomposed organic compost or cow dung manure.
  2. Add Vermicompost: Boosts microbial activity and root growth.
  3. Use Neem Cake or Bone Meal: These organic amendments provide nitrogen and phosphorus for faster, stronger plant development.
  4. Loosen the Soil: Broccoli roots grow deep, so till the soil to at least 12 inches deep for proper aeration and drainage.

If growing in pots, choose a large container (12-14 inches deep) and ensure proper drainage holes.


Step 3: Planting Broccoli Seeds or Seedlings

You can start broccoli from seeds or nursery seedlings depending on your time and convenience.

From Seeds:

  1. Sow seeds ½ inch deep in seed trays or small pots.
  2. Keep them in a semi-shaded area and mist daily to keep the soil moist.
  3. Germination takes about 5–10 days.
  4. Once seedlings have 4–5 true leaves and are about 4 inches tall, transplant them into the garden or larger pots.

From Seedlings:

If you want a faster start, buy healthy, pest-free broccoli seedlings from an organic nursery and transplant them directly into the soil.

Spacing:

  • Keep 18 inches between plants and 24 inches between rows to allow proper airflow and prevent disease.

Step 4: Watering and Sunlight Requirements

Broccoli grows best with consistent moisture and sunlight.

  • Watering: Keep the soil evenly moist but not soggy. Water deeply once or twice a week depending on weather. Avoid overhead watering to reduce fungal diseases.
  • Mulching: Apply a 2-inch layer of organic mulch (like dry leaves or straw) around the base. It helps retain moisture and keeps the soil cool.
  • Sunlight: Broccoli needs 6–8 hours of sunlight daily. If growing indoors or on a balcony, ensure it gets bright indirect light.

Step 5: Feeding the Plants Organically

To promote faster growth and healthy heads, organic feeding is crucial. Use these natural fertilizers:

  1. Compost Tea or Vermiwash: Apply every 10–15 days to encourage leafy growth.
  2. Seaweed Extract or Fish Emulsion: Boosts nutrient uptake and strengthens plant structure.
  3. Banana Peel Fertilizer: High in potassium, great for producing firm broccoli heads.
  4. Cow Dung Slurry: Use once a month for nitrogen support.

Avoid chemical fertilizers, as they can disturb the soil’s natural balance and reduce organic quality.


Step 6: Natural Pest and Disease Control

Common broccoli pests include aphids, caterpillars, cabbage worms, and flea beetles. To keep them under control organically:

  • Neem Oil Spray: Mix 5 ml of neem oil with 1 liter of water and spray weekly.
  • Garlic-Chili Spray: Natural repellent that keeps pests away.
  • Handpick Caterpillars: Inspect leaves regularly and remove pests manually.
  • Companion Planting: Grow marigold, basil, or mint near broccoli to repel harmful insects.

Also, avoid waterlogging to prevent fungal diseases like root rot or powdery mildew.


Step 7: Temperature and Growing Conditions

Broccoli prefers cool weather—ideal temperatures range between 15°C to 25°C (59°F to 77°F).

If temperatures rise above 30°C (86°F), the plants may bolt (produce flowers early), which affects the taste and texture.

To manage this:

  • Use shade nets in warmer months.
  • Mulch generously to keep roots cool.
  • Water in early morning or evening to reduce heat stress.

Step 8: Pruning and Maintenance

Regular maintenance ensures better growth and yield.

  • Remove Yellow Leaves: Cut off old or damaged leaves to focus energy on head formation.
  • Support Growth: As broccoli grows tall, support the main stem if needed to prevent bending.
  • Weed Control: Remove weeds regularly to prevent nutrient competition.

Step 9: Harvesting Broccoli

The most exciting part!

Broccoli is ready to harvest about 60–90 days after planting, depending on the variety and growing conditions.

How to Know It’s Ready:

  • The central head should be firm, compact, and deep green.
  • Harvest before the small flower buds open or turn yellow.

How to Harvest:

  • Use a sharp knife to cut the main head 5–6 inches below the head, including a portion of the stem.
  • Leave the plant in place—smaller side shoots will continue to grow, giving you multiple harvests over time.

Step 10: Aftercare and Continuous Harvest

Even after the main harvest, your broccoli plant isn’t done!

  • Keep watering and feeding lightly with compost tea.
  • You’ll see side shoots emerging from the base after 1–2 weeks—these smaller florets can be harvested too.
  • Continue this until the plant naturally completes its cycle.

Bonus Tips for Faster Organic Broccoli Growth

  1. Soak Seeds Before Sowing: Soak in warm water for 8 hours to speed up germination.
  2. Use Raised Beds: Promotes better drainage and faster root development.
  3. Add Epsom Salt: Mix 1 tsp in 1 liter of water and spray once a month for magnesium boost.
  4. Rotate Crops: Avoid planting broccoli in the same spot every season to prevent soil-borne diseases.
  5. Plant Early: Start seeds early in the season to take advantage of cooler weather.

Health Benefits of Homegrown Organic Broccoli

Homegrown organic broccoli is not only fresher but also more nutritious. Here are some key benefits:

  • Boosts Immunity: High vitamin C content supports immune function.
  • Supports Digestion: Rich in fiber and antioxidants.
  • Anti-Cancer Properties: Contains sulforaphane, known for detoxifying harmful compounds.
  • Heart Health: Helps reduce cholesterol and improve circulation.
  • Bone Strength: Packed with calcium and vitamin K.

Final Thoughts

Growing organic broccoli in your kitchen garden is easy, fulfilling, and incredibly healthy. By following these steps—choosing the right variety, using nutrient-rich soil, feeding organically, and maintaining consistent care—you can harvest fresh, crunchy, and chemical-free broccoli faster than you think.

Remember, the key to success is patience and consistent organic care. Once you taste your first homegrown broccoli, you’ll realize the flavor difference that comes from growing your own food with love and natural methods.

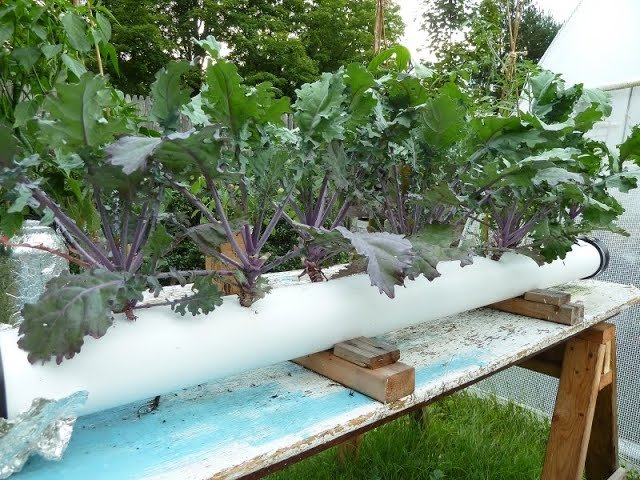
How to Grow Kale at Home in PVC Pipes: A Unique DIY Gardening Guide for Fresh, Healthy Greens

How to Grow Kale at Home in PVC Pipes: A Unique DIY Gardening Guide for Fresh, Healthy Greens

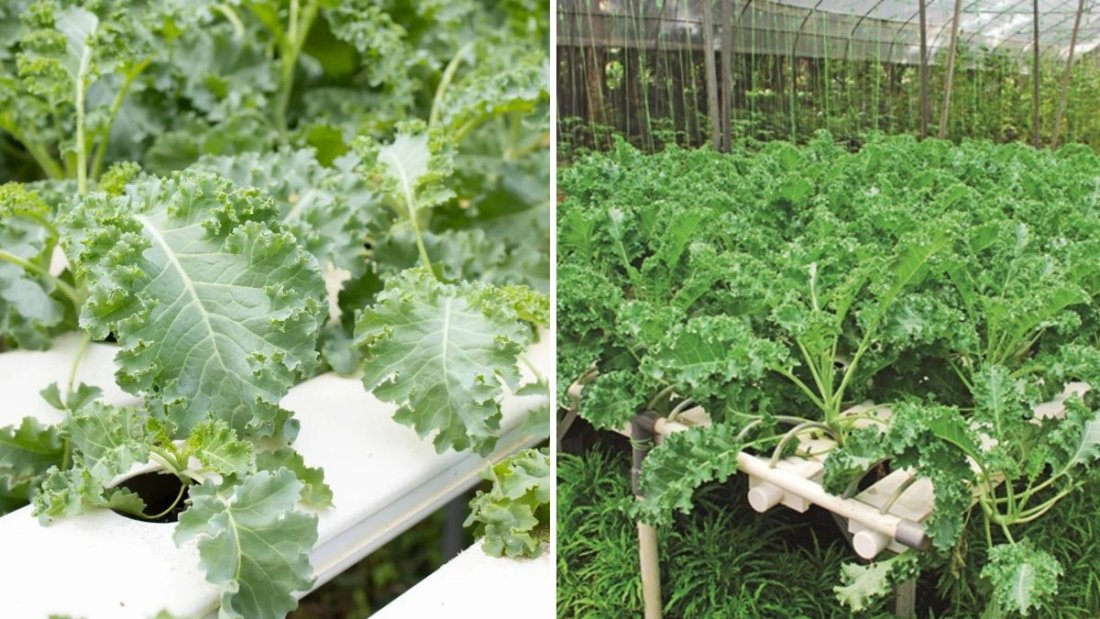
Growing your own vegetables at home is one of the most rewarding gardening experiences — and when it comes to leafy greens, kale stands out as a nutrient powerhouse. If you’re looking for a creative and space-saving way to grow kale, using PVC pipes is a brilliant solution. This innovative method not only saves space but also allows for easy management and a clean, efficient growing system.

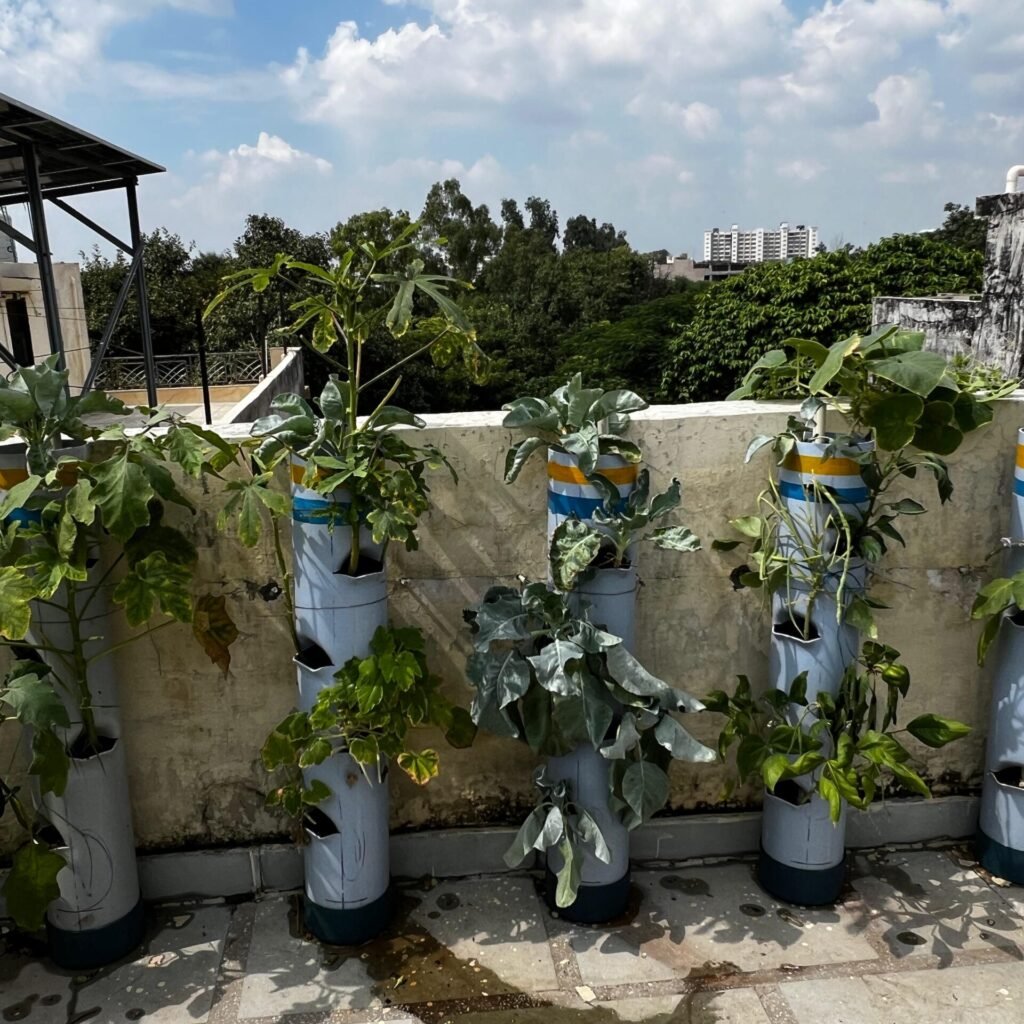
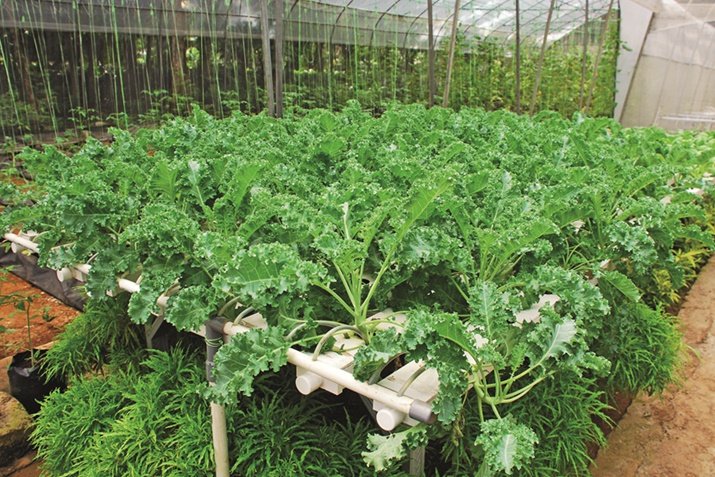
In this detailed guide, we’ll explore how to grow kale at home in PVC pipes, including the materials you’ll need, step-by-step planting instructions, and expert care tips to ensure your kale plants thrive all year long. Whether you live in an apartment or have a full backyard, this DIY setup can fit perfectly into any home garden.


Why Grow Kale in PVC Pipes?

Kale is a hardy, cool-season crop packed with vitamins A, C, K, calcium, and antioxidants. Traditionally, kale is grown in garden beds or pots, but using PVC pipes offers unique benefits:

  • Space Efficiency: Ideal for balconies, rooftops, and small gardens.
  • Clean and Organized Setup: Less soil mess and easy watering.
  • Efficient Water Use: Perfect for hydroponic or soil-based systems.
  • Reusable and Durable: PVC pipes last for years with minimal maintenance.
  • Pest Control: Elevated growing reduces soil-borne pest issues.

This method allows you to enjoy fresh, organic kale without needing large garden space — making it perfect for urban gardeners.


Materials You’ll Need

Before you start, gather all the required materials. Here’s what you’ll need for your PVC pipe kale garden:

  1. PVC Pipes (4–6 inches in diameter) – Choose sturdy pipes long enough to fit your space.
  2. PVC End Caps – To close both ends and retain water/soil.
  3. Hole Saw or Drill – To make planting holes.
  4. Net Cups or Small Pots – Optional if using a hydroponic setup.
  5. Potting Mix or Cocopeat – For soil-based growing.
  6. Nutrient Solution (for hydroponic method) – Balanced NPK fertilizer for leafy greens.
  7. Kale Seeds or Seedlings – Choose your favorite variety like curly kale or Tuscan kale.
  8. Watering Can or Drip System – For regular watering.
  9. Support Stands or Brackets – To hold pipes in place.

You can choose between a soil-based system or a hydroponic setup depending on your preference and resources.


Step-by-Step Guide to Grow Kale in PVC Pipes

Let’s break down the entire process — from pipe preparation to harvesting lush, green kale leaves.


Step 1: Preparing the PVC Pipes

Start by measuring and cutting your PVC pipes according to your available space. A 4–6 foot pipe works well for most home gardens.

  • Use a hole saw or drill to make planting holes about 3–4 inches apart along the top side of the pipe.
  • The holes should be around 2 inches wide — large enough for a small kale seedling.
  • Seal both ends with PVC caps to prevent water or soil from escaping.
  • Place the pipe horizontally on supports or brackets to keep it stable.

If you’re using multiple pipes, you can stack them vertically for a multi-layer garden structure.


Step 2: Setting Up the Growing Medium

For Soil-Based Setup:

  • Fill the pipe with a mix of garden soil, compost, and cocopeat (in equal parts).
  • This ensures good aeration, drainage, and nutrient balance.
  • You can also add a handful of organic fertilizer or vermicompost for a nutrient boost.

For Hydroponic Setup:

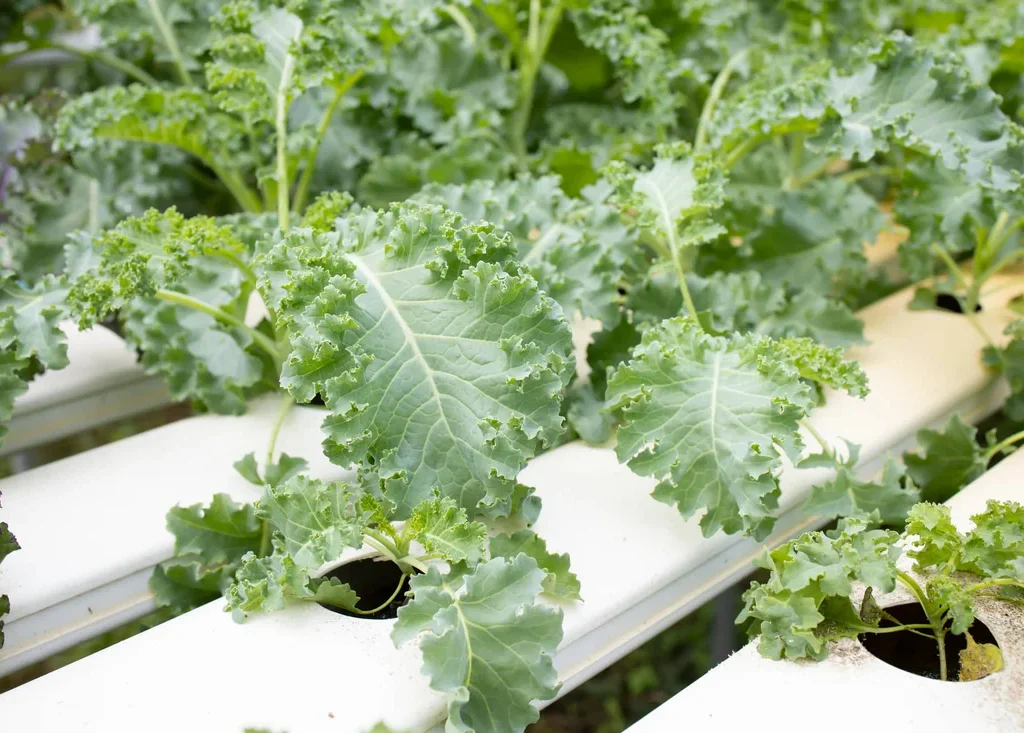
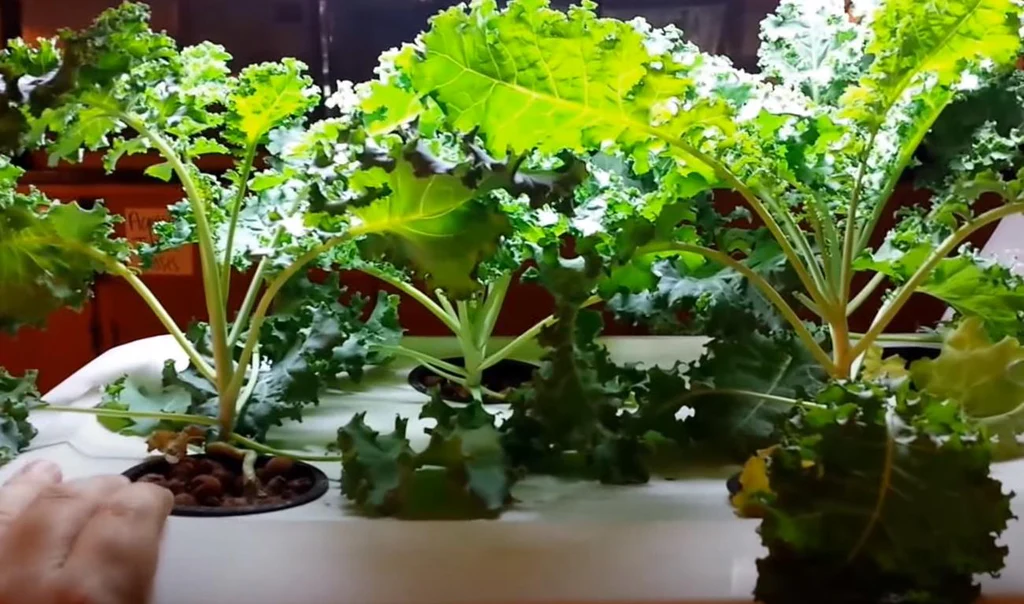
  • Instead of soil, use net cups filled with cocopeat or perlite.
  • Place them in the planting holes.
  • Circulate a nutrient-rich water solution through the pipe using a small pump or manual watering.

Step 3: Sowing Kale Seeds or Transplanting Seedlings

You can start kale either from seeds or seedlings.

  • If using seeds, plant 2–3 seeds per hole, about ¼ inch deep.
  • Keep the soil moist until germination, which usually takes 5–10 days.
  • Once seedlings are 2–3 inches tall, thin them out, leaving the strongest plant per hole.

If you already have seedlings, gently transplant them into the holes, ensuring their roots are covered with soil or growing medium.


Step 4: Watering and Nutrient Management

Kale prefers consistent moisture but doesn’t like soggy roots.

  • Water your plants regularly, ensuring the medium stays moist but not waterlogged.
  • For hydroponic systems, maintain a steady flow of nutrient solution.
  • Use a balanced fertilizer (NPK 10-10-10) or organic compost tea every 10–14 days.

Monitor the plants for signs of nutrient deficiency — pale leaves usually indicate a lack of nitrogen.


Step 5: Providing Sunlight and Ideal Conditions

Kale loves cool temperatures and plenty of light.

  • Place your PVC setup in a sunny spot that gets at least 5–6 hours of sunlight daily.
  • If growing indoors or on balconies with limited light, use LED grow lights.
  • The ideal temperature range for kale is 15–25°C (59–77°F).

In hot climates, provide partial shade during the afternoon to prevent leaf scorching.


Step 6: Managing Pests and Diseases

Although kale is hardy, it can occasionally attract pests like aphids, caterpillars, and whiteflies.

  • Inspect your plants regularly and remove pests by hand or spray them with neem oil or insecticidal soap.
  • Maintain good air circulation between the plants to prevent fungal diseases like powdery mildew.

Growing kale in PVC pipes also minimizes contact with soil pests, making this method naturally more pest-resistant.


Step 7: Harvesting Your Homegrown Kale

Your kale plants will be ready to harvest in about 50–70 days after planting.

  • Harvest the outer leaves first, allowing the inner ones to continue growing.
  • Regular harvesting encourages new growth and keeps the plant productive for months.
  • Use clean scissors to cut the leaves about an inch above the base.

Freshly harvested kale can be used in salads, smoothies, soups, or sautéed dishes — a true reward for your DIY efforts.


Tips for Success

  1. Rotate the pipes occasionally for even sunlight exposure.
  2. Mulch the soil surface (if possible) to retain moisture.
  3. Clean the pipes between growing cycles to prevent algae buildup.
  4. If using a hydroponic setup, change the nutrient solution every 2 weeks.
  5. Choose compact or dwarf kale varieties for smaller pipes or limited space.

With proper care, your PVC kale garden can yield fresh greens for several months — and it’s easy to replant once the season ends.


Advantages of Growing Kale in PVC Pipes

  • Eco-Friendly Gardening: Reuses materials and saves water.
  • Space Optimization: Ideal for tight spaces or apartment balconies.
  • Aesthetic Appeal: Looks neat and modern — perfect for decorative kitchen gardens.
  • Less Weeding & Soil Issues: Minimal contact with ground soil reduces weed problems.
  • Scalable Design: You can expand or move the system easily.

This system works equally well for other leafy greens like lettuce, spinach, basil, or Swiss chard — making it a versatile gardening solution.


Final Thoughts

Growing kale in PVC pipes is not only practical but also an enjoyable DIY project that brings innovation into home gardening. It combines creativity, sustainability, and health, offering you a continuous supply of organic greens right from your balcony or backyard.

Whether you’re a beginner gardener or an experienced plant lover, this method can easily fit into your lifestyle. With minimal space and effort, you can grow lush, nutrient-rich kale all year round — proving that you don’t need a big garden to enjoy big harvests.

So, gather your materials, set up your PVC pipes, and start your kale-growing journey today. Soon, you’ll be harvesting fresh, crisp kale leaves straight from your own DIY garden system — a true symbol of modern, sustainable living!

How to Grow Spinach at Home: Complete Guide with Tips, Updates, and Expert Advice

How to Grow Spinach at Home: Complete Guide with Tips, Updates, and Expert Advice

Growing spinach at home is one of the most rewarding gardening experiences, especially if you love having fresh, nutrient-rich greens available year-round. Spinach is a fast-growing leafy vegetable that can thrive in containers, raised beds, or even small backyard patches. Whether you’re a beginner gardener or an experienced grower, understanding the right methods—from seed selection to harvesting—can make all the difference in achieving lush, flavorful spinach leaves.

In this detailed guide inspired by the video “How To Grow Spinach At Home – Full Information With Updates,” you’ll learn everything you need to know about successfully growing spinach at home, including soil preparation, watering, sunlight needs, pest control, and tips for continuous harvests.


Why Grow Spinach at Home?

Spinach (Spinacia oleracea) is a cool-season leafy vegetable rich in vitamins A, C, K, and folate, as well as minerals like iron, calcium, and magnesium. It’s known for its versatility—you can use it in salads, soups, smoothies, and curries.

When you grow spinach at home, you gain several advantages:

  • Freshness: Homegrown spinach is tender, flavorful, and pesticide-free.
  • Cost-effective: A single packet of seeds can yield several harvests.
  • Nutrient-rich diet: Fresh leaves retain more vitamins and minerals than store-bought options.
  • Sustainability: Growing your own food reduces waste and supports an eco-friendly lifestyle.

Step 1: Choosing the Right Spinach Variety

There are several spinach varieties suited for different climates and preferences. Here are some popular options you can try:

  • Bloomsdale Long Standing: A classic variety with dark green, crinkled leaves; great for cooler weather.
  • Baby Leaf Spinach: Perfect for salads; grows quickly and can be harvested early.
  • New Zealand Spinach: A heat-tolerant option that thrives in warmer climates.
  • Malabar Spinach: A vining spinach suitable for tropical and humid regions.

For home gardeners in warm regions, New Zealand or Malabar spinach is ideal because they can withstand higher temperatures without bolting (premature flowering). In cooler areas, classic spinach types like Bloomsdale or Giant Winter are better choices.


Step 2: Preparing the Soil

Spinach thrives in loose, well-drained, fertile soil that’s rich in organic matter. A slightly acidic to neutral pH (6.0–7.0) works best.

Here’s how to prepare your growing medium:

  1. Loosen the soil using a garden fork or trowel to ensure proper aeration.
  2. Mix in organic compost or well-rotted manure to enrich the soil with nutrients.
  3. If you’re growing spinach in containers, use a mixture of:
    • 50% garden soil
    • 30% compost or cow dung manure
    • 20% cocopeat or sand for drainage

Avoid heavy clay soil, as it retains too much water, which can cause root rot.


Step 3: Selecting the Ideal Spot

Spinach prefers partial to full sunlight, depending on your region. In cooler climates, give your spinach 5–6 hours of direct sun. In hotter areas, partial shade helps protect the tender leaves from excessive heat.

A balcony, terrace, or kitchen garden that receives morning sun and afternoon shade is perfect. For indoor growers, place the pots near a sunny window or use LED grow lights to provide sufficient light.


Step 4: Sowing Spinach Seeds

You can start spinach from seeds easily.

Steps for sowing:

  1. Soak the seeds in water for 10–12 hours before planting to improve germination.
  2. Sow seeds about ½ inch deep and 2 inches apart in rows.
  3. Lightly cover with soil and gently water using a spray bottle or watering can.
  4. Keep the soil moist until seeds germinate, which usually takes 7–10 days.

Once the seedlings appear, thin them out to ensure enough space for growth—each plant should have around 3–4 inches between them.


Step 5: Watering and Fertilizing

Spinach loves moisture but hates soggy conditions. Keep the soil consistently damp, especially during dry periods. Water early in the morning or late evening to minimize evaporation.

Watering tips:

  • Avoid overhead watering to prevent fungal diseases.
  • Ensure good drainage in pots and garden beds.
  • Mulch around the plants to retain soil moisture.

Fertilization:
Spinach is a heavy feeder. Use a nitrogen-rich fertilizer to promote lush green growth. You can apply:

  • Liquid seaweed extract or compost tea every 10–15 days, or
  • A balanced organic fertilizer (NPK 10:10:10) monthly.

Avoid over-fertilizing—too much nitrogen can lead to excessive leaf growth but poor flavor.


Step 6: Managing Pests and Diseases

Spinach is relatively low-maintenance, but a few pests and diseases can affect it.

Common pests:

  • Aphids
  • Leaf miners
  • Cutworms
  • Slugs and snails

Control tips:

  • Spray neem oil solution (5 ml per liter of water) every 7–10 days as a natural pesticide.
  • Keep the area weed-free to discourage pest habitats.
  • Handpick visible pests early in the morning.
  • Avoid overwatering to prevent fungal infections like downy mildew.

If you notice yellow or wilted leaves, remove them promptly to prevent the spread of disease.


Step 7: Growth Updates and Maintenance

Spinach grows quickly, often ready for harvest within 30–45 days after sowing. During this period:

  • Regularly check soil moisture and water as needed.
  • Pinch off flower buds as soon as they appear to delay bolting.
  • Add light compost around the plants every two weeks to encourage new leaf growth.

If you want a continuous supply of spinach, sow new seeds every 2–3 weeks. This staggered planting ensures you’ll always have fresh greens available.


Step 8: Harvesting Spinach

You can start harvesting baby spinach leaves when they’re about 3–4 inches long. For mature leaves, wait until they reach 6–8 inches.

How to harvest:

  • Use scissors or garden shears to cut the outer leaves, allowing the inner leaves to continue growing.
  • Avoid pulling out the whole plant if you want multiple harvests.
  • Harvest early in the morning when the leaves are crisp and full of moisture.

Frequent harvesting encourages new growth, giving you fresh leaves for several weeks.


Step 9: Post-Harvest Care and Regrowth

After harvesting, keep watering and lightly feeding the plant. Spinach will regrow if the central crown remains intact. However, once it bolts or the weather becomes too warm, the leaves may turn bitter.

You can collect seeds from the bolted plants by allowing them to dry on the stem. Store the seeds in a cool, dry place for your next planting season.


Bonus Tips for Spinach Success

  • Avoid overcrowding: Proper spacing improves air circulation and reduces disease risk.
  • Companion planting: Grow spinach alongside carrots, radishes, or onions—they make great neighbors.
  • Use mulch: Helps regulate soil temperature and retains moisture.
  • Rotate crops: Don’t plant spinach in the same spot season after season to prevent soil-borne diseases.
  • Winter growing tip: In cold climates, cover spinach beds with a frost cloth to extend the growing season.

Health Benefits of Homegrown Spinach

Fresh spinach isn’t just delicious—it’s a nutritional powerhouse. Regular consumption supports:

  • Healthy eyesight: Rich in lutein and beta-carotene.
  • Bone strength: High in vitamin K and calcium.
  • Heart health: Packed with antioxidants that reduce inflammation.
  • Improved immunity: Contains vitamins A and C to fight infections.

Eating spinach fresh from your garden ensures you get maximum nutritional value without chemical residues.


Final Thoughts

Growing spinach at home is simple, fast, and highly rewarding. With proper soil preparation, watering, and care, you can enjoy multiple harvests throughout the year. Whether you’re growing in a small pot on your balcony or in a backyard garden, spinach adapts well to most environments.

Remember, success lies in consistency—regular watering, pest management, and timely harvesting will give you lush, flavorful leaves. So, grab a handful of seeds, prepare your soil, and start growing your own spinach today. You’ll not only save money but also enjoy the unbeatable taste and nutrition of homegrown greens!