Imagine harvesting fresh, living food right from your kitchen counter—no soil, no sunlight, and no garden required! That’s the magic of lentil sprouts. Growing your own sprouts is one of the easiest and fastest ways to add nutrition, flavor, and freshness to your meals. In just a few days, you can transform ordinary lentils into crunchy, protein-packed sprouts bursting with vitamins and enzymes.
In this detailed guide, inspired by the YouTube video “Grow Food In Your Kitchen | How To Sprout Lentils At Home | Harvesting Sprouts | Kitchen Gardening,” you’ll learn step-by-step how to sprout lentils at home, from soaking and rinsing to harvesting and storing. We’ll also explore the benefits of sprouting, troubleshooting tips, and creative ways to use your homegrown lentil sprouts in the kitchen.
If you’ve ever wanted to grow food indoors without any special equipment, this is your perfect beginner’s project!
1. Why Sprout Lentils at Home?
Lentil sprouts are incredibly nutrient-dense and easy to grow. Sprouting unlocks the natural goodness stored inside the lentil seed, making it more digestible and enhancing its nutritional value.
Here’s why you should start sprouting lentils today:
- Fast Growth: Ready to eat in 3–5 days.
- No Soil Needed: Just water and air circulation.
- Space-Saving: Grows right on your kitchen counter.
- Highly Nutritious: Rich in protein, fiber, vitamins C and B, iron, and folate.
- Budget-Friendly: One handful of lentils produces a jar full of sprouts.
Sprouting is also an eco-friendly, sustainable way to grow food year-round—perfect for small apartments or city homes.
2. What You’ll Need to Sprout Lentils
You don’t need fancy equipment to sprout lentils. A few simple kitchen items are enough:

Ingredients & Materials:
- ½ cup dry lentils (green, brown, or red)
- Filtered water
- A glass jar or bowl
- A sprouting lid, muslin cloth, or fine mesh cover
- A rubber band (if using cloth)
- A bowl or stand to hold the jar upside down for drainage
That’s it! Lentils are one of the most forgiving seeds to sprout, making them a great choice for beginners.
3. Choosing the Right Lentils for Sprouting
Not all lentils sprout equally well. To ensure successful germination:
- Choose whole lentils (not split or polished).
- Avoid pre-cooked or processed varieties.
- Look for organic, untreated lentils—chemical-treated ones may not sprout.
Green and brown lentils sprout the best, while red lentils (which are often split) usually don’t germinate. If you’re unsure, buy lentils specifically labeled “for sprouting” from a health store or online.
4. Step-by-Step: How to Sprout Lentils at Home
Follow these simple steps to grow your own batch of crunchy, fresh lentil sprouts right in your kitchen.
Step 1: Measure and Rinse
Measure about ½ cup of dry lentils.
Place them in a bowl or jar and rinse thoroughly under cool running water. This removes dust or impurities and ensures a clean start for sprouting.
Step 2: Soak the Lentils
Soaking is the key step that “wakes up” the lentils.

- Add 3 times the amount of water (1½ cups) to your rinsed lentils.
- Let them soak for 8–12 hours or overnight at room temperature.
During soaking, lentils absorb water, swell up, and begin the germination process. You’ll notice tiny cracks in their outer skin after soaking—this means they’re ready for the next stage.
Step 3: Drain and Rinse
After soaking, pour off the water using a mesh strainer or sprouting lid.
Rinse the lentils again with fresh water, then drain completely.
It’s important to remove excess water to prevent mold or rot during sprouting.
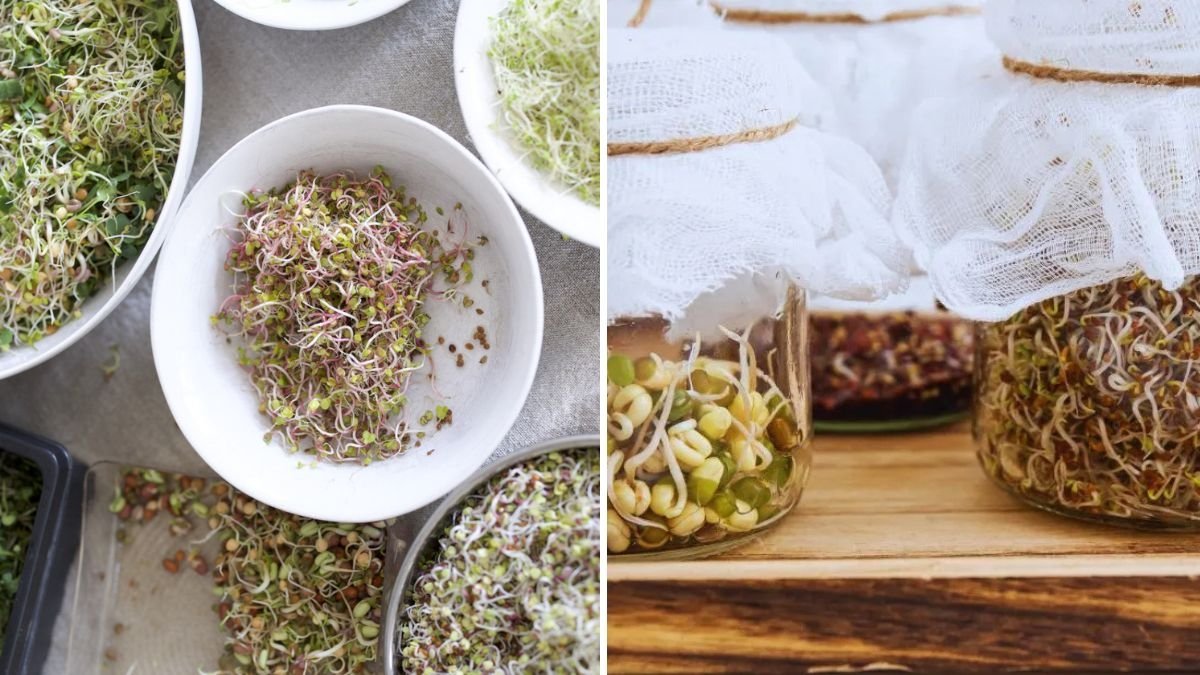
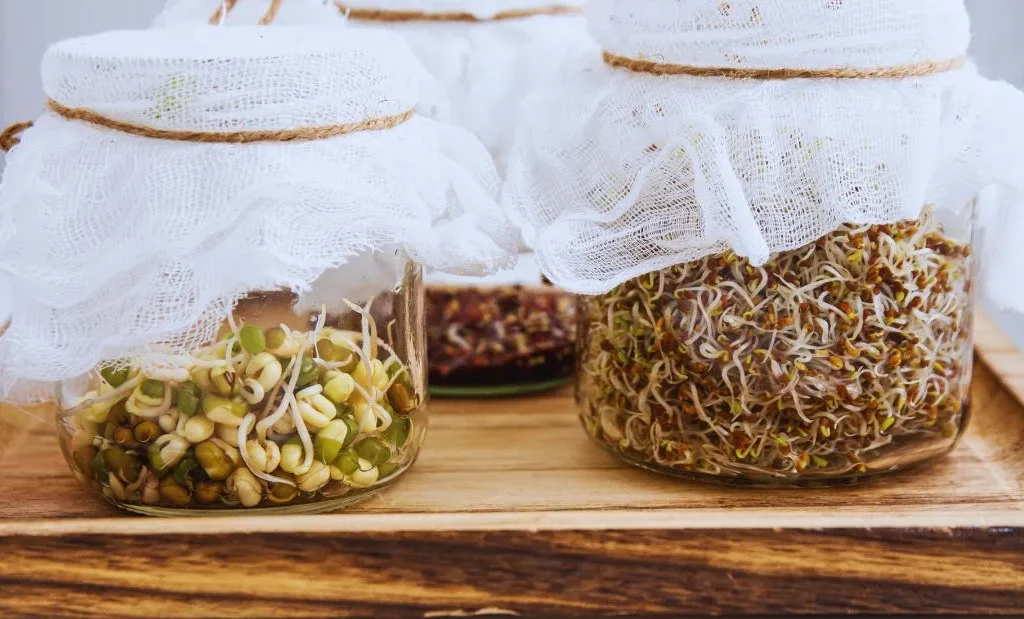
Step 4: Sprouting Setup
Transfer the soaked lentils into your sprouting jar or container.
Cover the top with a breathable lid or muslin cloth, secured with a rubber band.
Tilt the jar at an angle (mouth facing downward) to allow any remaining water to drain out and air to circulate.
Place the jar in a dark, warm spot (like your kitchen counter or pantry) away from direct sunlight.
Step 5: Rinse and Drain Daily
Rinse your lentils 2–3 times daily with cool, clean water. Each time:
- Swirl the lentils gently.
- Drain thoroughly to avoid standing water.
- Return the jar to its tilted position.
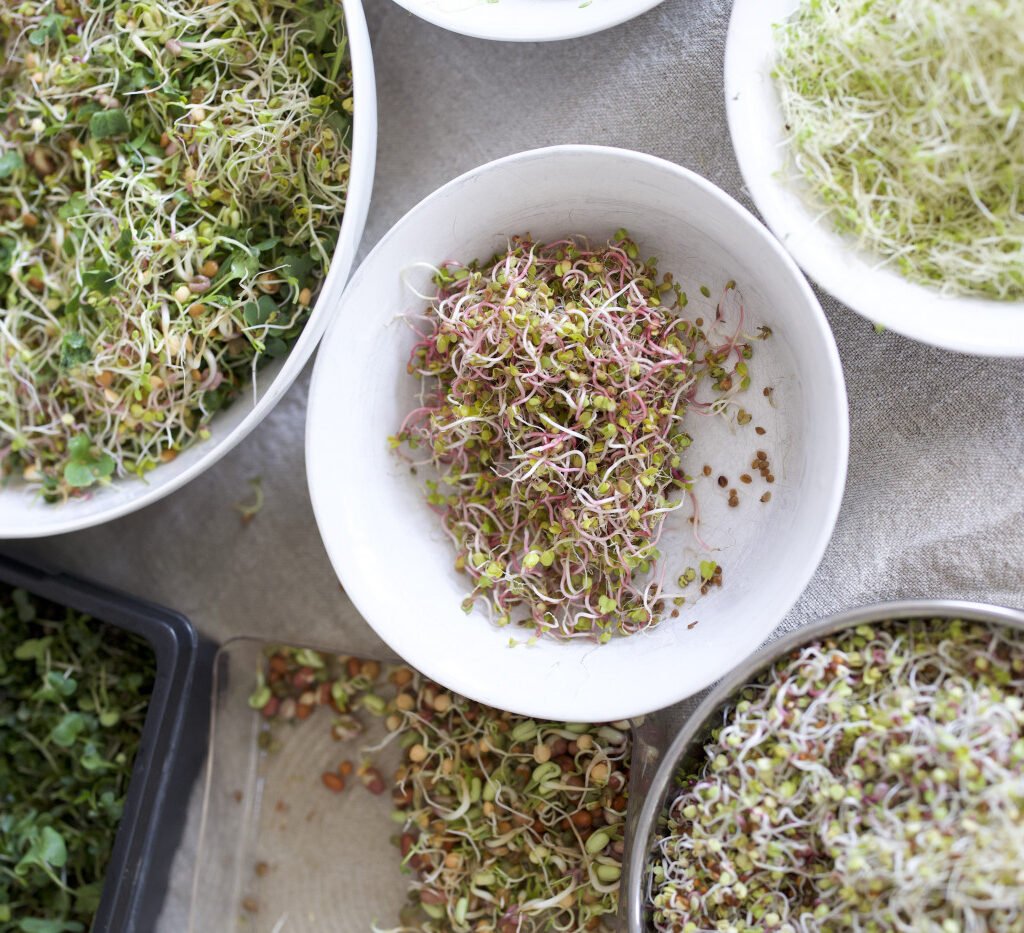
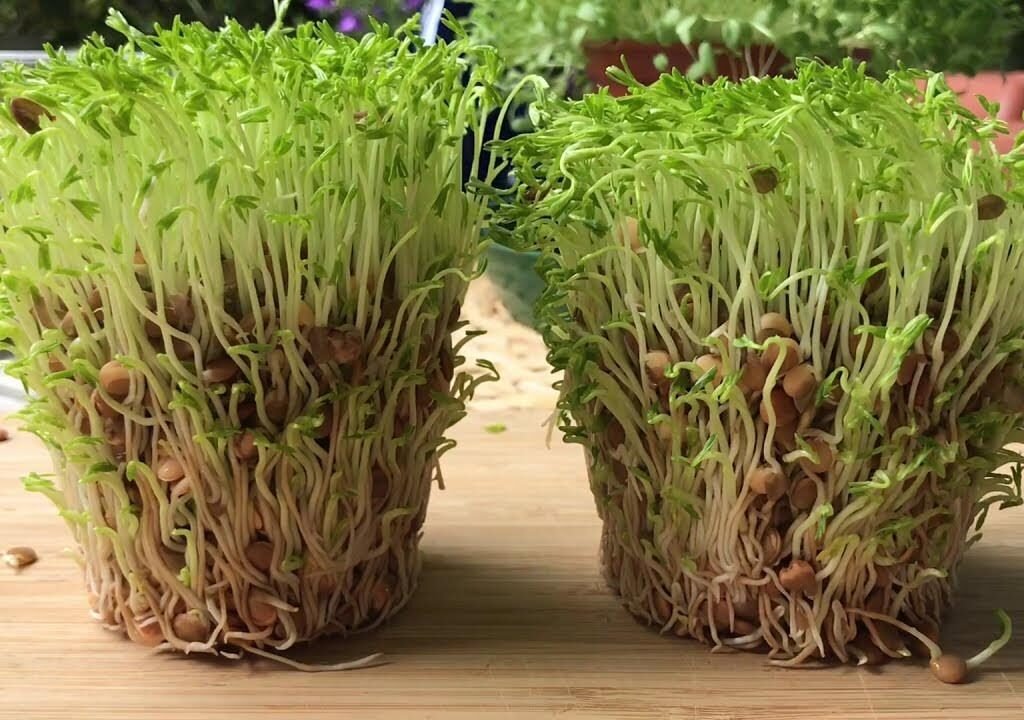
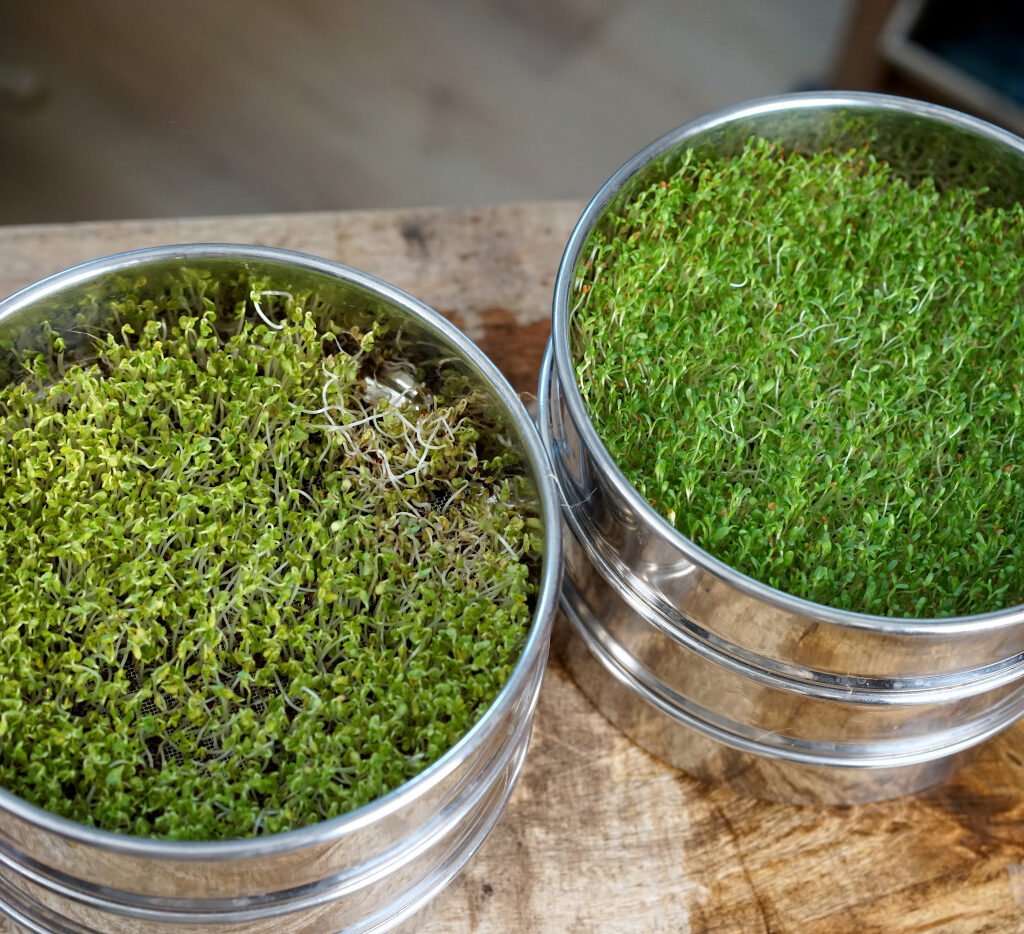
Within 24–36 hours, you’ll notice tiny white roots emerging. Continue rinsing daily until the sprouts reach your desired length—usually ½ to 1 inch long.
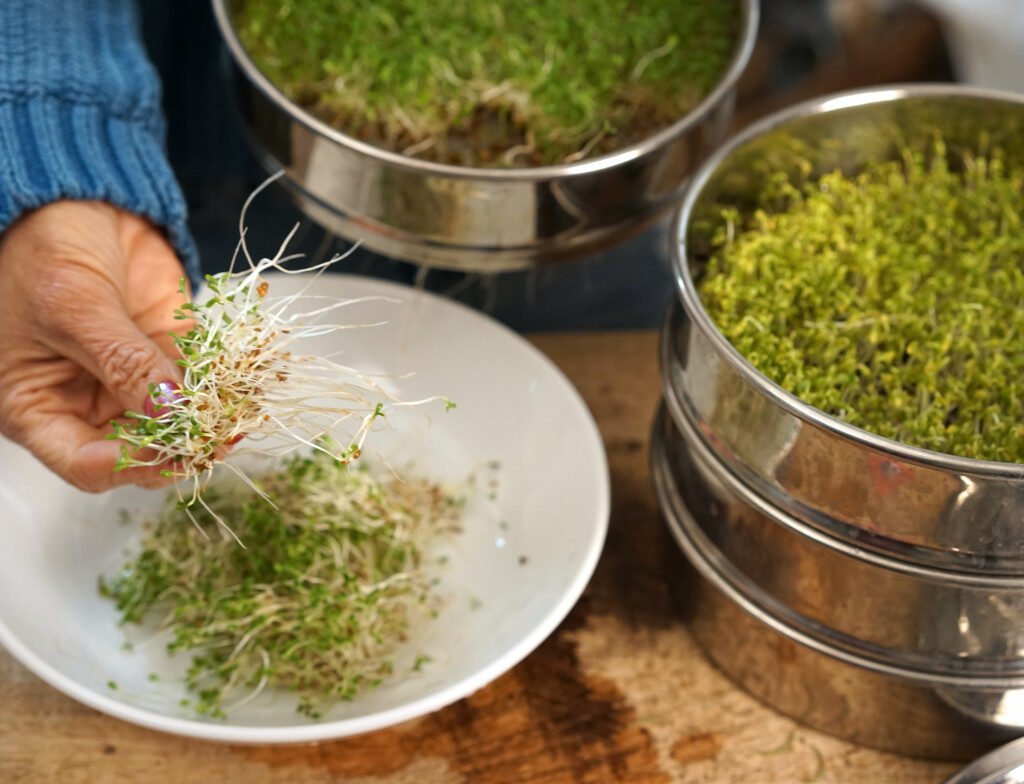
Step 6: Harvest and Store
Your lentil sprouts will be ready in about 3–4 days. Once they reach a length of about an inch, give them a final rinse and drain completely.
Spread them on a clean towel to remove extra moisture, then transfer them to an airtight container.
Store in the refrigerator for up to 5–7 days.

To keep them fresh longer, line the container with a paper towel to absorb any excess moisture.
5. Tips for Successful Sprouting
- Use clean utensils and jars to prevent bacterial growth.
- Avoid direct sunlight during sprouting—too much heat can spoil them.
- Don’t oversoak—this can suffocate the seeds and cause rotting.
- If you notice a musty smell, rinse more frequently or start over.
- Cool, well-ventilated areas are ideal for sprouting in hot climates.
Once you get the hang of it, you can experiment with other seeds like mung beans, chickpeas, or alfalfa!
6. Nutritional Benefits of Lentil Sprouts
Sprouting transforms lentils into a superfood by unlocking their full nutritional potential. Here’s why sprouted lentils are so good for you:
| Nutrient | Benefit |
|---|---|
| Protein | Builds and repairs body tissues |
| Fiber | Aids digestion and promotes gut health |
| Vitamin C | Strengthens immunity and improves skin health |
| Iron & Folate | Boosts energy and supports red blood cell production |
| Enzymes | Enhance nutrient absorption and digestion |
| Antioxidants | Help fight free radicals and reduce inflammation |
Sprouting also reduces anti-nutrients like phytic acid, which can block mineral absorption, making the lentils easier to digest and more nutritious than raw or cooked ones.
7. Common Sprouting Problems and Fixes
| Problem | Possible Cause | Solution |
|---|---|---|
| Lentils not sprouting | Old or treated lentils | Use fresh, organic, untreated lentils |
| Foul smell | Poor drainage or excessive moisture | Rinse more frequently; ensure jar is tilted for airflow |
| Mold or slime | Warm temperature and no air circulation | Move to a cooler spot; use a breathable lid |
| Sprouts too short | Harvested too early | Give them another 12–24 hours to grow |
By maintaining good hygiene and consistent rinsing, your sprouts will stay healthy and fresh.
8. Harvesting and Using Lentil Sprouts
Once your lentil sprouts are ready, it’s time to enjoy them! These little powerhouses are incredibly versatile in the kitchen.
Delicious Ways to Use Lentil Sprouts:

- Raw Salads: Mix with chopped vegetables, olive oil, and lemon for a crunchy salad.
- Smoothies: Add a handful for a nutrient boost.
- Sandwiches & Wraps: Layer sprouts for a fresh, crisp bite.
- Stir-Fries: Lightly sauté for 1–2 minutes to retain crunch.
- Soups: Add at the end of cooking for extra texture.
- Indian Style Chaat: Toss with tomatoes, onions, coriander, lemon, and spices for a flavorful snack.
Avoid overcooking—light steaming or stir-frying preserves their nutrients and crunchiness.
9. Expanding Your Kitchen Garden with Sprouts
Once you master lentil sprouting, you can expand your mini indoor “kitchen garden” with other seeds like mung beans, chickpeas, alfalfa, fenugreek, or mustard.
You can even use stackable sprouting trays or multiple jars to grow different sprouts at once. It’s a fun, educational, and rewarding way to introduce homegrown greens into your daily meals—all without needing outdoor space!
10. Health and Safety Tips
While sprouting is simple, hygiene is crucial because moist environments can encourage bacterial growth if not managed properly.
Follow these precautions:
- Always rinse thoroughly and use clean jars.
- If sprouts smell sour or slimy, discard them.
- Refrigerate immediately after harvesting.
- Optionally, lightly steam sprouts before eating to eliminate bacteria—especially for children or elderly individuals.
11. The Joy of Growing Food Indoors
Sprouting lentils is more than just a food project—it’s a small act of sustainable living. You’re growing living nutrition with almost no waste, no soil, and minimal resources. Watching dry seeds transform into vibrant green sprouts is a rewarding, meditative experience that connects you directly with your food.
It’s the perfect example of kitchen gardening at its simplest and healthiest—fresh food, grown by you, right on your countertop.
Conclusion
Growing lentil sprouts at home is one of the easiest and most satisfying ways to bring healthy, fresh, and sustainable food into your daily routine. With just a jar, some water, and a handful of lentils, you can harvest your own nutrient-packed greens in under a week—no garden required!

Whether you add them to salads, wraps, or stir-fries, these tiny sprouts deliver big health benefits. Plus, they’re fun to grow, kid-friendly, and a great step toward more eco-conscious, self-sufficient living.
So the next time you’re in your kitchen, grab a jar, soak some lentils, and start your home sprouting adventure. Within days, you’ll be harvesting your very own micro-garden—fresh, flavorful, and straight from your kitchen to your plate.
Leave A Comment