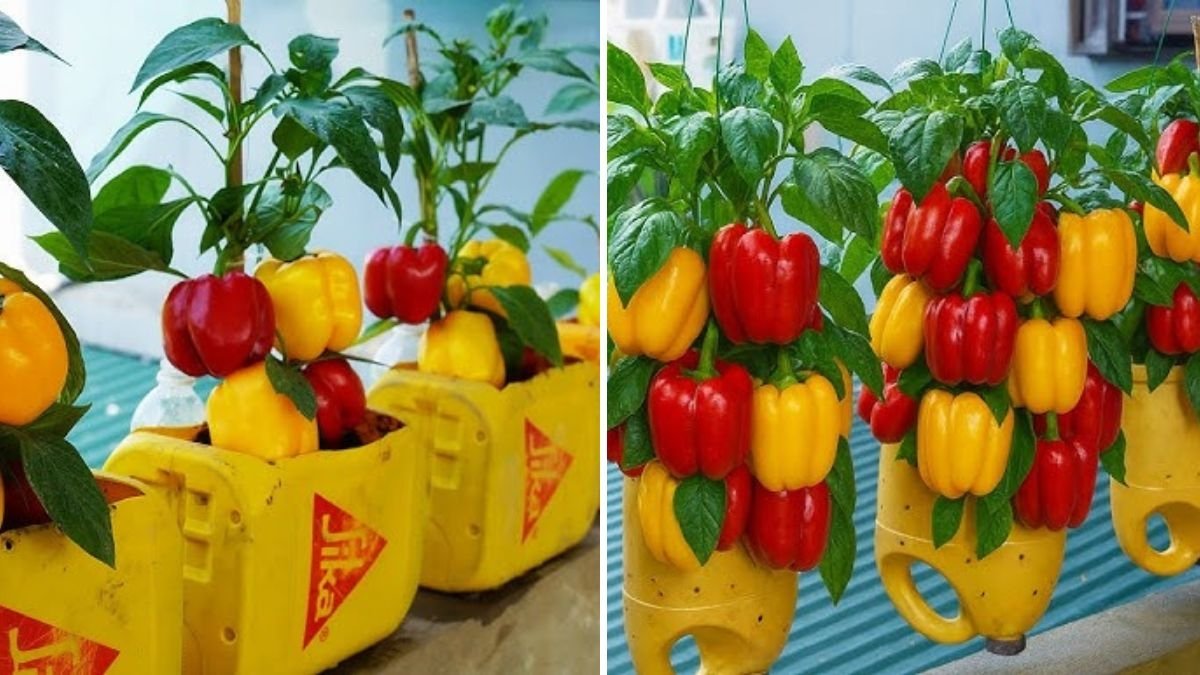
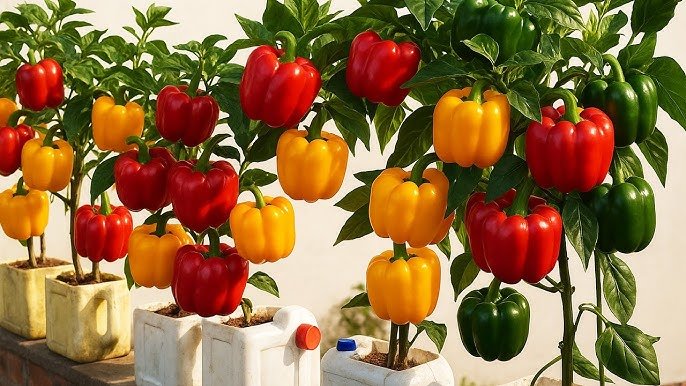
Imagine stepping out onto your balcony and picking fresh, colorful bell peppers straight from your own little garden — grown entirely in recycled plastic bottles! Sounds amazing, right? With the right technique, you don’t need a backyard or a large space to grow your own food. This eco-friendly and space-saving method is perfect for urban gardeners who want to enjoy homegrown produce without the need for big pots or garden beds.
In this article, inspired by the YouTube video “How to Grow Bell Peppers in Plastic Bottles | Easy & Productive Balcony Gardening”, we’ll show you how to grow large, sweet, and healthy bell peppers right in plastic bottles. From preparing your containers to harvesting your first fruits, this guide will help you create a thriving mini pepper garden — even in a small apartment balcony!
Why Grow Bell Peppers in Plastic Bottles?

Bell peppers (also known as capsicum or sweet peppers) are a favorite in kitchens around the world — colorful, crisp, and full of flavor. Growing them in plastic bottles offers several benefits:
- Eco-friendly recycling: Give new life to discarded bottles and reduce plastic waste.
- Space-saving design: Perfect for balconies, windowsills, or terraces.
- Low cost: No need for expensive pots or equipment.
- Controlled growth: Easy to manage soil, water, and fertilizer.
- Highly productive: With the right care, each bottle can yield several peppers.
This simple DIY gardening trick helps you turn waste into wellness — growing your own food while helping the planet.
Materials You’ll Need
Before you start, gather these basic supplies:
- 2-liter or 5-liter plastic bottles (depending on space)
- Sharp knife or scissors
- Mung bean, cow dung, or compost-enriched potting mix
- Bell pepper seeds or seedlings
- Water
- A small stick or support pole
- Organic fertilizer (like compost tea or banana peel fertilizer)
Optional but useful:

- A small mesh or cloth for drainage holes
- Spray bottle for gentle watering
Step 1: Prepare the Plastic Bottles
This is the foundation of your bottle garden.
- Cut the bottle:
- For vertical planting: Cut off the top third of the bottle (just below the neck).
- For horizontal planting: Cut a rectangular opening on one side to fill with soil.
- Make drainage holes:
Use a heated needle or sharp tool to make 4–5 small holes at the bottom for proper drainage. Without these, excess water can stagnate and rot the roots. - Add a drainage layer (optional):
If possible, place a thin layer of gravel or small pebbles at the bottom. This prevents soil compaction and improves air circulation.
Step 2: Prepare the Potting Mix
Bell peppers love loose, fertile, and well-drained soil. The right mix provides nutrition and encourages root development.
Ideal soil mix:
- 40% garden soil or coco peat
- 30% organic compost or cow dung manure
- 20% sand or perlite
- 10% neem cake or organic fertilizer powder
Mix thoroughly. This combination retains moisture while allowing air to reach the roots — essential for healthy growth.
Step 3: Germinate the Bell Pepper Seeds
You can start your bell pepper plants from seeds or use small nursery seedlings.
For seed germination:

- Soak the seeds in warm water for 8–10 hours to soften the shell and speed up sprouting.
- Fill a small tray or container with moist potting mix.
- Place seeds 1–2 cm deep and lightly cover them with soil.
- Keep the tray in a warm and shaded area.
- Mist the soil daily — don’t let it dry out.
Seeds will usually germinate in 7–14 days. When seedlings are 10–12 cm tall and have 4–6 true leaves, they’re ready for transplanting into bottles.
Step 4: Transplanting into Plastic Bottles
- Fill each prepared bottle with your potting mix, leaving about 3 cm of space from the top.
- Carefully remove the seedlings from the tray — handle them gently to avoid damaging the roots.
- Make a small hole in the center of the bottle and plant one seedling per bottle.
- Press the soil lightly around the base to stabilize the plant.
- Water gently to help the roots settle.
If you’re planting multiple bottles, space them about 20–25 cm apart on your balcony so each plant gets enough light and airflow.
Step 5: Provide Proper Light and Temperature
Bell peppers thrive in warm and sunny environments.
- Sunlight: They need at least 6–8 hours of direct sunlight every day. Place your bottles in a sunny spot — near a balcony railing, window, or terrace ledge.
- Temperature: Ideal range is 20–30°C (68–86°F). If the weather gets too hot, provide partial shade during the afternoon.
If you live in a cooler region, you can use transparent plastic covers to retain warmth — just make sure there’s ventilation to avoid moisture buildup.
Step 6: Watering the Plants
Consistent watering is crucial for juicy, healthy peppers.
- Water once every 2–3 days, or whenever the top inch of soil feels dry.
- Avoid overwatering — soggy soil leads to root rot.
- During hot weather, you may need to water daily in small amounts.
- Use a spray bottle or small watering can for gentle application.
To keep the soil moist longer, add a mulch layer of dry leaves or coco husk on top.

Step 7: Feeding and Fertilizing
To grow big, sweet, and colorful bell peppers, nutrition is key.
Feed your plants every 15 days with an organic fertilizer like:
- Compost tea (soak compost in water for 24 hours and use the liquid)
- Banana peel fertilizer (rich in potassium for better fruiting)
- Fish emulsion or seaweed extract (for strong root growth)
For homemade organic feed, mix:
- 1 liter of water
- 2 tablespoons of cow dung or compost slurry
- 1 teaspoon of wood ash or bone meal
Apply directly to the base of each plant. Avoid pouring on leaves to prevent burns.
Step 8: Supporting and Pruning
As your bell pepper plants grow, they’ll need support to stand upright and bear heavy fruits.
- Insert a small bamboo stick or wooden skewer into the bottle near the stem.
- Tie the plant loosely with a soft cloth or garden thread.
Pruning tips:

- Remove yellow or damaged leaves regularly.
- Pinch off early flowers until the plant grows about 30 cm tall — this helps it develop a strong structure before fruiting.
- Trim small side shoots that drain energy from the main stems.
Pruning ensures better airflow, healthier growth, and more productive fruiting.
Step 9: Flowering and Pollination
Bell peppers are self-pollinating, but you can boost productivity by gently shaking the flowers or using a soft paintbrush to transfer pollen between blooms.
If your balcony doesn’t get pollinating insects, manual pollination ensures that flowers turn into fruits. Within a week or two, you’ll notice small green peppers forming — a satisfying reward for your efforts!
Step 10: Harvesting
Bell peppers are usually ready for harvest 60–80 days after transplanting, depending on the variety and growing conditions.
- For green peppers: Harvest when they reach full size and firm texture.
- For red, yellow, or orange peppers: Leave them on the plant longer to ripen fully — the color deepens and flavor becomes sweeter.
To harvest, cut the stem gently using scissors or a knife, leaving a short portion attached to the fruit. Avoid pulling, as it may damage the plant.
With good care, each plant can yield 10–15 peppers or more over several months!

Step 11: Common Problems and Natural Remedies
- Yellowing Leaves:
- Usually caused by overwatering or nutrient deficiency.
- Reduce watering and apply compost tea.
- Pests (aphids, whiteflies):
- Spray neem oil diluted in water once a week.
- Small or Bitter Fruits:
- Ensure regular watering and feed potassium-rich fertilizer.
- Flower Drop:
- Caused by temperature stress or irregular watering.
- Keep soil evenly moist and provide partial shade during heat waves.
Step 12: Health Benefits of Homegrown Bell Peppers
Homegrown bell peppers are not just fresher and tastier — they’re a powerhouse of nutrition!
- High in vitamin C: Strengthens immunity and skin health.
- Rich in antioxidants: Fights inflammation and supports heart health.
- Low in calories: Great for weight management.
- Loaded with fiber: Promotes digestion and gut health.
Eating colorful peppers ensures you get a variety of nutrients — green for chlorophyll, red for beta-carotene, and yellow/orange for lutein and vitamin A.
Conclusion
Growing bell peppers in plastic bottles is one of the most rewarding and eco-friendly ways to enjoy homegrown produce — no large garden required! With just a few bottles, some good soil, and regular care, you can transform your balcony into a vibrant mini farm.
This simple method not only gives you fresh, sweet, and healthy peppers, but also helps reduce plastic waste and make the most of your limited space. It’s affordable, sustainable, and perfect for beginner gardeners.
So, start saving those empty bottles, grab a handful of seeds, and get planting. In just a few weeks, your balcony will be full of color — and flavor!
Leave A Comment