If you’ve ever tried growing bell peppers but ended up with small, bitter fruits, you’re not alone. Many gardeners struggle to produce large, juicy, and sweet peppers — but the good news is, there’s a simple method that works wonders. Whether you have a big backyard or just a few pots on your balcony, this guide will show you how to grow bell peppers from seeds and get big, sweet, and colorful harvests every time.
The secret lies in understanding the needs of the plant — from seed germination to fertilizing, watering, and pruning. In this detailed guide, inspired by the YouTube video “Bell peppers are big and sweet if you grow them by this method”, we’ll walk through everything step by step.
Why Grow Bell Peppers at Home?
Bell peppers, also known as capsicum or sweet peppers, are one of the most versatile vegetables you can grow. They add color, crunch, and nutrition to salads, curries, pizzas, and stir-fries.
Here’s why growing them at home is worth it:
- Better taste: Homegrown peppers are naturally sweeter and juicier.
- Chemical-free: No pesticides or harmful sprays — only clean, healthy produce.
- Cost-effective: A few seeds can yield several kilograms of fresh peppers.
- Satisfying: Watching your tiny seeds turn into vibrant plants is pure joy.
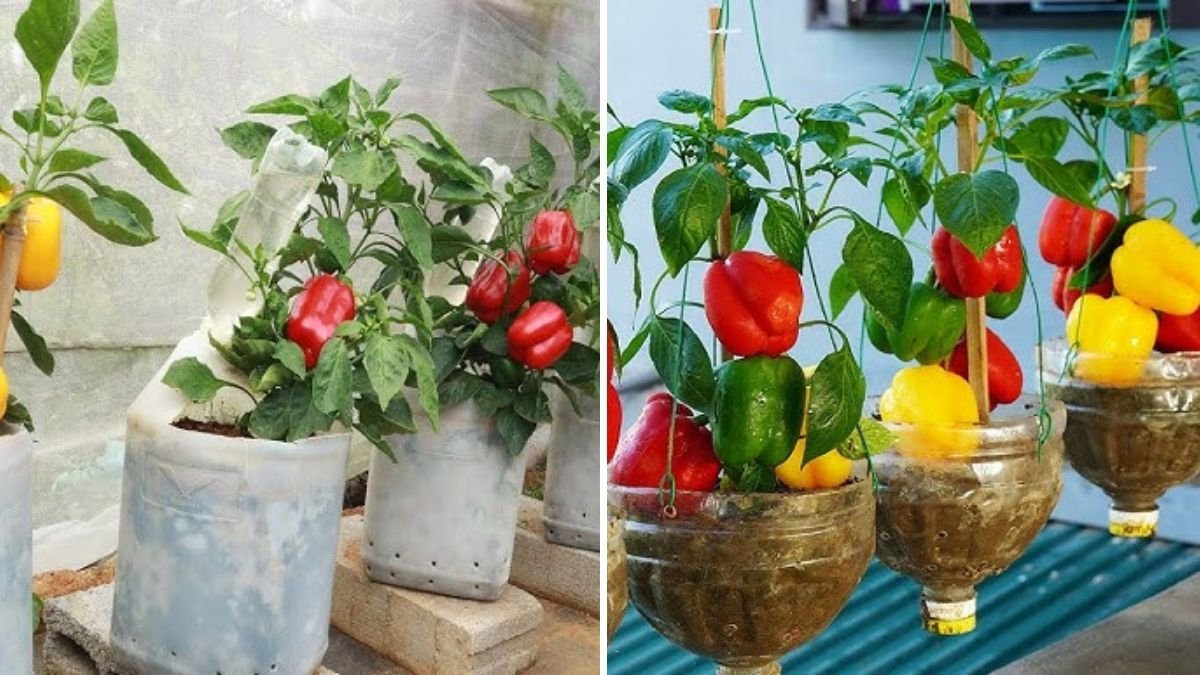
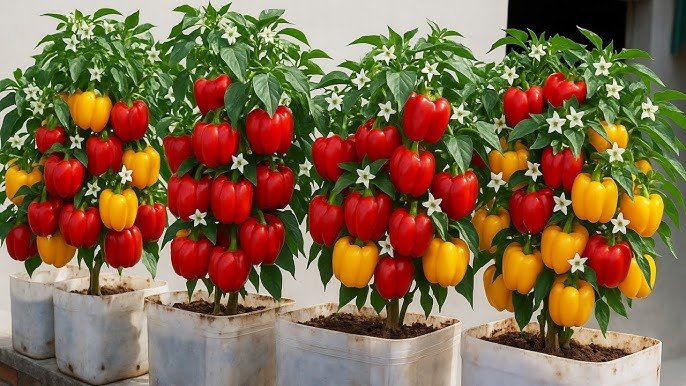
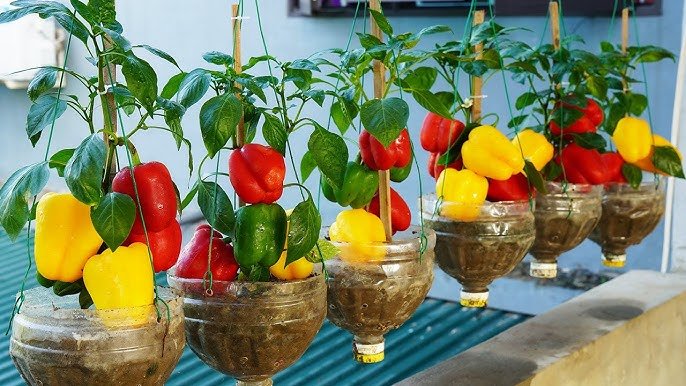
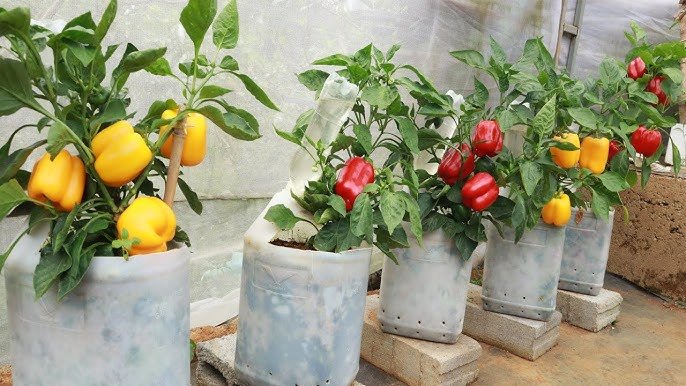
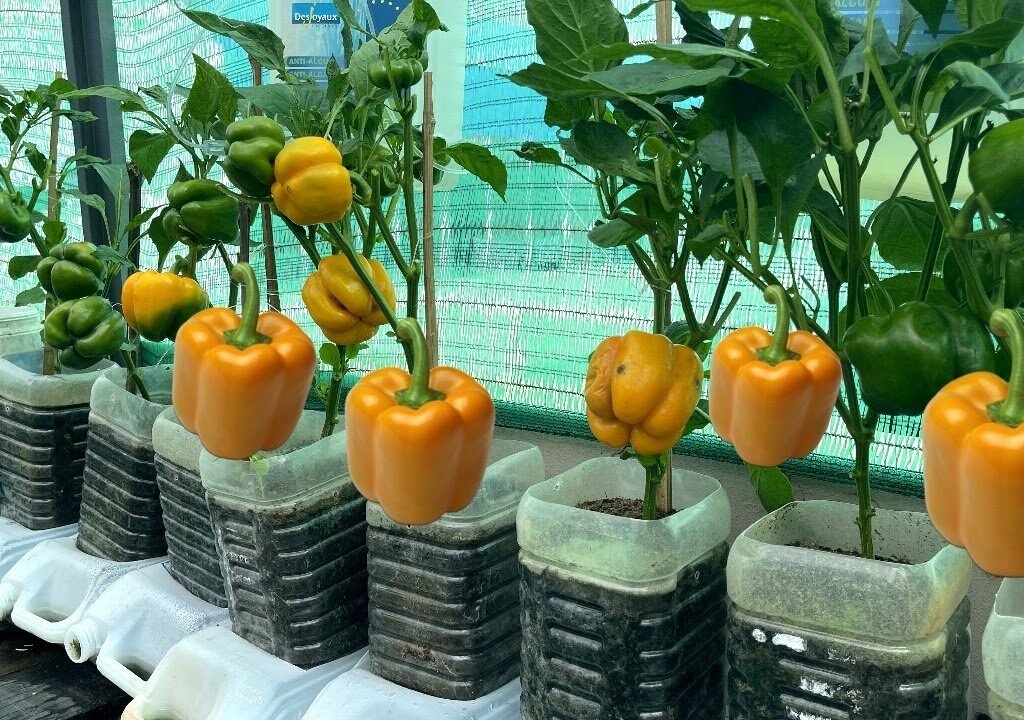
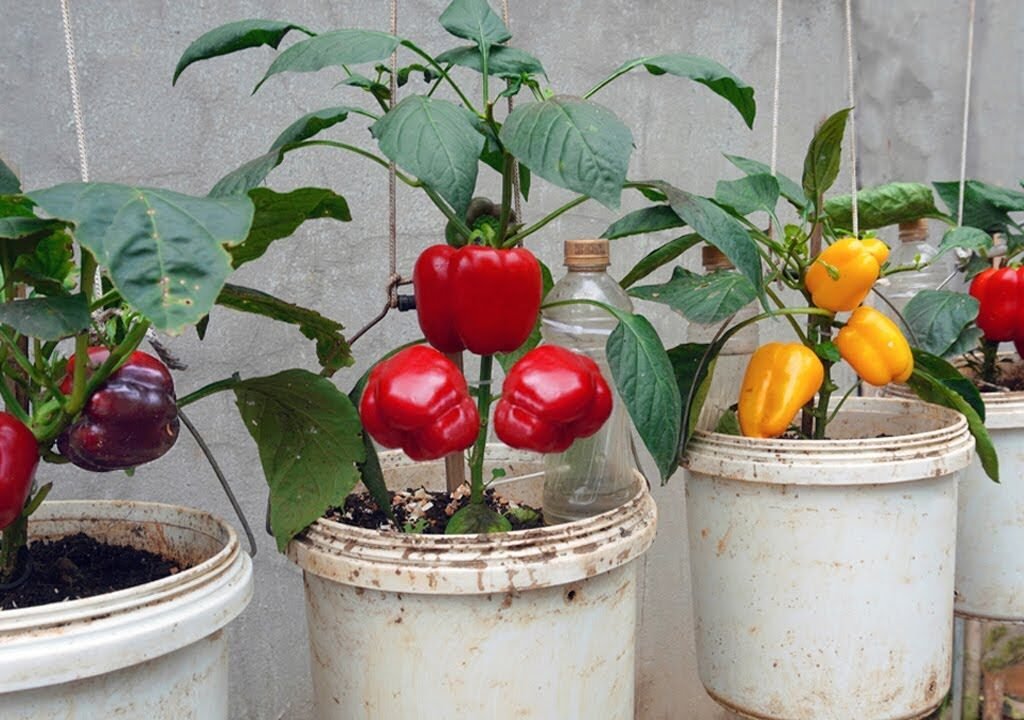
- Space-friendly: You can grow them in containers, grow bags, or directly in the soil.
Step 1: Selecting the Right Seeds
Your results depend greatly on the quality of the seeds. Choose seeds from reliable sources or from a healthy, ripe bell pepper you’ve already enjoyed.
If you’re reusing seeds from store-bought peppers, make sure they come from mature, brightly colored fruits (red, yellow, or orange). These have fully developed, viable seeds.
Before sowing:

- Dry the seeds for 1–2 days in a shaded place.
- Avoid direct sunlight, as it can damage germination power.
Step 2: Preparing the Growing Medium
Bell peppers thrive in loose, nutrient-rich, and well-drained soil. A perfect potting mix ensures proper root growth and prevents rot.
Here’s a great mix you can make at home:
- 40% garden soil or coco peat
- 30% compost or well-rotted cow dung manure
- 20% sand or perlite for aeration
- 10% neem cake or organic fertilizer to prevent pests
Mix well and fill your pots or seed trays. Bell peppers prefer slightly acidic to neutral soil (pH 6.0–6.8).
Step 3: Sowing the Seeds
- Fill small pots, trays, or recycled containers with the potting mix.
- Sow 2–3 seeds per hole at a depth of about 0.5 cm.
- Lightly cover the seeds with soil and mist with water.
- Place them in a warm, bright area, but out of direct sunlight.
Bell pepper seeds need warmth to germinate — ideally around 25–30°C (77–86°F). If the weather is cold, cover the tray with a plastic wrap or transparent lid to retain heat and moisture.
Germination usually takes 7–14 days. Once seedlings appear, remove the cover and ensure good airflow.
Step 4: Transplanting the Seedlings
When seedlings grow about 10–15 cm tall and have at least 4–6 true leaves, they’re ready to be transplanted.
Here’s how:

- Choose a container or grow bag that’s at least 12 inches deep.
- Fill it with fresh potting mix enriched with compost.
- Carefully remove the seedlings from the tray without damaging the roots.
- Plant each seedling in the center, burying it slightly deeper than before.
- Water gently to help it settle.
If you’re planting in the ground, space the plants 45–60 cm apart in rows, allowing enough air circulation to prevent fungal issues.
Step 5: Providing the Right Conditions
To grow big and sweet bell peppers, environmental care is key.
Light:
Bell peppers need 6–8 hours of sunlight daily. If you’re growing indoors or on a shaded balcony, use reflective surfaces or LED grow lights.
Temperature:
Ideal range is 20–30°C (68–86°F). Below 15°C, growth slows down; above 35°C, flowers may drop.
Watering:
Keep the soil consistently moist but not soggy. Water deeply every 2–3 days, depending on the climate. Avoid overwatering, as it leads to root rot.
Mulching:
Apply a thin layer of dry leaves, straw, or coconut husk around the base to retain moisture and control weeds.
Step 6: Feeding for Bigger and Sweeter Fruits
The secret to large, juicy peppers is balanced nutrition.

Feed your plants every 15 days with organic fertilizer or compost tea. You can also use this natural recipe for excellent results:
- 1 liter water
- 2 tablespoons compost or cow dung slurry
- 1 teaspoon bone meal or fish emulsion
Mix well and water the base of the plants.
For sweeter fruits, add banana peel fertilizer or wood ash once every two weeks — both are rich in potassium, which enhances fruit sweetness and color.
Step 7: Pruning and Plant Care
Bell pepper plants benefit greatly from light pruning. It encourages bushy growth and more fruit production.
- Pinch off the first flowers that appear — this allows the plant to focus on root and stem growth first.
- Once the plant reaches about 30 cm (1 foot), remove any weak or lower leaves touching the soil.
- Tie the main stem to a small stick or support to prevent bending.
Pruning improves air circulation and sunlight penetration, reducing disease risk and improving fruit quality.
Step 8: Pollination and Flowering
Bell peppers are self-pollinating, but you can help nature a little for better yields.
If you’re growing indoors or in an enclosed space, gently shake the flowers or use a soft brush to transfer pollen between blooms. This simple trick can significantly increase fruit set.

Step 9: Common Problems and Natural Solutions
1. Yellow Leaves: Usually caused by overwatering or nitrogen deficiency. Reduce watering and apply compost tea.
2. Dropping Flowers: Happens due to heat stress or irregular watering. Maintain consistent soil moisture.
3. Aphids and Whiteflies: Spray neem oil mixed with mild soap once a week.
4. Small or bitter peppers: Caused by low potassium or irregular watering. Add banana peel fertilizer and maintain moisture balance.
Step 10: Harvesting Sweet, Big Bell Peppers
Your peppers will be ready for harvest 60–80 days after transplanting. You can pick them while they’re green or wait until they turn red, yellow, or orange for maximum sweetness.
To harvest:
- Use a sharp knife or scissors to cut the pepper along with a short piece of stem.
- Avoid pulling — it may damage the plant.
After harvesting, continue caring for the plant — it can produce for several more months!

Bonus Tip: Regrowing from Kitchen Scraps
Don’t throw away the seeds from your next store-bought pepper! You can dry them and plant them again using the same method. Bell peppers are one of the easiest vegetables to regrow indefinitely from seeds, making them a sustainable choice for home gardening.
Health Benefits of Bell Peppers
Besides their beauty and taste, bell peppers are packed with nutrients that make them a fantastic addition to any diet:
- Rich in vitamin C: Boosts immunity and skin health.
- Loaded with antioxidants: Helps fight inflammation and aging.
- Low in calories: Great for weight management.
- High in fiber: Aids digestion and promotes gut health.
- Contains capsaicin (mild): Supports heart health and metabolism.
Eating colorful peppers (red, yellow, and orange) ensures you get a wide range of phytonutrients and antioxidants.
Conclusion
Growing big, sweet bell peppers from seeds isn’t as hard as it seems — it’s all about following the right steps and giving your plants the care they deserve. With proper soil preparation, regular feeding, and balanced watering, you can enjoy a continuous harvest of delicious, vibrant peppers right from your garden or balcony.
This real gardening method is sustainable, affordable, and rewarding. In just a few months, you’ll be harvesting your own crisp, juicy peppers — perfect for salads, stir-fries, or simply munching fresh!
So don’t wait — grab some seeds, recycle a few containers, and start your pepper-growing journey today. Your future self (and your taste buds) will thank you for it
Leave A Comment