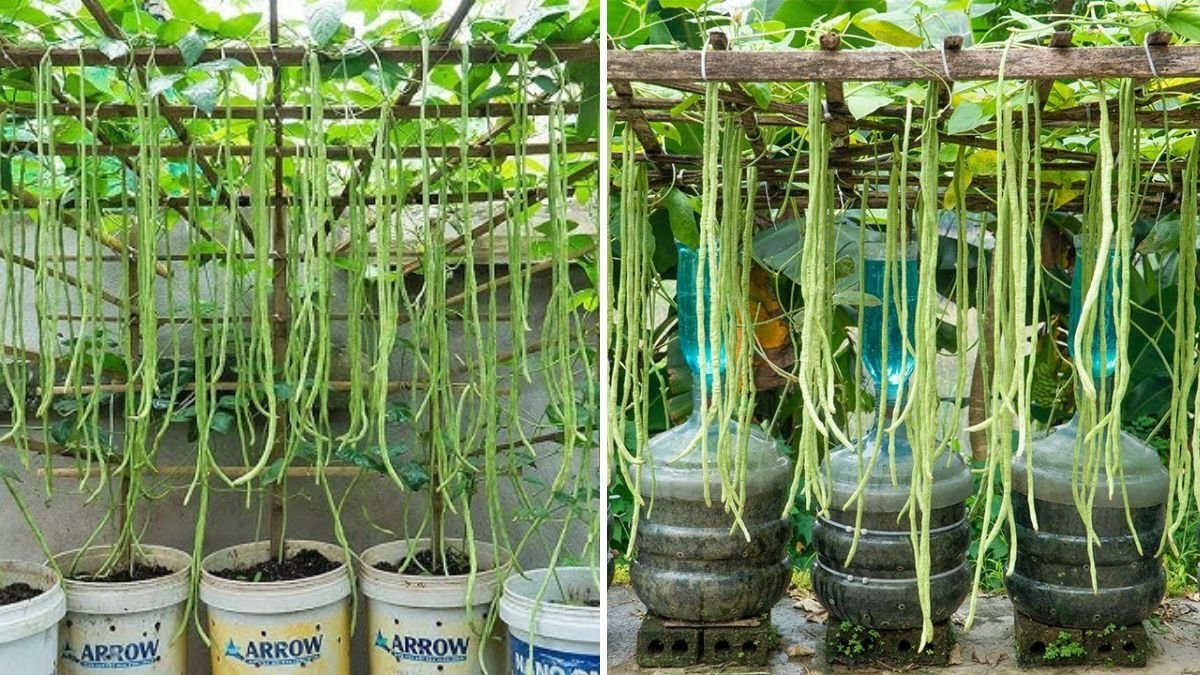
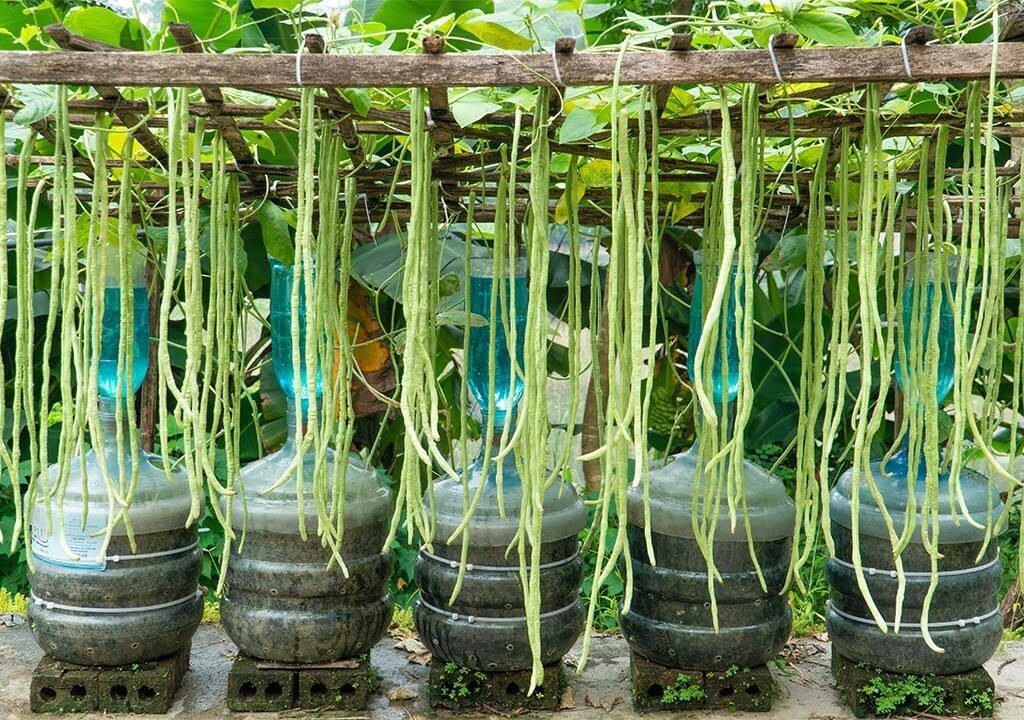
Growing vegetables at home doesn’t have to be complicated or expensive — and if you’ve ever dreamed of harvesting yardlong beans by the kilo, this simple plastic bottle method will blow your mind. In this guide, we’ll uncover the step-by-step process of how you can grow yardlong beans (also known as asparagus beans or Chinese long beans) faster than ever before, even in small spaces. Imagine harvesting up to 100 kilograms of beans with minimal effort — all from a single plastic bottle setup!
Let’s dive in and explore how to transform an ordinary recycled bottle into a powerful container for high-yield, fast-growing yardlong beans.
Why Grow Yardlong Beans in Plastic Bottles?
Yardlong beans are one of the most productive and easy-to-grow vegetables you can cultivate at home. They thrive in warm weather, need little maintenance, and reward you with long, tender pods rich in nutrients. Traditionally, they’re grown in garden soil or large pots, but plastic bottles offer unique advantages:
- Saves space: Perfect for balconies, rooftops, or small yards.
- Cost-effective: Uses recycled materials — ideal for eco-conscious gardeners.
- Water-efficient: The bottle helps retain moisture and reduce water waste.
- Faster growth: Controlled growing conditions lead to quicker germination and healthier roots.
With this method, you can turn waste into a thriving mini-garden — and the yield can be surprisingly high!
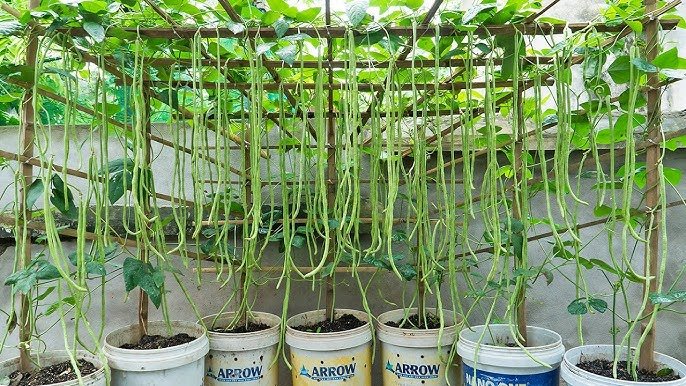
Step 1: Preparing the Plastic Bottle Planter

Start with a large plastic bottle — a 2 or 5-liter water bottle works best. The bigger the bottle, the better the root space and yield.

How to Prepare:
- Cut the Bottle:
Cut off the top section (about one-third of the bottle) to create an open container. You can keep the top part to use as a mini greenhouse later. - Add Drainage Holes:
Using a heated nail or knife, make 4–6 small holes at the bottom to allow excess water to drain. This prevents root rot. - Create a Water Reservoir (Optional):
For a self-watering version, cut the bottle in half. Invert the top part (with the cap removed) and insert it into the bottom half. Add a piece of cloth or cotton as a wick through the neck — this will draw water from below into the soil. - Clean and Sterilize:
Wash the bottle thoroughly to remove any chemicals or residues that might harm young seedlings.
This bottle will act as both the pot and the moisture regulator — ideal for fast, healthy growth.
Step 2: Choosing the Right Soil Mix
The secret to fast-growing, productive yardlong beans lies in a nutrient-rich, well-draining soil mix.
Ideal Mix:
- 40% garden soil or cocopeat
- 30% compost or well-rotted manure
- 20% sand or perlite
- 10% rice husk or leaf mold (optional for aeration)
Mix everything thoroughly. Yardlong beans love slightly loose soil that allows roots to breathe and spread easily. You can also add a handful of wood ash or bone meal for phosphorus — it boosts flower and pod development.
Step 3: Planting the Yardlong Bean Seeds
Yardlong beans grow best from seeds rather than transplants.
Steps:
- Soak Seeds:
Soak the seeds in warm water for 6–8 hours before planting. This softens the seed coat and encourages faster germination. - Plant Depth:
Sow 2–3 seeds per bottle about 1 inch deep. Cover gently with soil and water lightly. - Germination Time:
Place the bottles in a warm, sunny spot. Seeds usually sprout within 4–7 days. - Thinning:
Once the seedlings are about 4 inches tall, thin them out — keeping only the strongest plant per bottle for maximum yield.
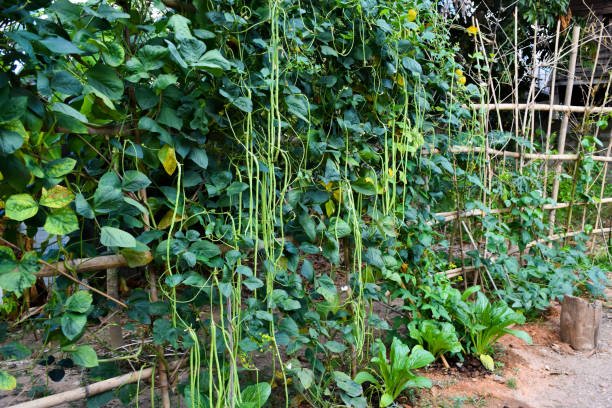
Step 4: Providing Sunlight and Support
Yardlong beans are sun-loving climbers, so they need both ample light and a sturdy trellis.

Sunlight Needs:
- At least 6–8 hours of full sunlight per day.
- If growing indoors or on a shaded balcony, use a grow light for 10–12 hours daily.
Building the Trellis:
- Use bamboo sticks, metal rods, or jute strings to support the vines.
- Train the plants early by gently wrapping the tendrils around the support.
Without a trellis, the plants will tangle and produce fewer pods — so vertical support is crucial.
Step 5: Watering and Fertilizing for Rapid Growth
Proper watering and nutrition are key to achieving a 100kg harvest.
Watering Tips:
- Keep the soil consistently moist, not soggy.
- Water every morning or when the topsoil feels dry.
- If using the self-watering bottle system, refill the reservoir once every few days.
Fertilization Routine:
- At 2 weeks: Apply a liquid fertilizer made from banana peel tea or compost tea.
- During flowering: Use fish emulsion or bone meal tea to encourage more blooms.
- Every 2 weeks: Feed with a diluted organic fertilizer like seaweed extract.
Tip: Avoid high-nitrogen fertilizers — they promote leaves, not pods.
Step 6: Flowering and Pollination
Within 35–40 days, you’ll notice delicate white or purple flowers forming along the vines. These soon develop into long, slender pods.
- Encourage pollinators like bees by keeping other flowering plants nearby.
- You can also gently shake the vines each morning to assist in pollination if grown indoors.
Once flowering starts, reduce nitrogen and focus on phosphorus and potassium-rich feeds for maximum fruit set.

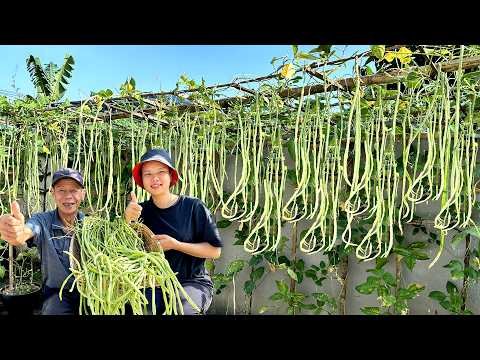
Step 7: Harvesting Yardlong Beans
Your yardlong beans will be ready to harvest around 60–75 days after sowing. The pods can grow up to 30–60 cm long, depending on the variety and growing conditions.
Harvesting Tips:
- Pick the pods while they’re young and tender — about pencil-thick.
- Harvest every 2–3 days to encourage more pod production.
- Use scissors or garden shears to avoid damaging the vines.
Regular harvesting signals the plant to keep producing, allowing you to achieve a massive continuous yield.
Step 8: Maintaining the Plants for Continuous Production
Yardlong bean vines can produce for 2–3 months if properly cared for.
Tips for Long-Term Yield:
- Remove yellow or dry leaves regularly.
- Spray neem oil or garlic solution weekly to prevent pests like aphids and caterpillars.
- Add a handful of compost or organic fertilizer every 3 weeks to replenish nutrients.
If maintained correctly, you can keep harvesting throughout the season — achieving up to 100 kilograms of beans from multiple bottles or one intensive setup.
Bonus: How This Bottle Method Speeds Up Growth
You might wonder — why does the plastic bottle method result in such rapid and abundant growth?

Here’s why it works:
- Enhanced Root Aeration: The narrow, vertical container encourages deep root growth.
- Optimal Moisture Control: The bottle system prevents overwatering and keeps roots consistently hydrated.
- Efficient Nutrient Absorption: Compact soil volume ensures that nutrients stay close to the root zone.
- Temperature Stability: Transparent bottles absorb sunlight, gently warming the soil and boosting germination speed.
Combined, these factors create a micro-greenhouse effect, promoting faster growth and earlier harvests.
Benefits of Growing Yardlong Beans at Home
Apart from the joy of harvesting your own food, yardlong beans offer amazing health and environmental benefits:
- Rich in protein, fiber, and vitamins A & C — great for immunity and digestion.
- Low in calories but packed with nutrients, perfect for healthy diets.
- Nitrogen-fixing plant: Improves soil fertility naturally.
- Eco-friendly gardening: Reduces plastic waste and promotes sustainability.
Plus, there’s nothing more satisfying than seeing vines full of green, crisp beans growing right outside your window.
Final Thoughts
With just a plastic bottle, a few seeds, and some basic care, you can grow yardlong beans faster and more abundantly than ever before. This method is perfect for beginners, urban gardeners, or anyone looking to make the most of limited space.

By following these simple steps — from preparing the bottle and soil mix to providing sunlight, trellis support, and organic nutrition — you can enjoy a continuous, high-yield harvest of up to 100kg of delicious, homegrown beans.
So next time you finish a bottle of water, don’t throw it away — turn it into your next mini garden project!
Your small effort can bring huge rewards, both on your plate and for the planet.
Leave A Comment